Content mapping for Canvas
Bridge the gap between Canvas and Studio with content mapping
Experimental feature
This article describes an experimental Sanity feature. The APIs described are subject to change and the documentation may not be completely accurate.
Canvas is a great tool for freestyle writing, but when it's time to put your creative output to work, you'll want to move everything into a structured environment where it can enjoy all of the benefits of treating content as data—Sanity Studio!
Gotcha
Some initial setup by a studio maintainer is needed to make content mapping work. Visit the article on configuring content mapping to learn more.
For example, you might sketch out a blog post in Canvas, and then connect your work to a new document in Sanity Studio of a specific content type—like a blogPost, with fields like title, excerpt, body, and tags.
A pretty clever mapping agent—from here on lovingly referred to as "the bot"—will go to work in the background identifying which parts of your rich content in Canvas corresponds to which document fields in your studio and automatically mapping content appropriately. Subject to your overrides, of course.
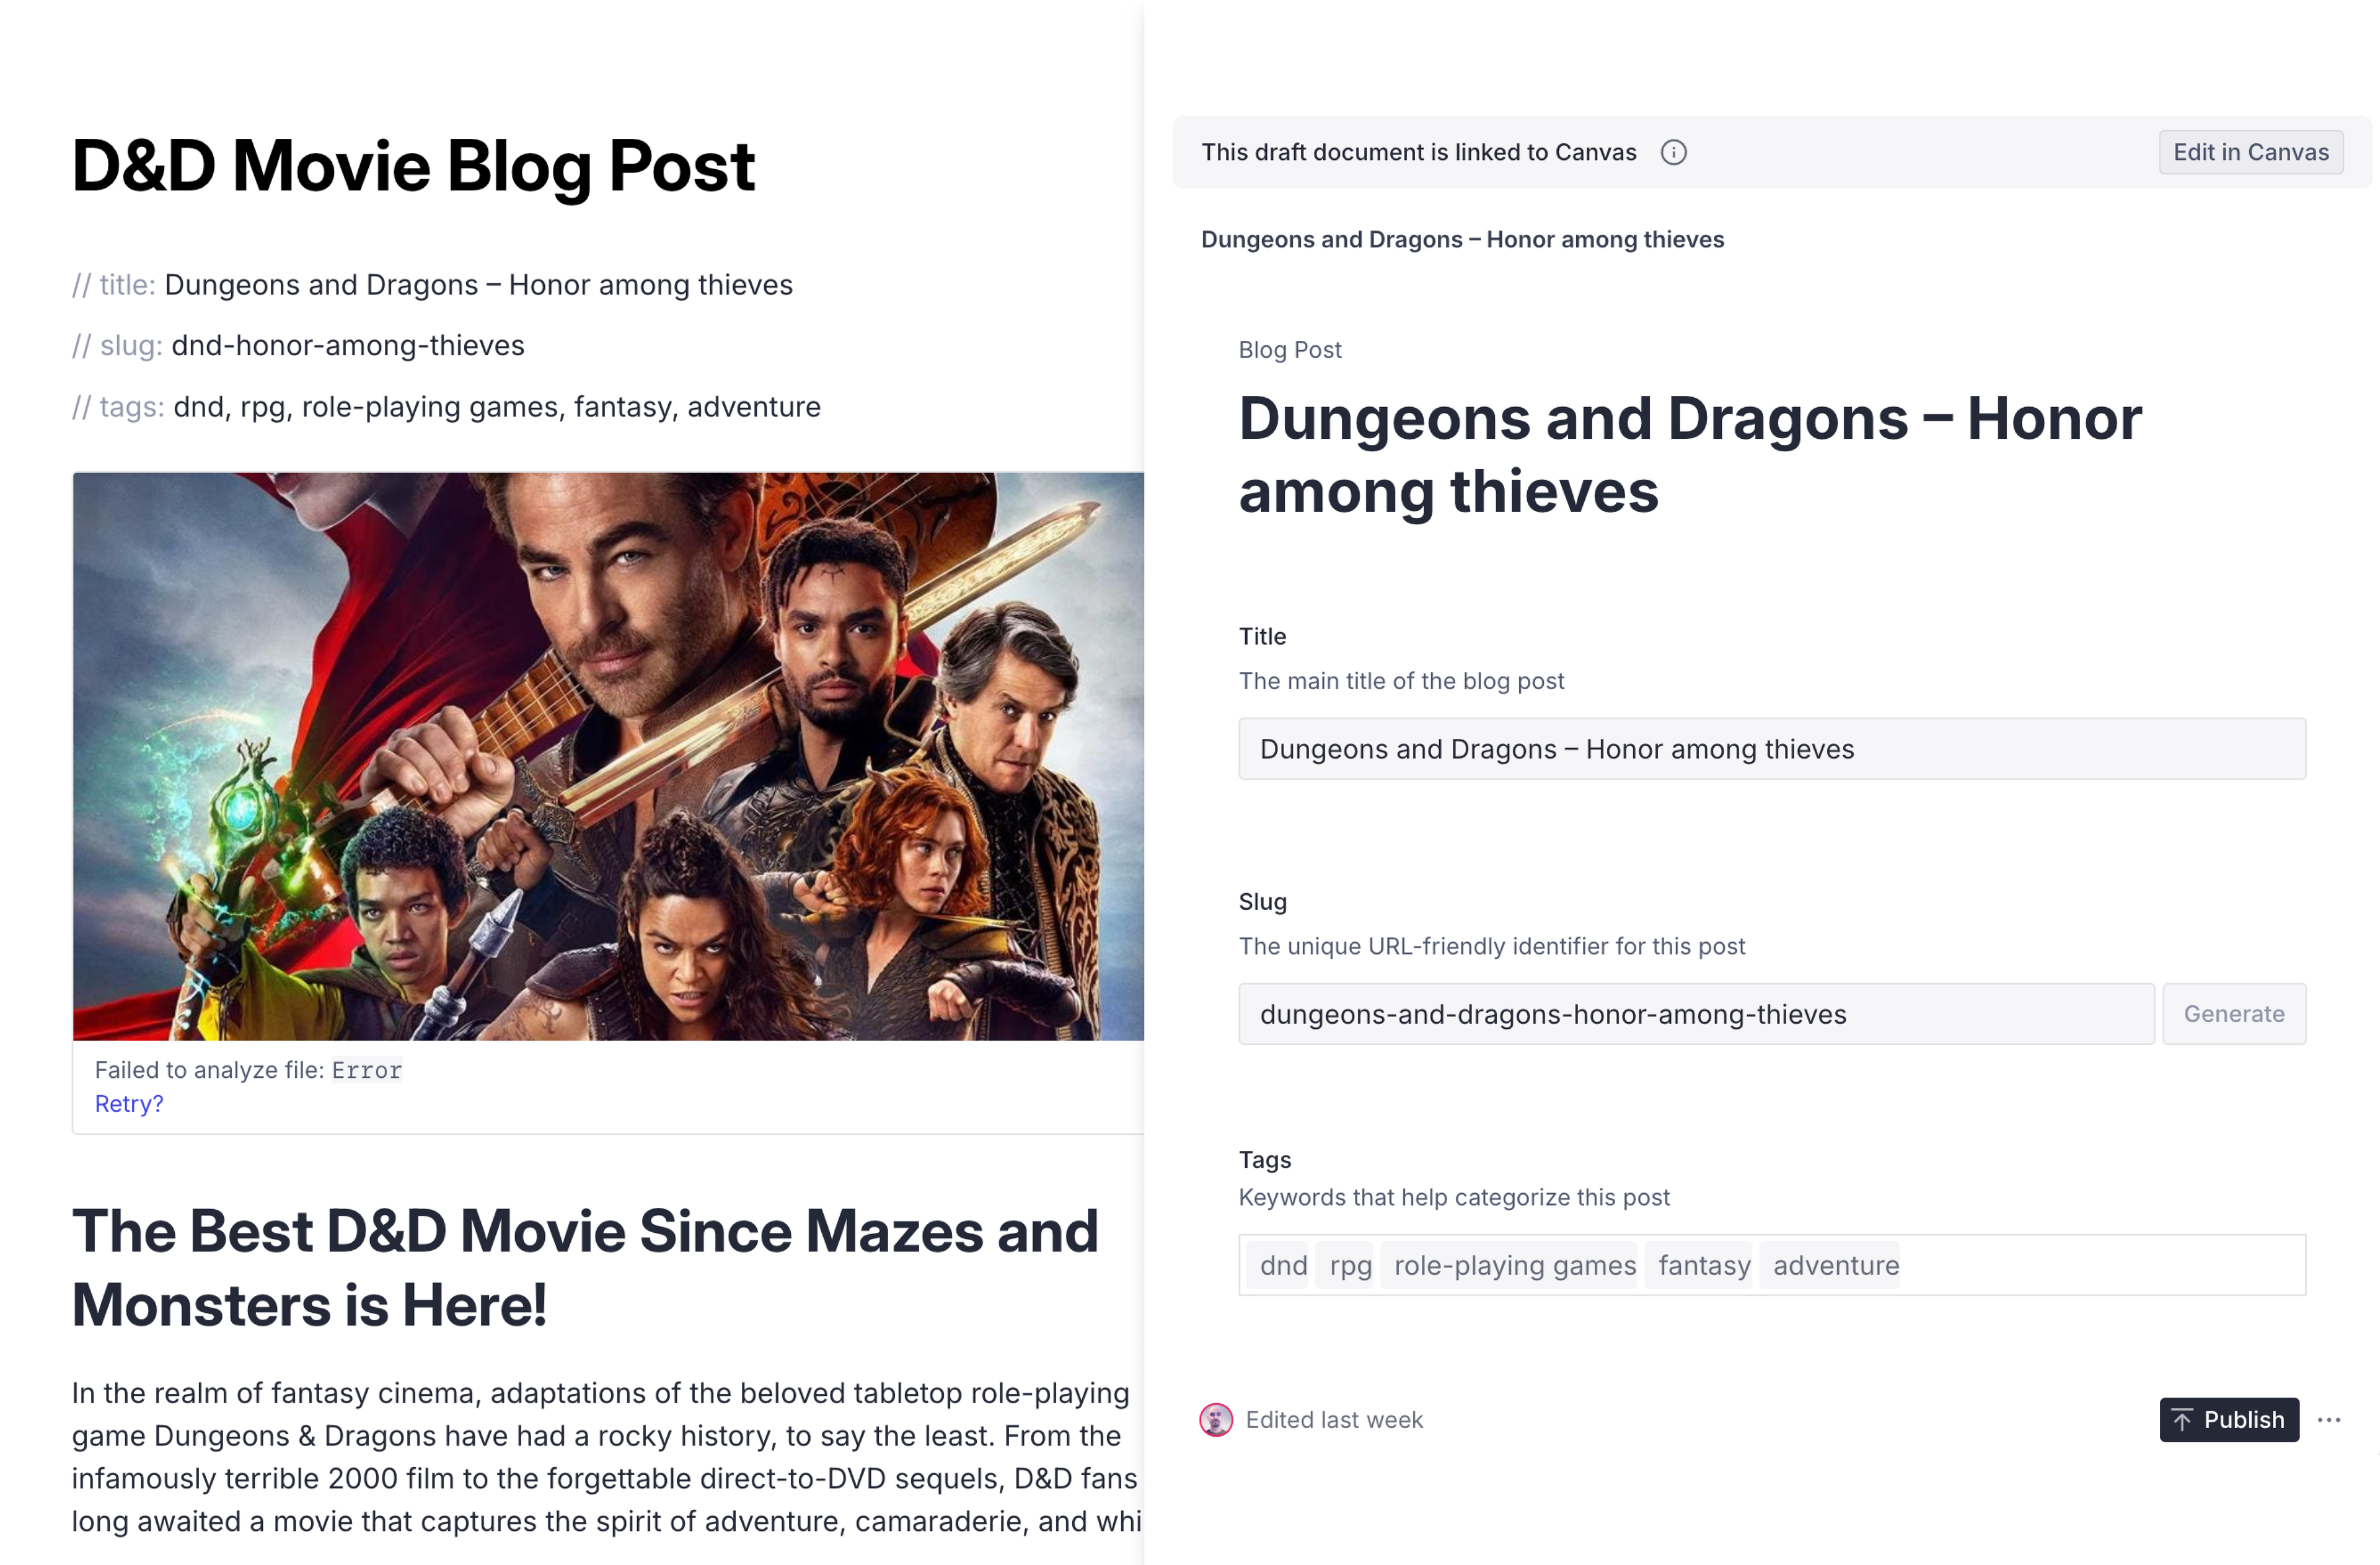
You also have the option of marking certain parts of your document as context, to make the bot ignore your "notes to self" and other non-content. You can even include little helpful pointers to the bot, like: // slug: my-cool-post or !! title below. The bot will try to infer meaning and decide what is content and what is context. Anything it gets wrong, you can fix!
Get started
Locate your project in the studio panel
- In Canvas, look for the button in the top right corner labeled Studio or, on smaller screens, with an icon resembling three boxes arranged in a diagram (a schema!).
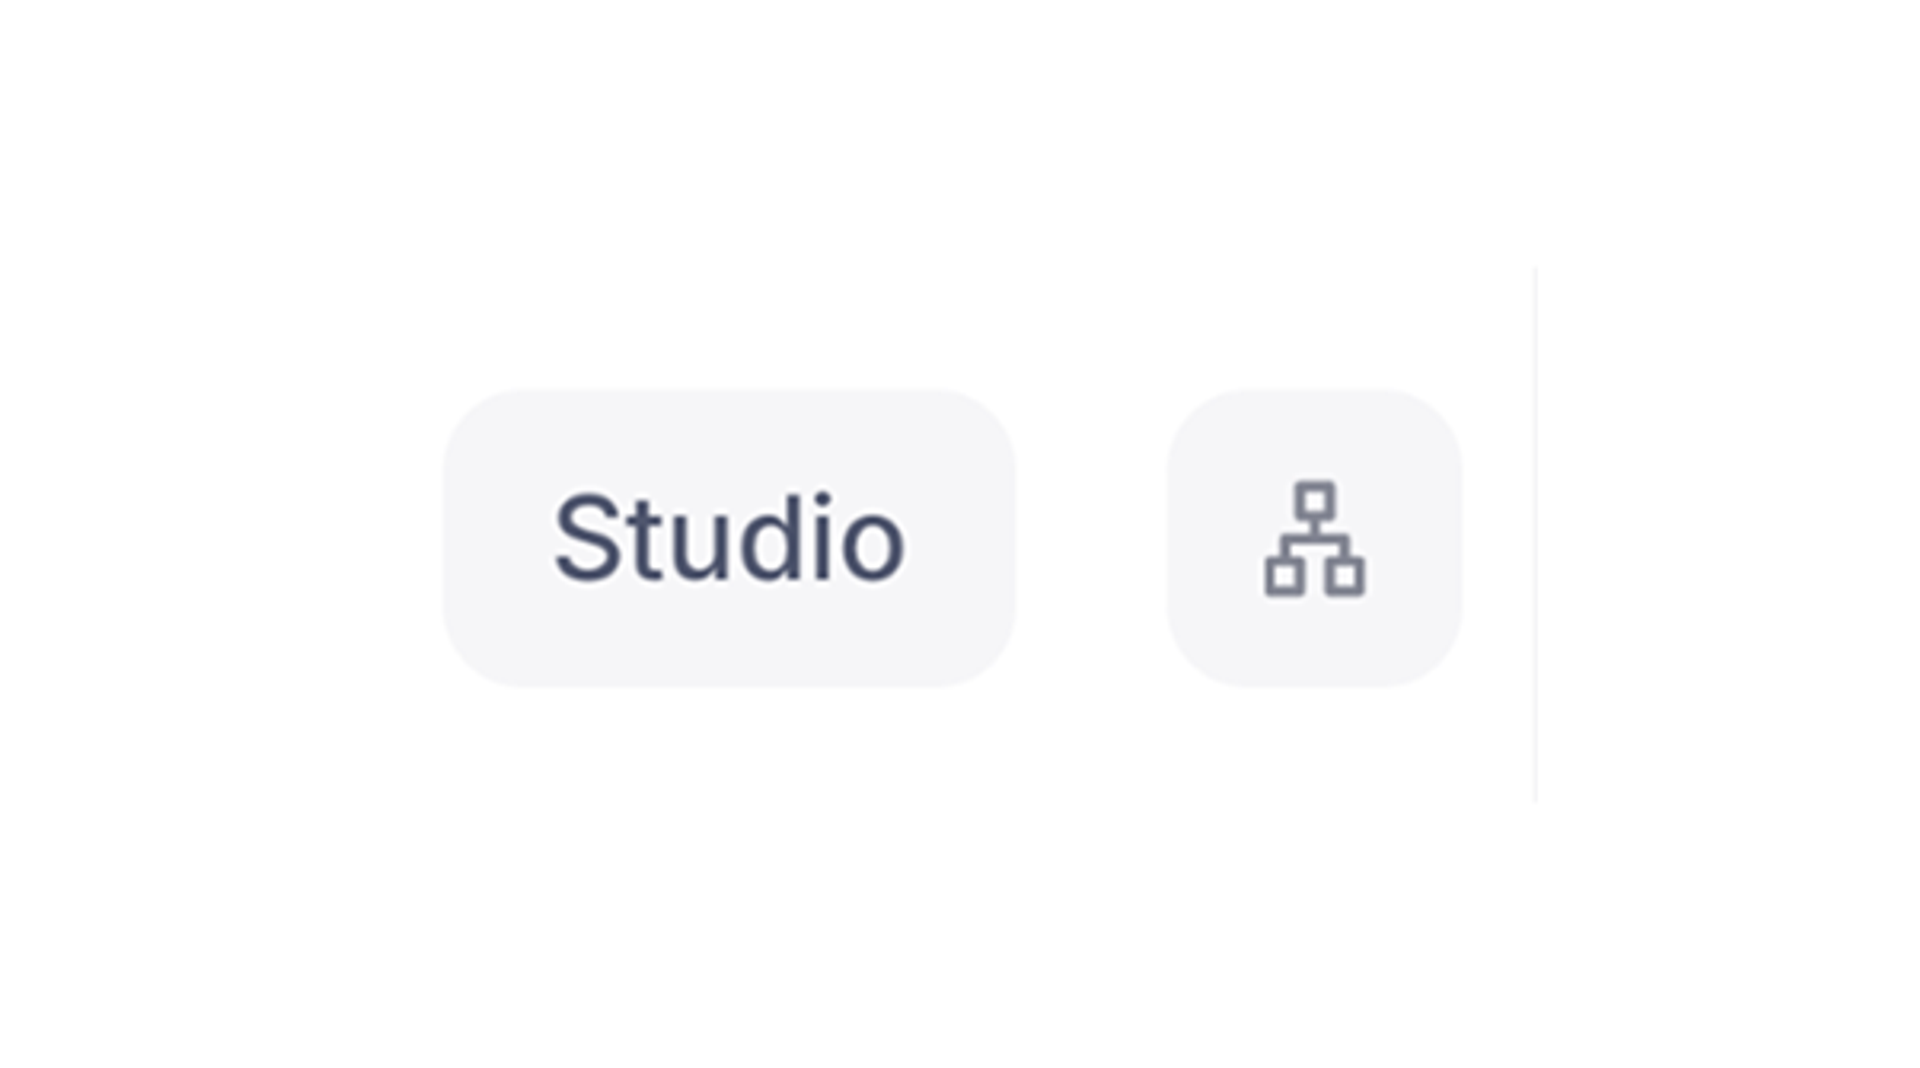
- Click the Studio button to reveal the Studio panel:
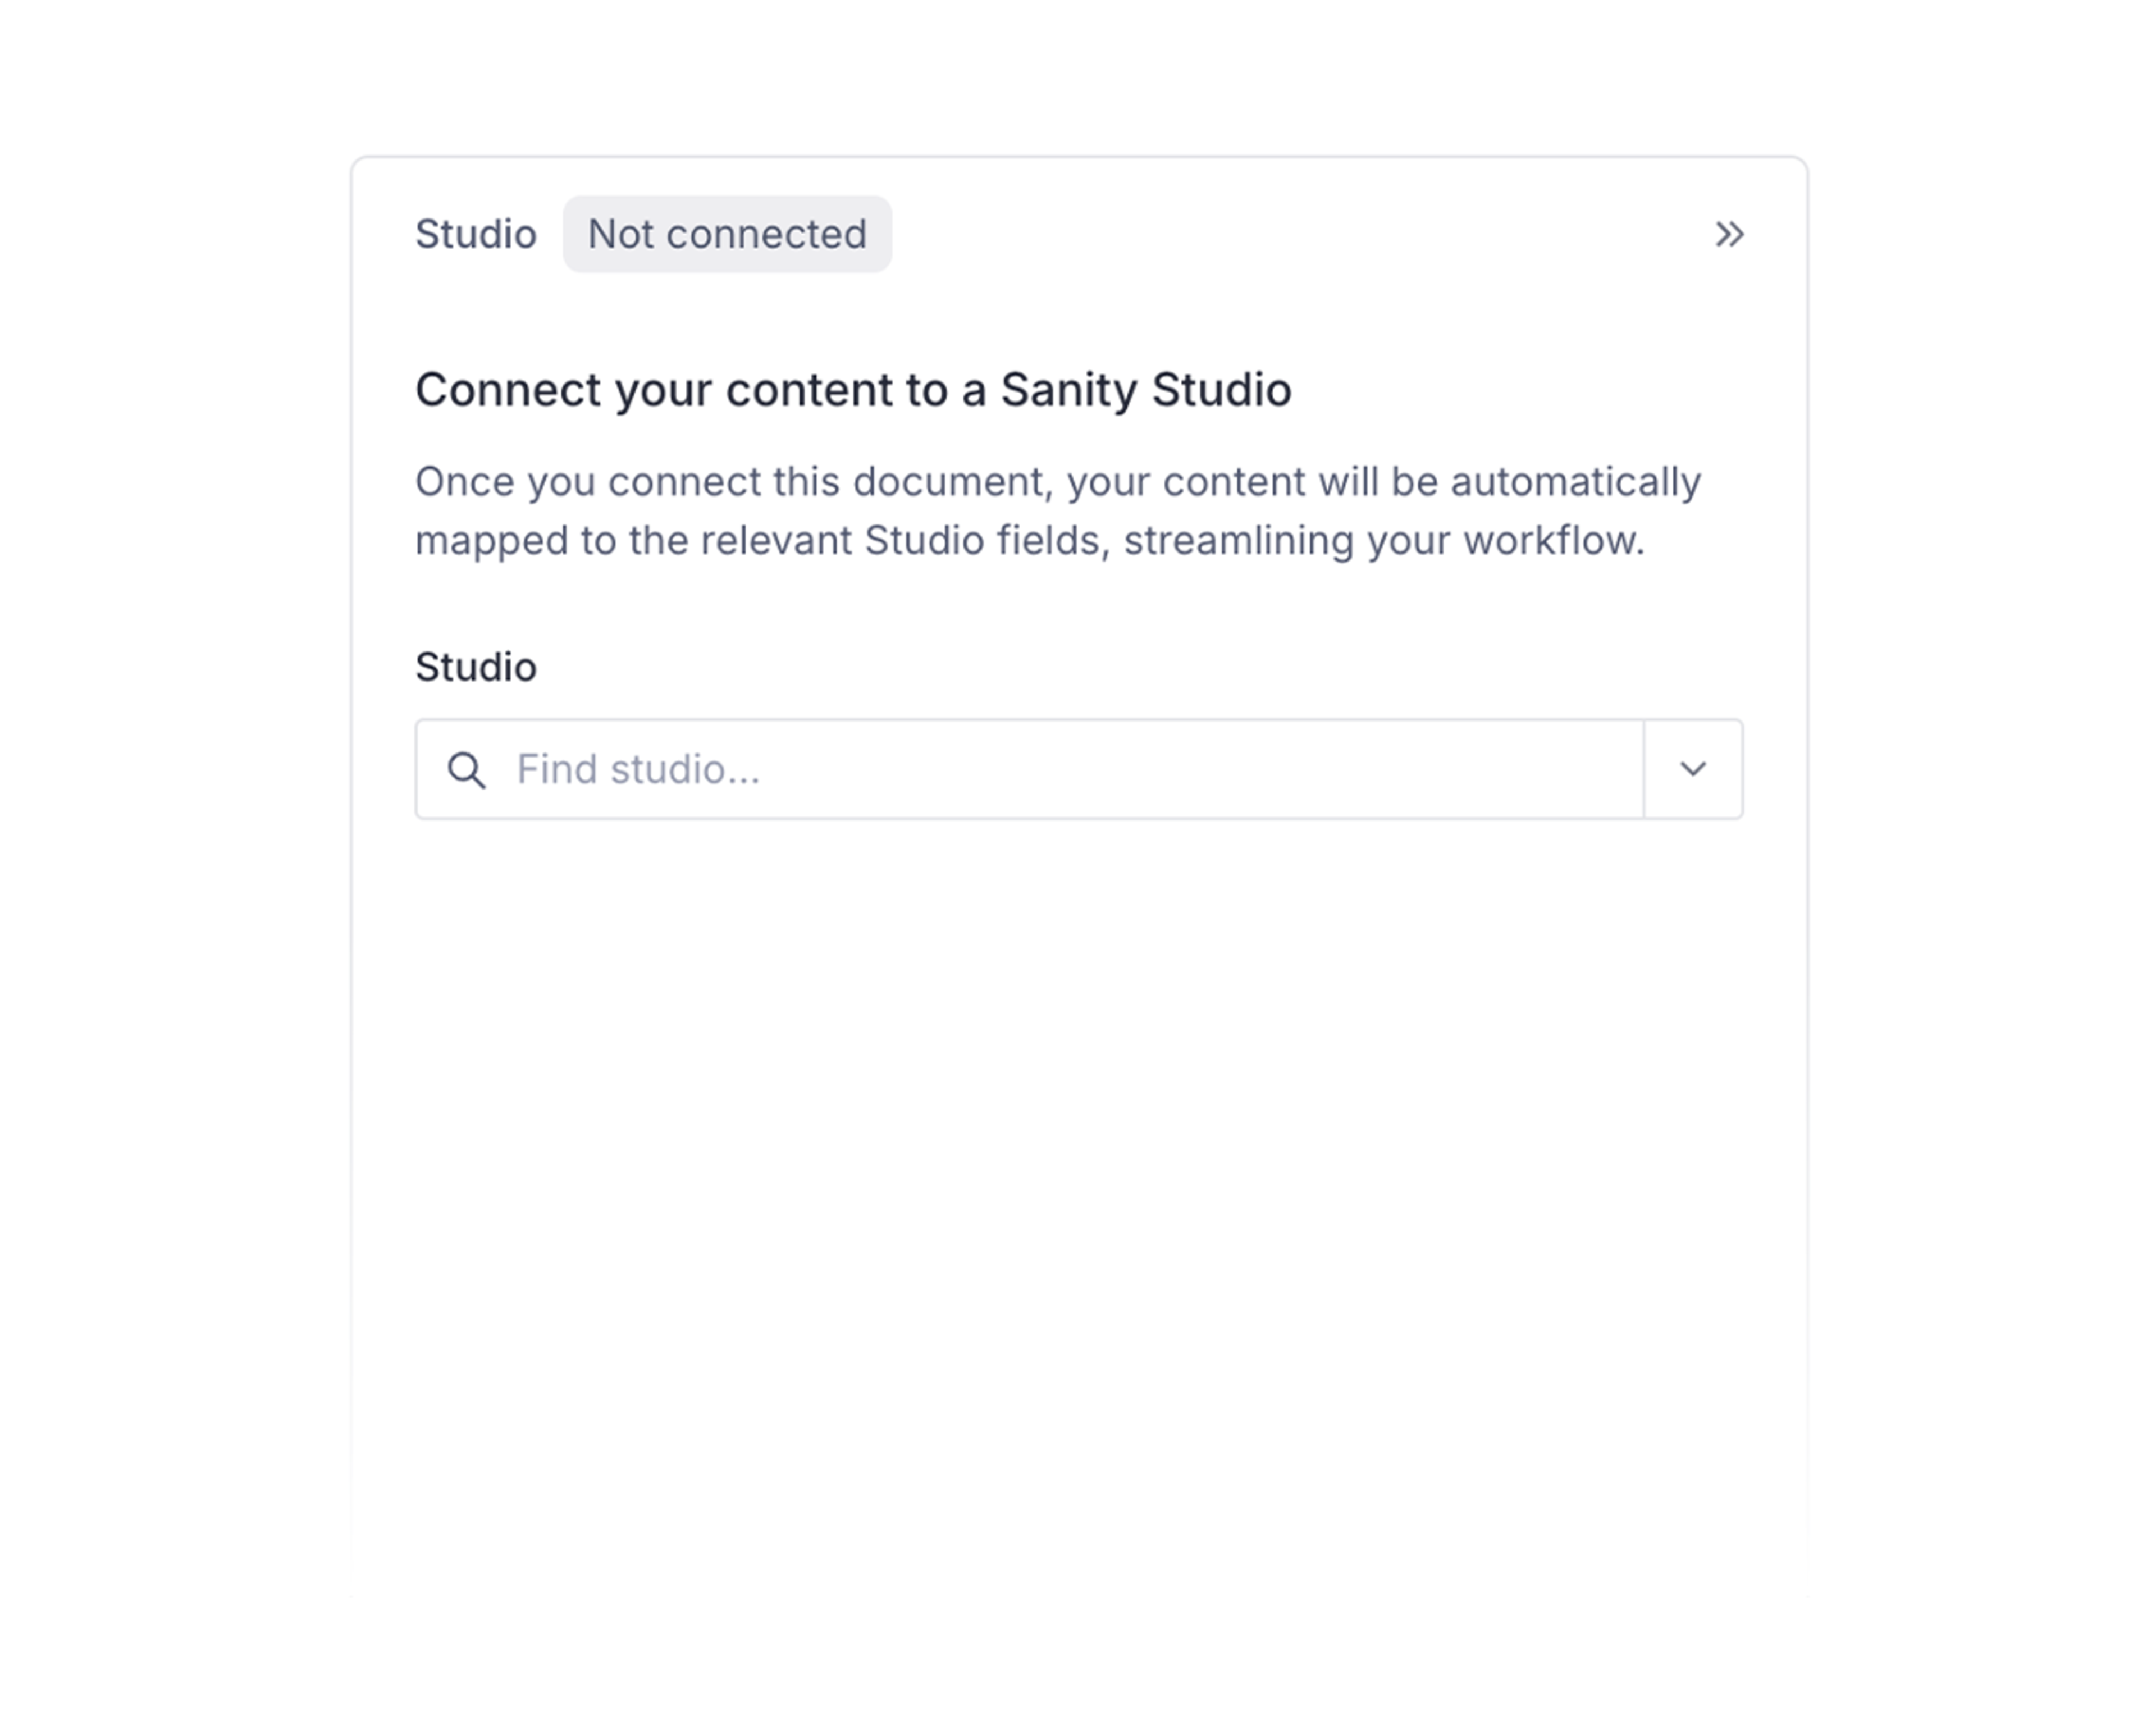
- Find your project in the Studio menu. If not automatically selected for you, find your studio deployment and workspace in the appropriate dropdowns. Then, find the document type you want to map your content to.
Gotcha
Can't see any projects in the dropdown? You may have to contact the person or people responsible for maintaining the studio and ask them to enable content mapping in Sanity Studio.
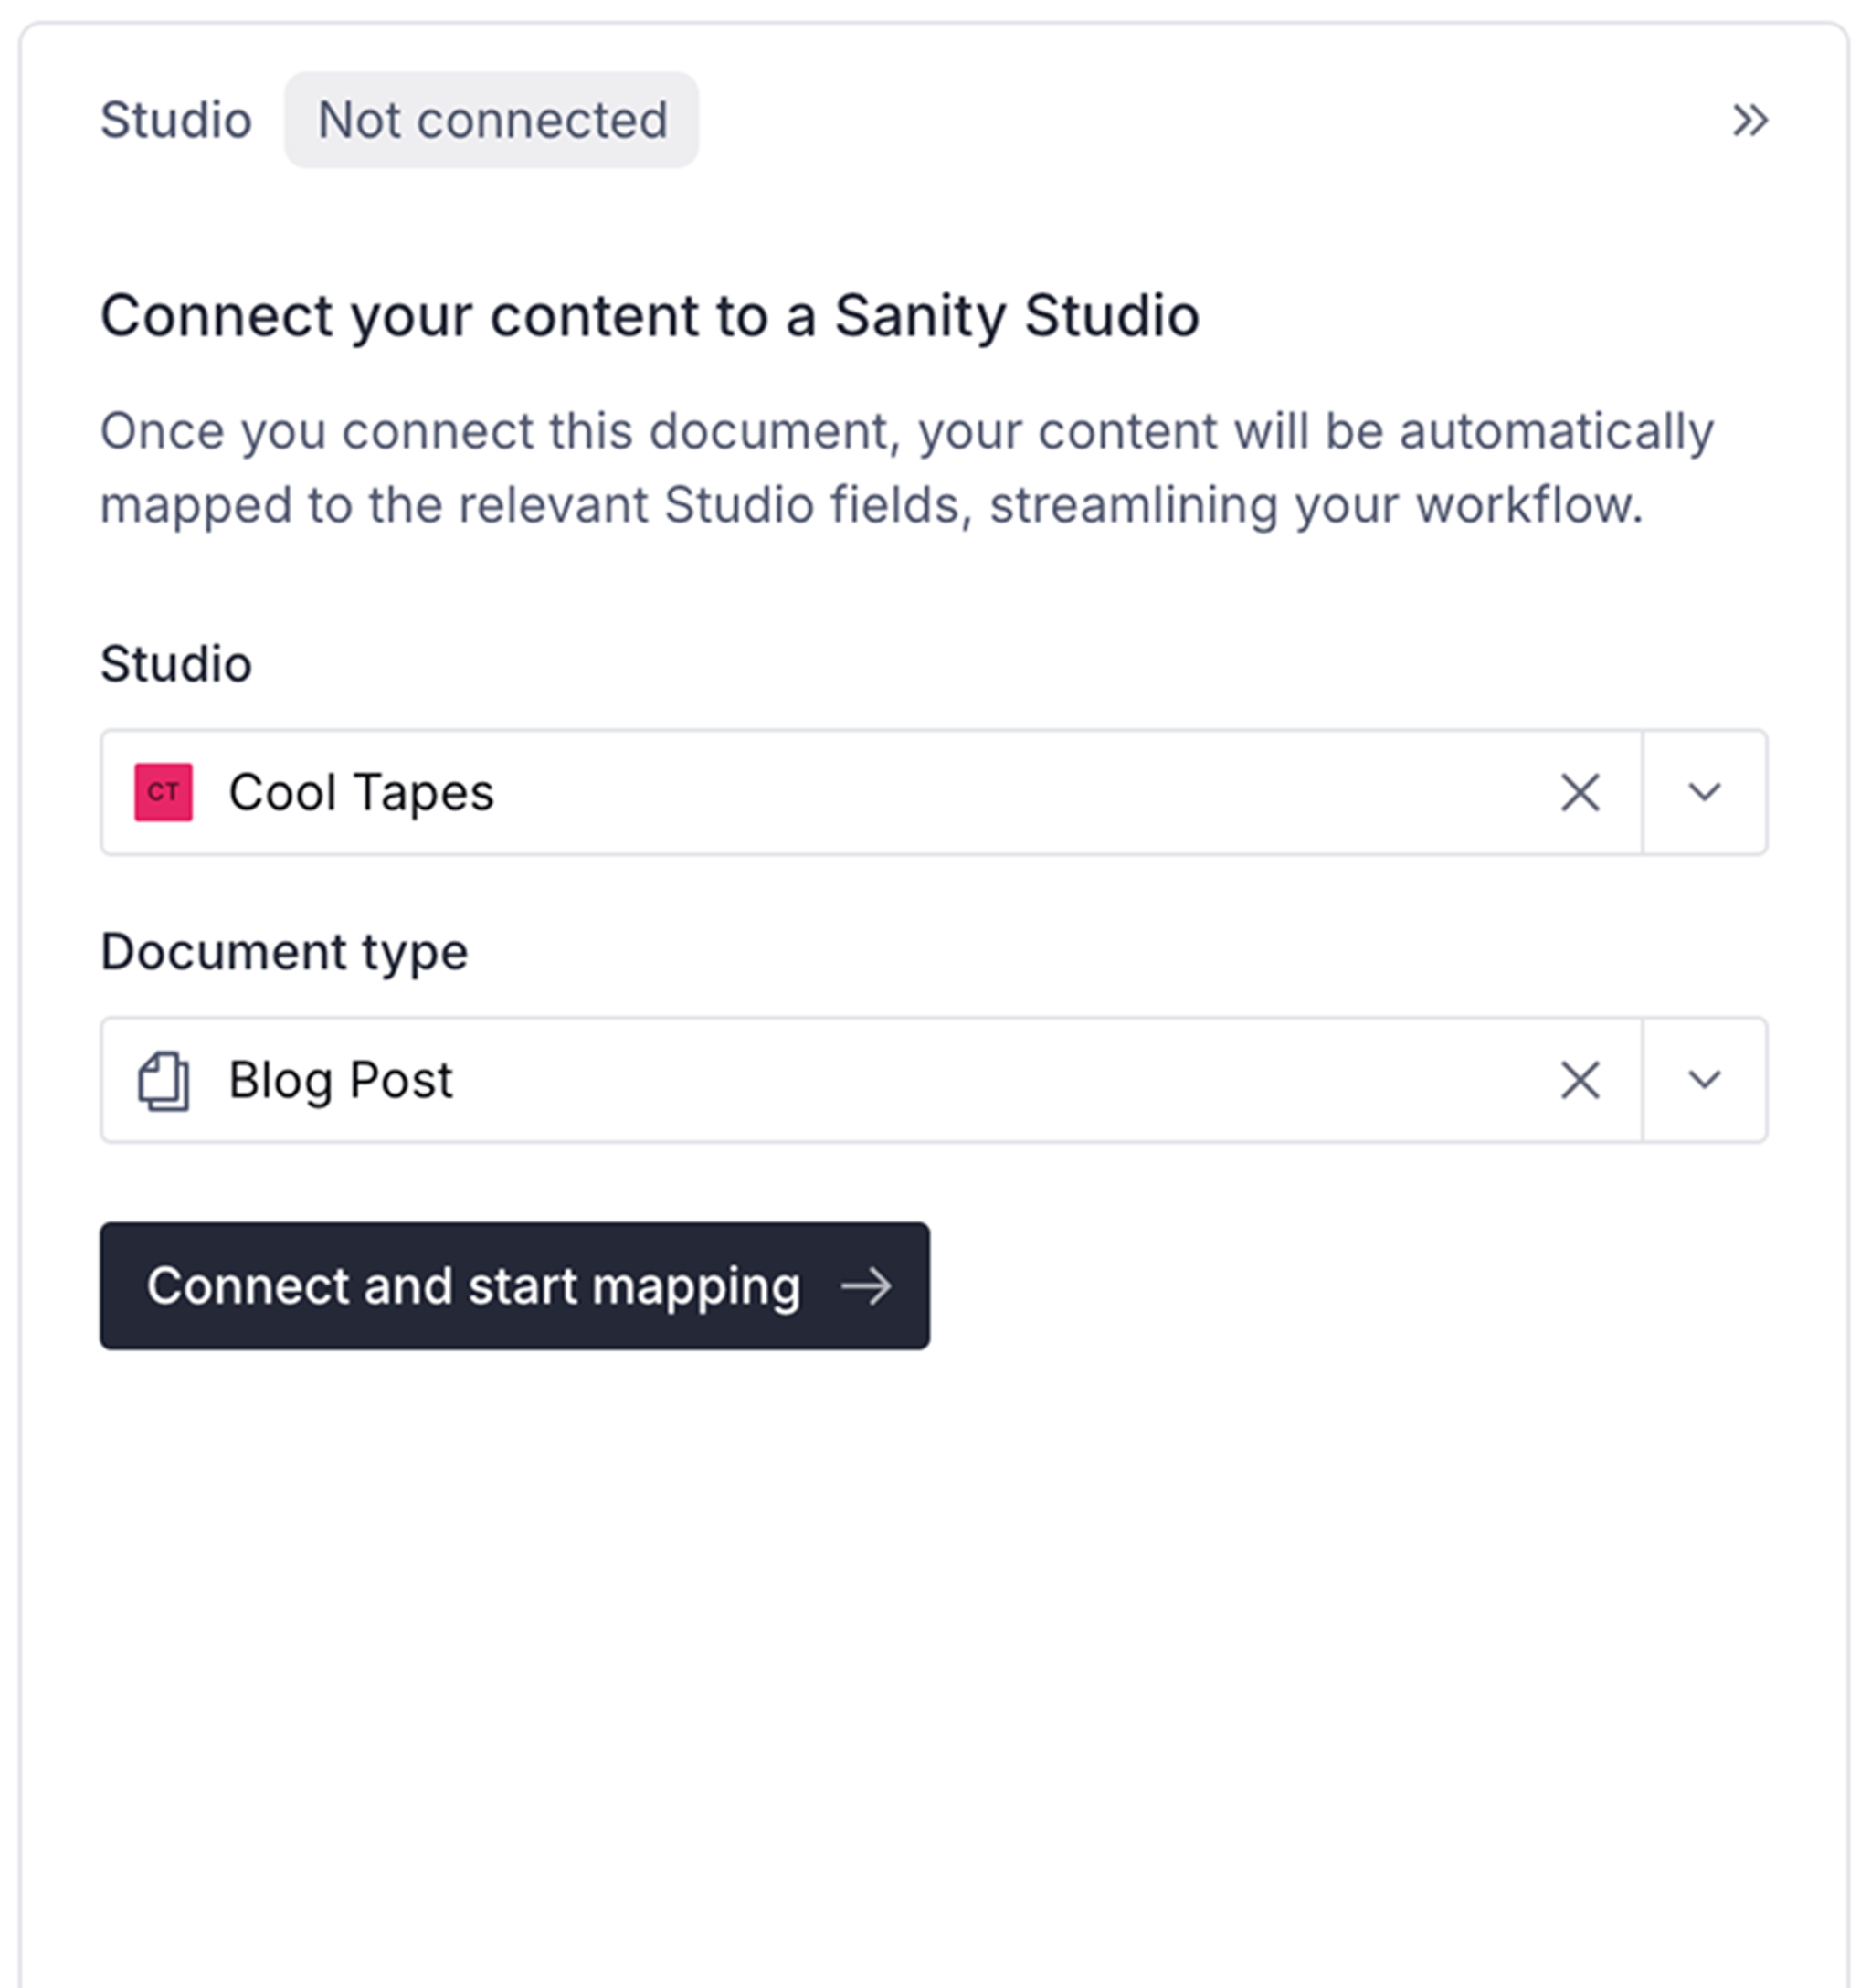
Select and apply a document type
- With your document type selected, click the button labeled Connect and start mapping -> to proceed.
- The link panel will change to show a "minimap" of the selected content type, with its fields laid out in a tree structure. Fields with a little arrow on their left can be clicked to expand and reveal their values, or drill down deeper into nested fields.
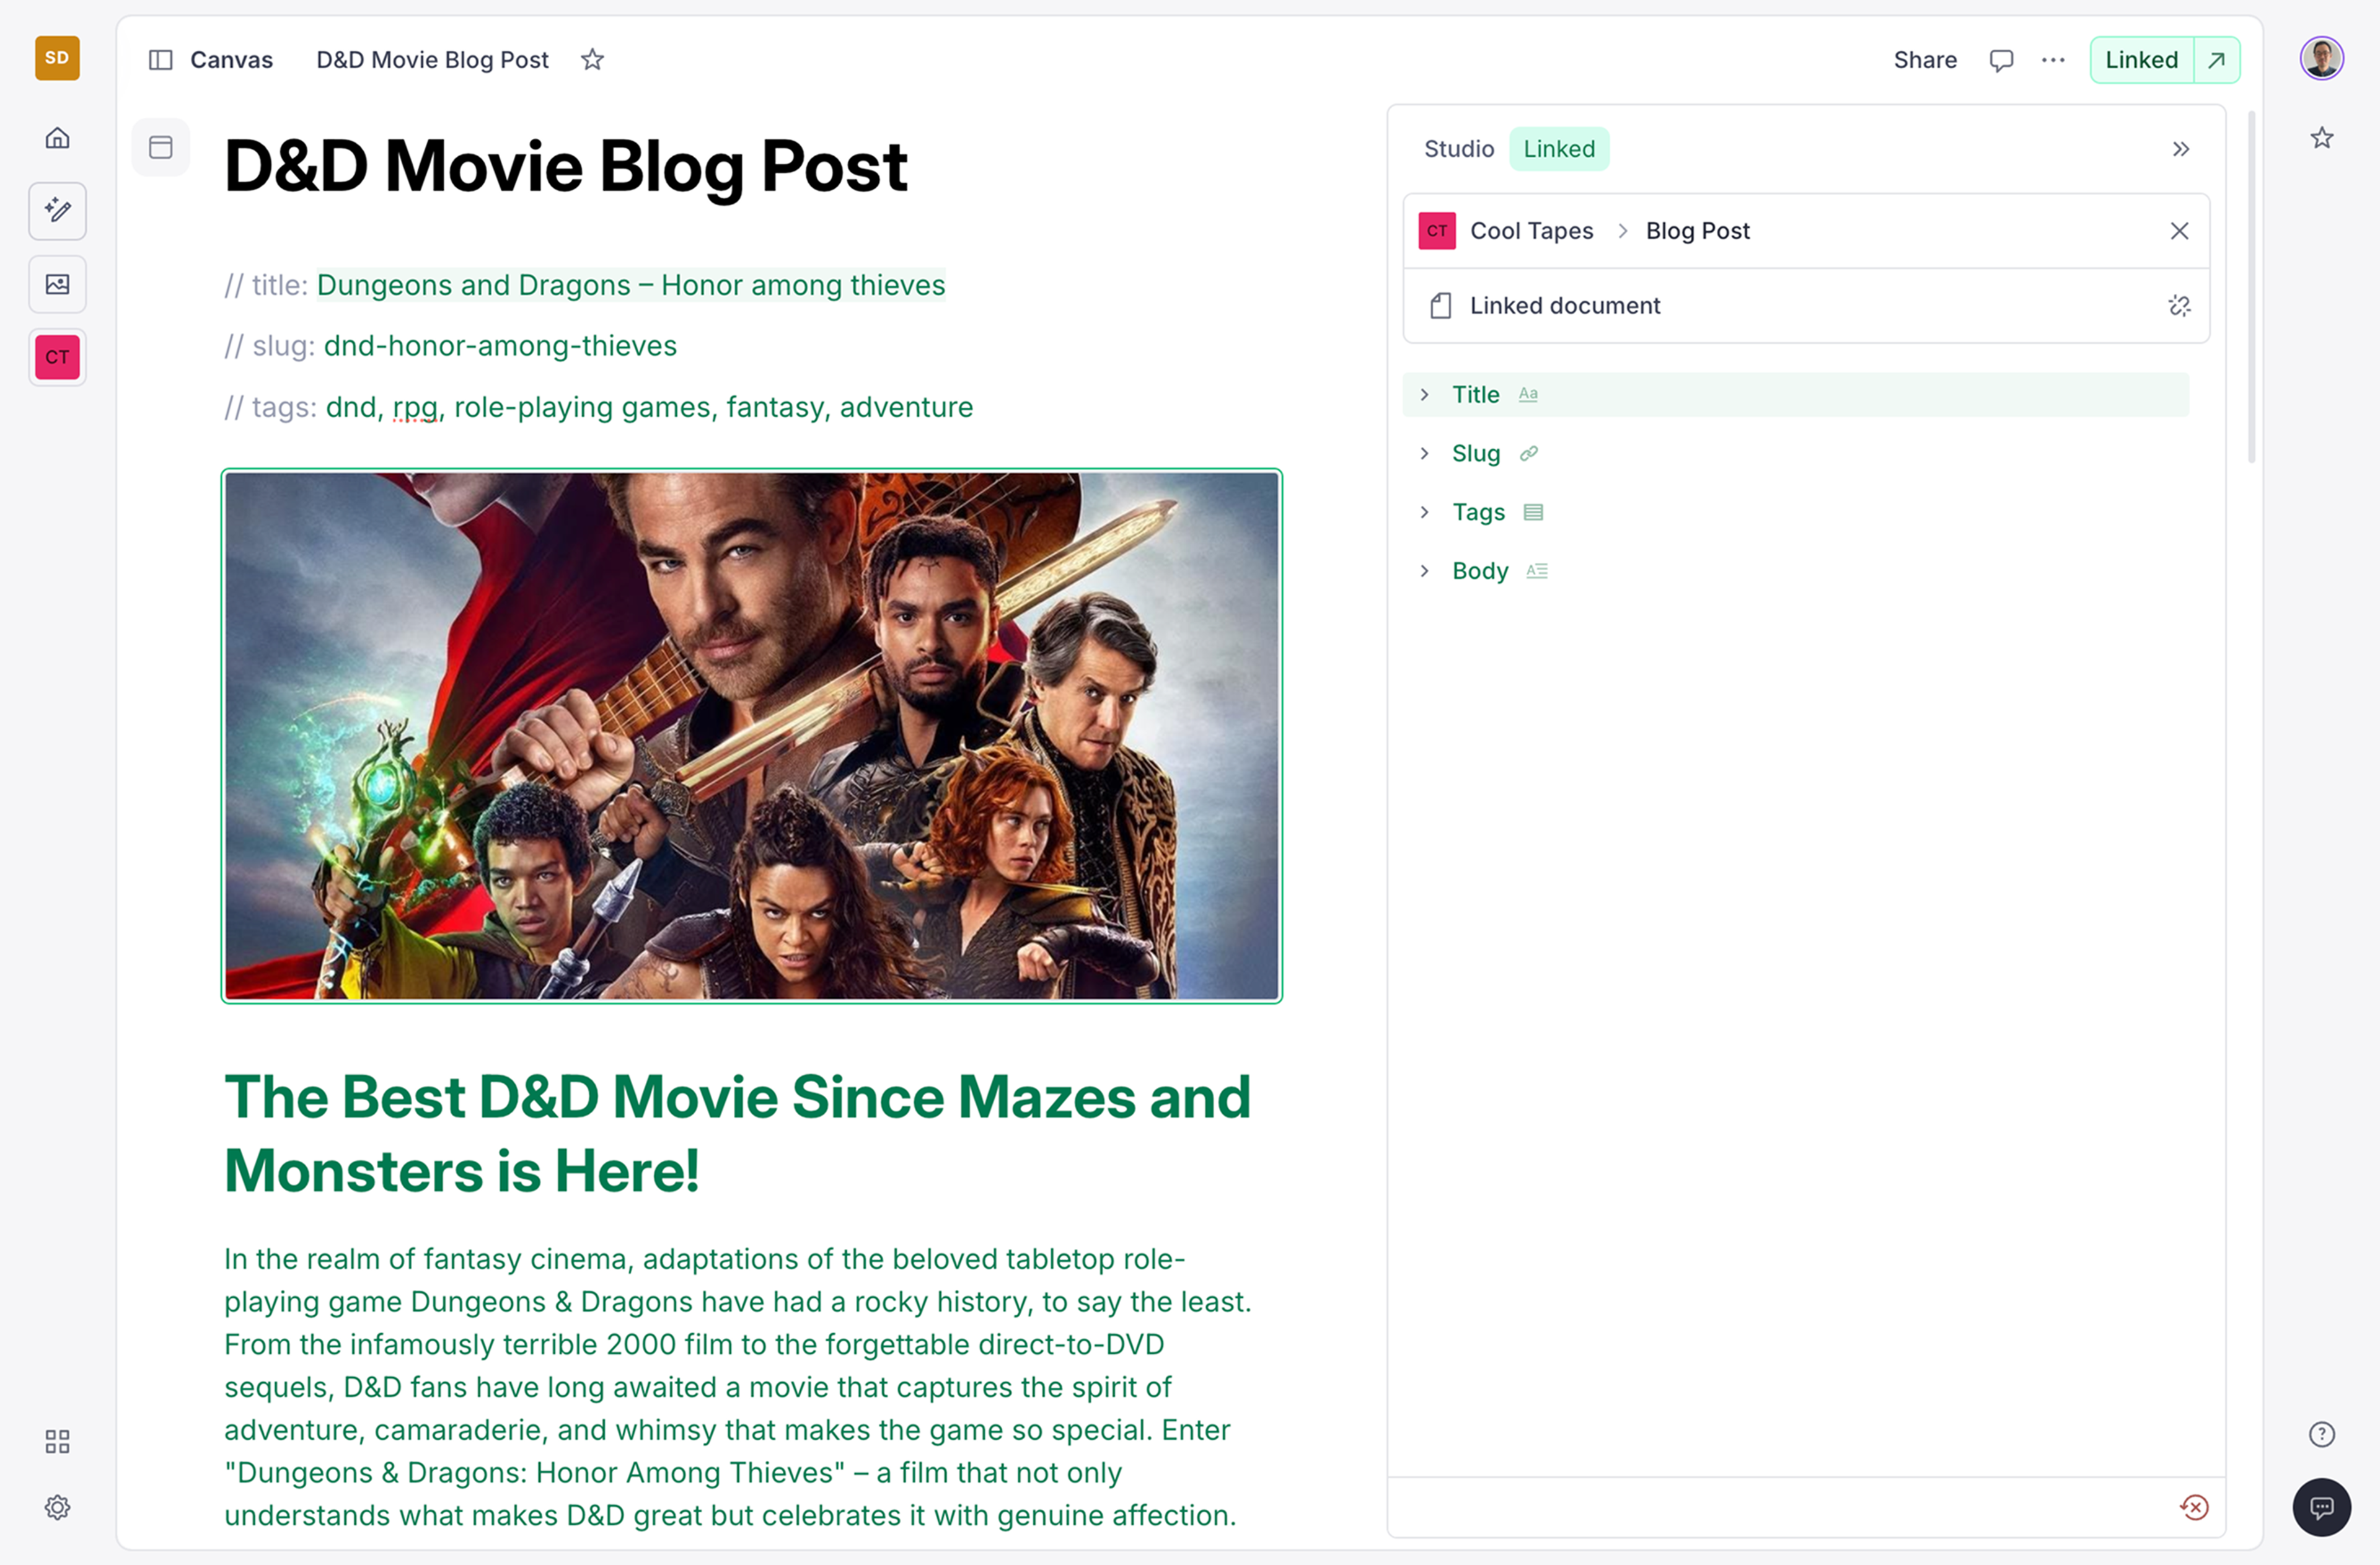
Note also the bottom right status indicator, which shows the mapping agent already making progress. It will keep working in the background, intelligently mapping your content to corresponding fields.
Exploring the Link Panel further
As your content is mapped, you'll see the minimap tree of document fields starting to fill out with content. You might also notice the colors changing as the mapping agent finishes with a field.
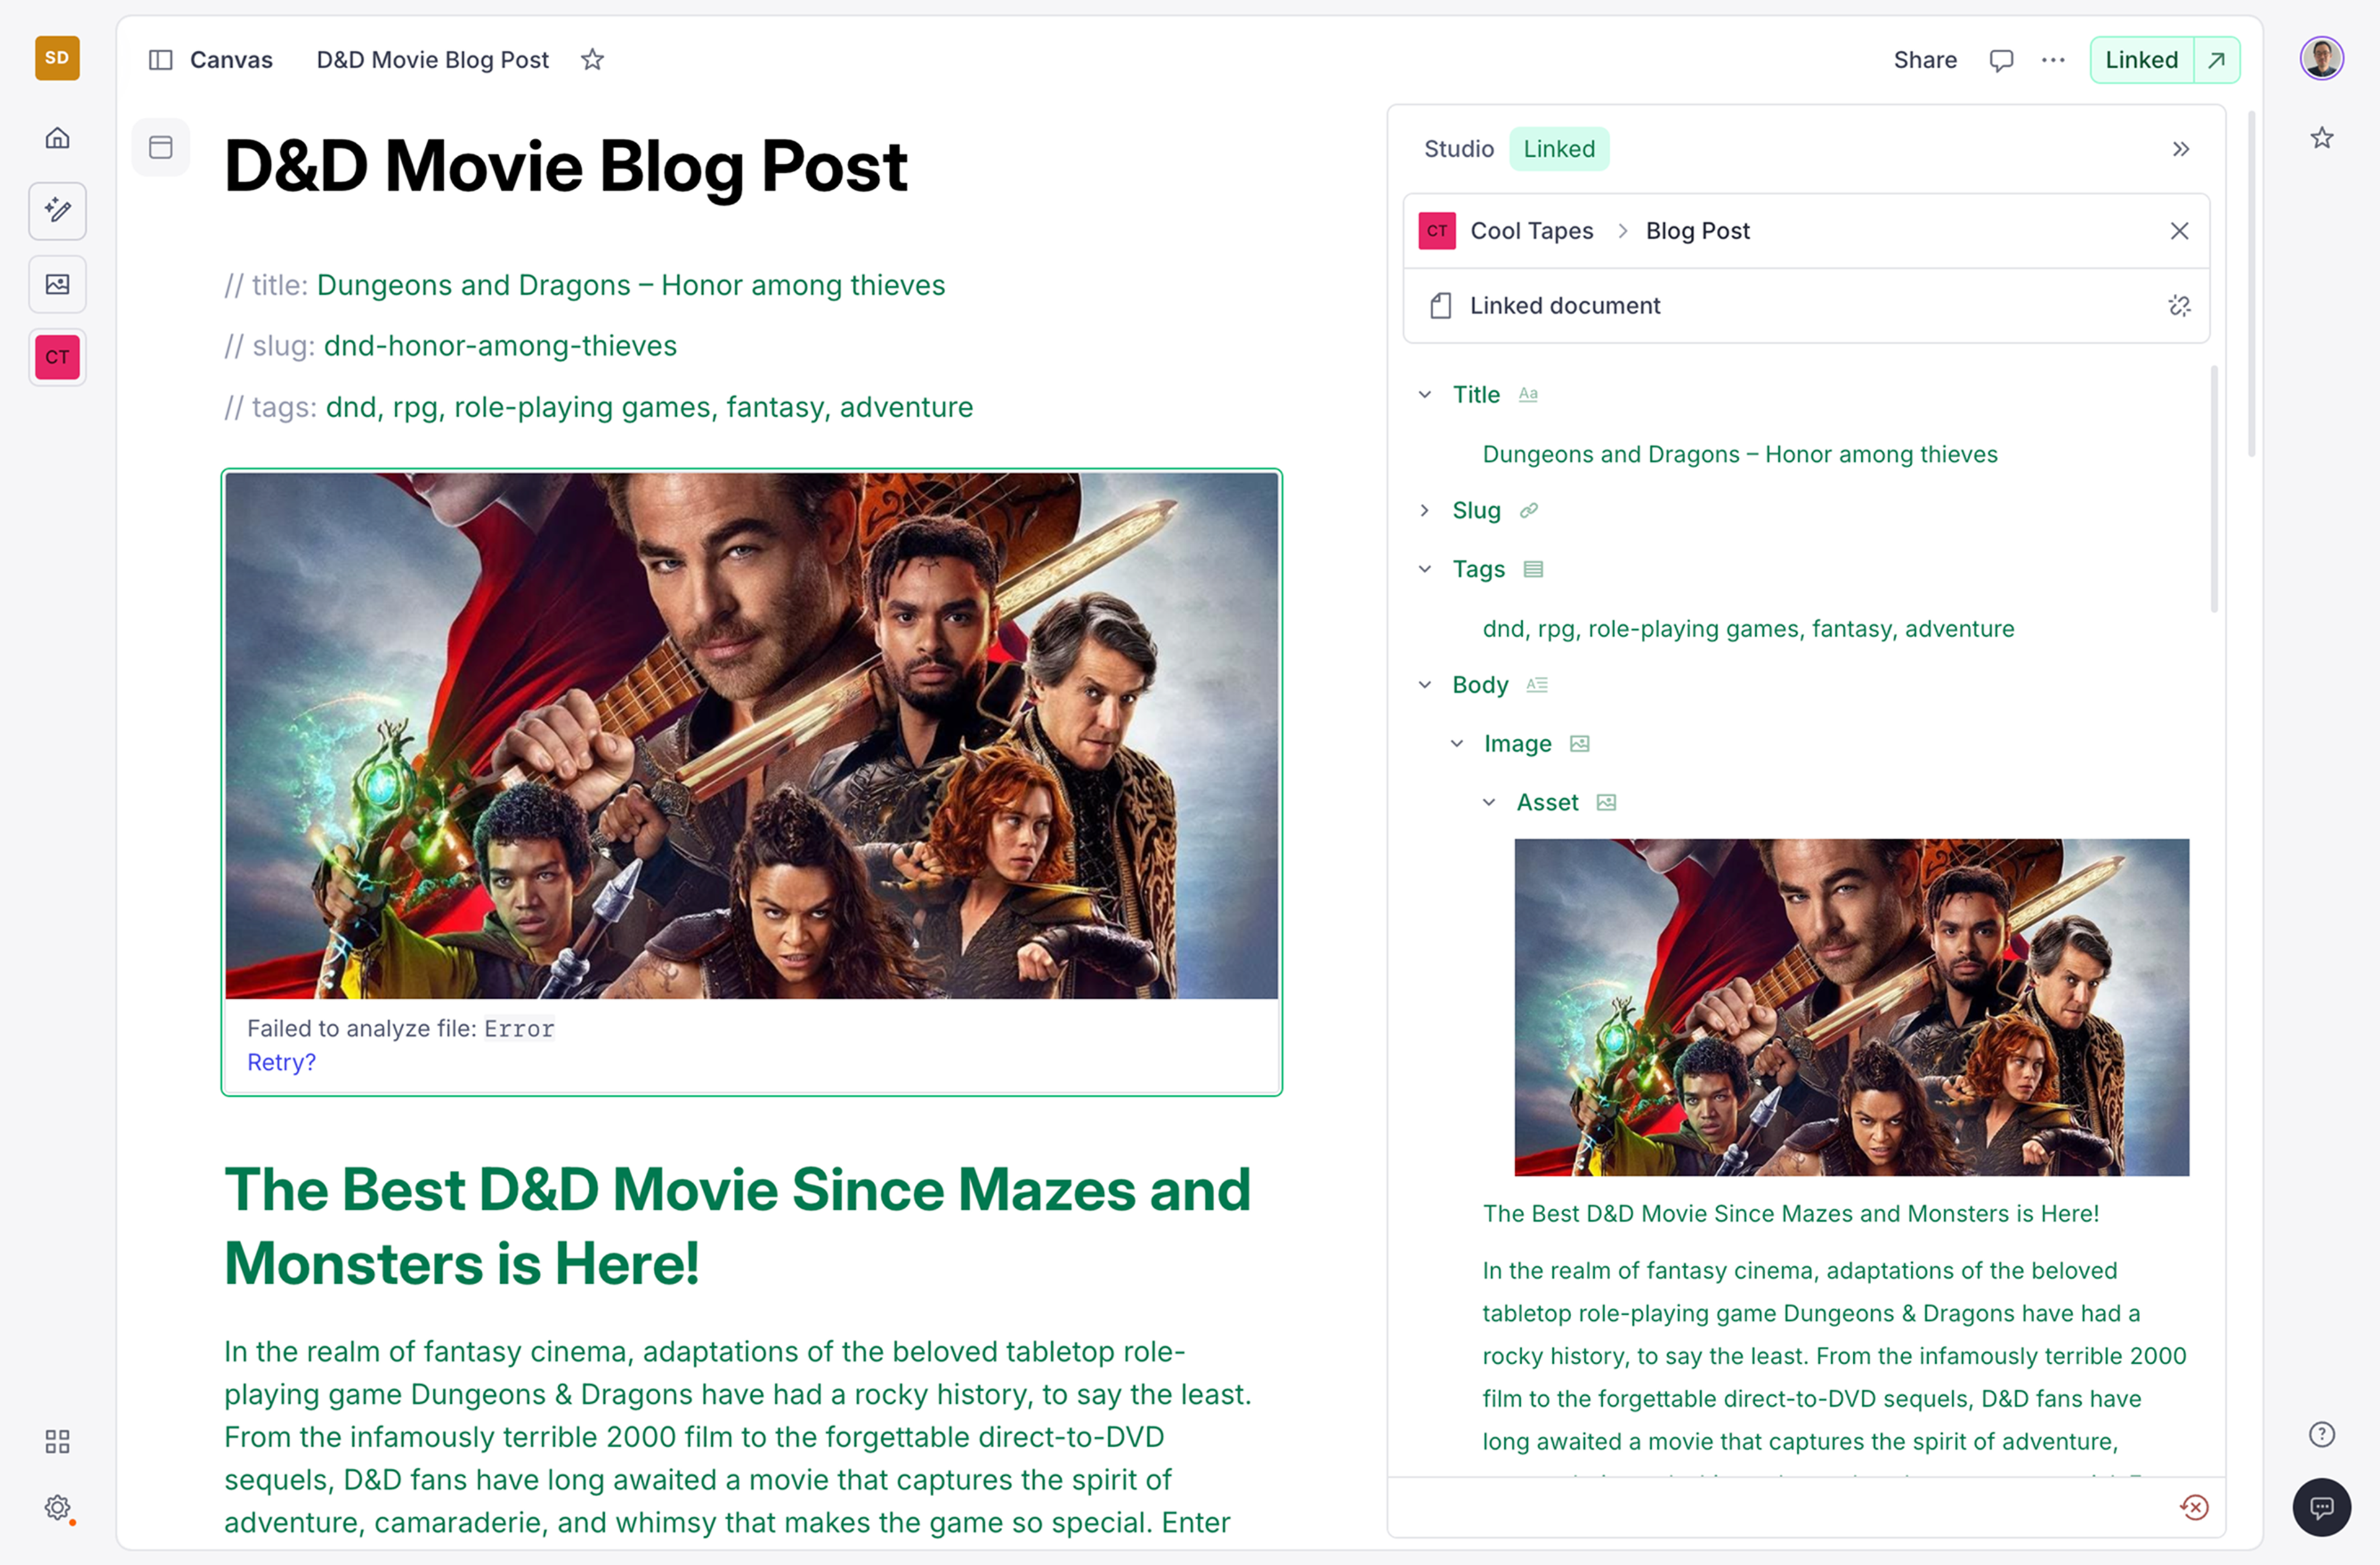
Using colors to discern mapping state
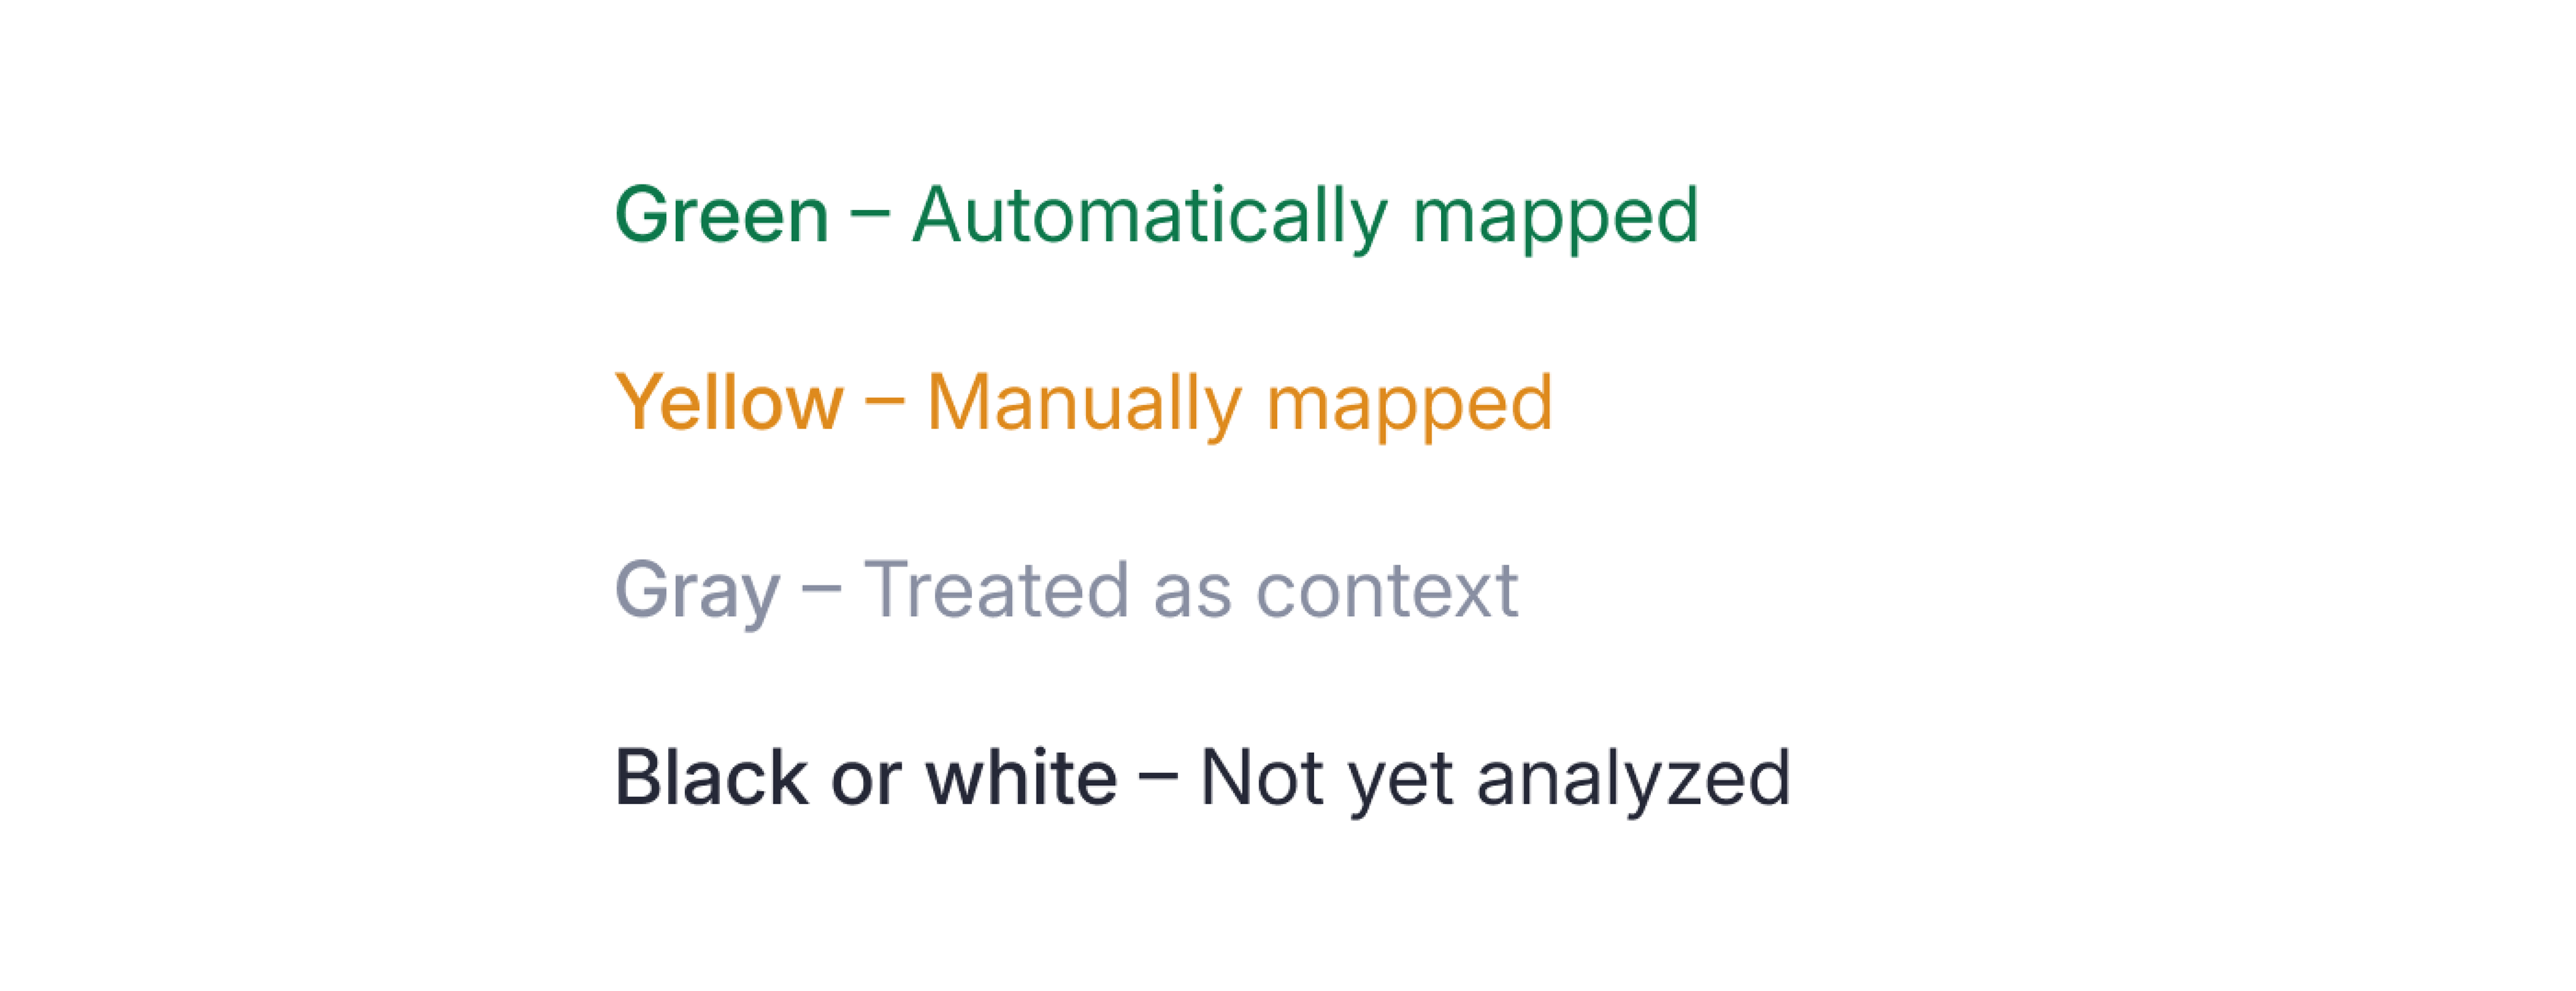
As the content is mapped, you'll notice your screen getting progressively more colorful. Content that was automatically mapped to a field will be tinted green, as will the corresponding field in the link panel minimap, while anything the bot has decided is context will get a light gray color.
The yellow-colored field in the screenshot above indicates a field where an editor has actively overruled the suggested mapping and manually linked a bit of content to a field, while text in black or white (depending on whether or not the dark mode is active) indicates content that the mapping agent hasn't yet analyzed.
Adjusting the results
While the automatic mapping is quite good (really!), you may at times want to manually adjust how your content in Canvas matches up with your studio schema. The tools you need to make these changes are at your fingertips.
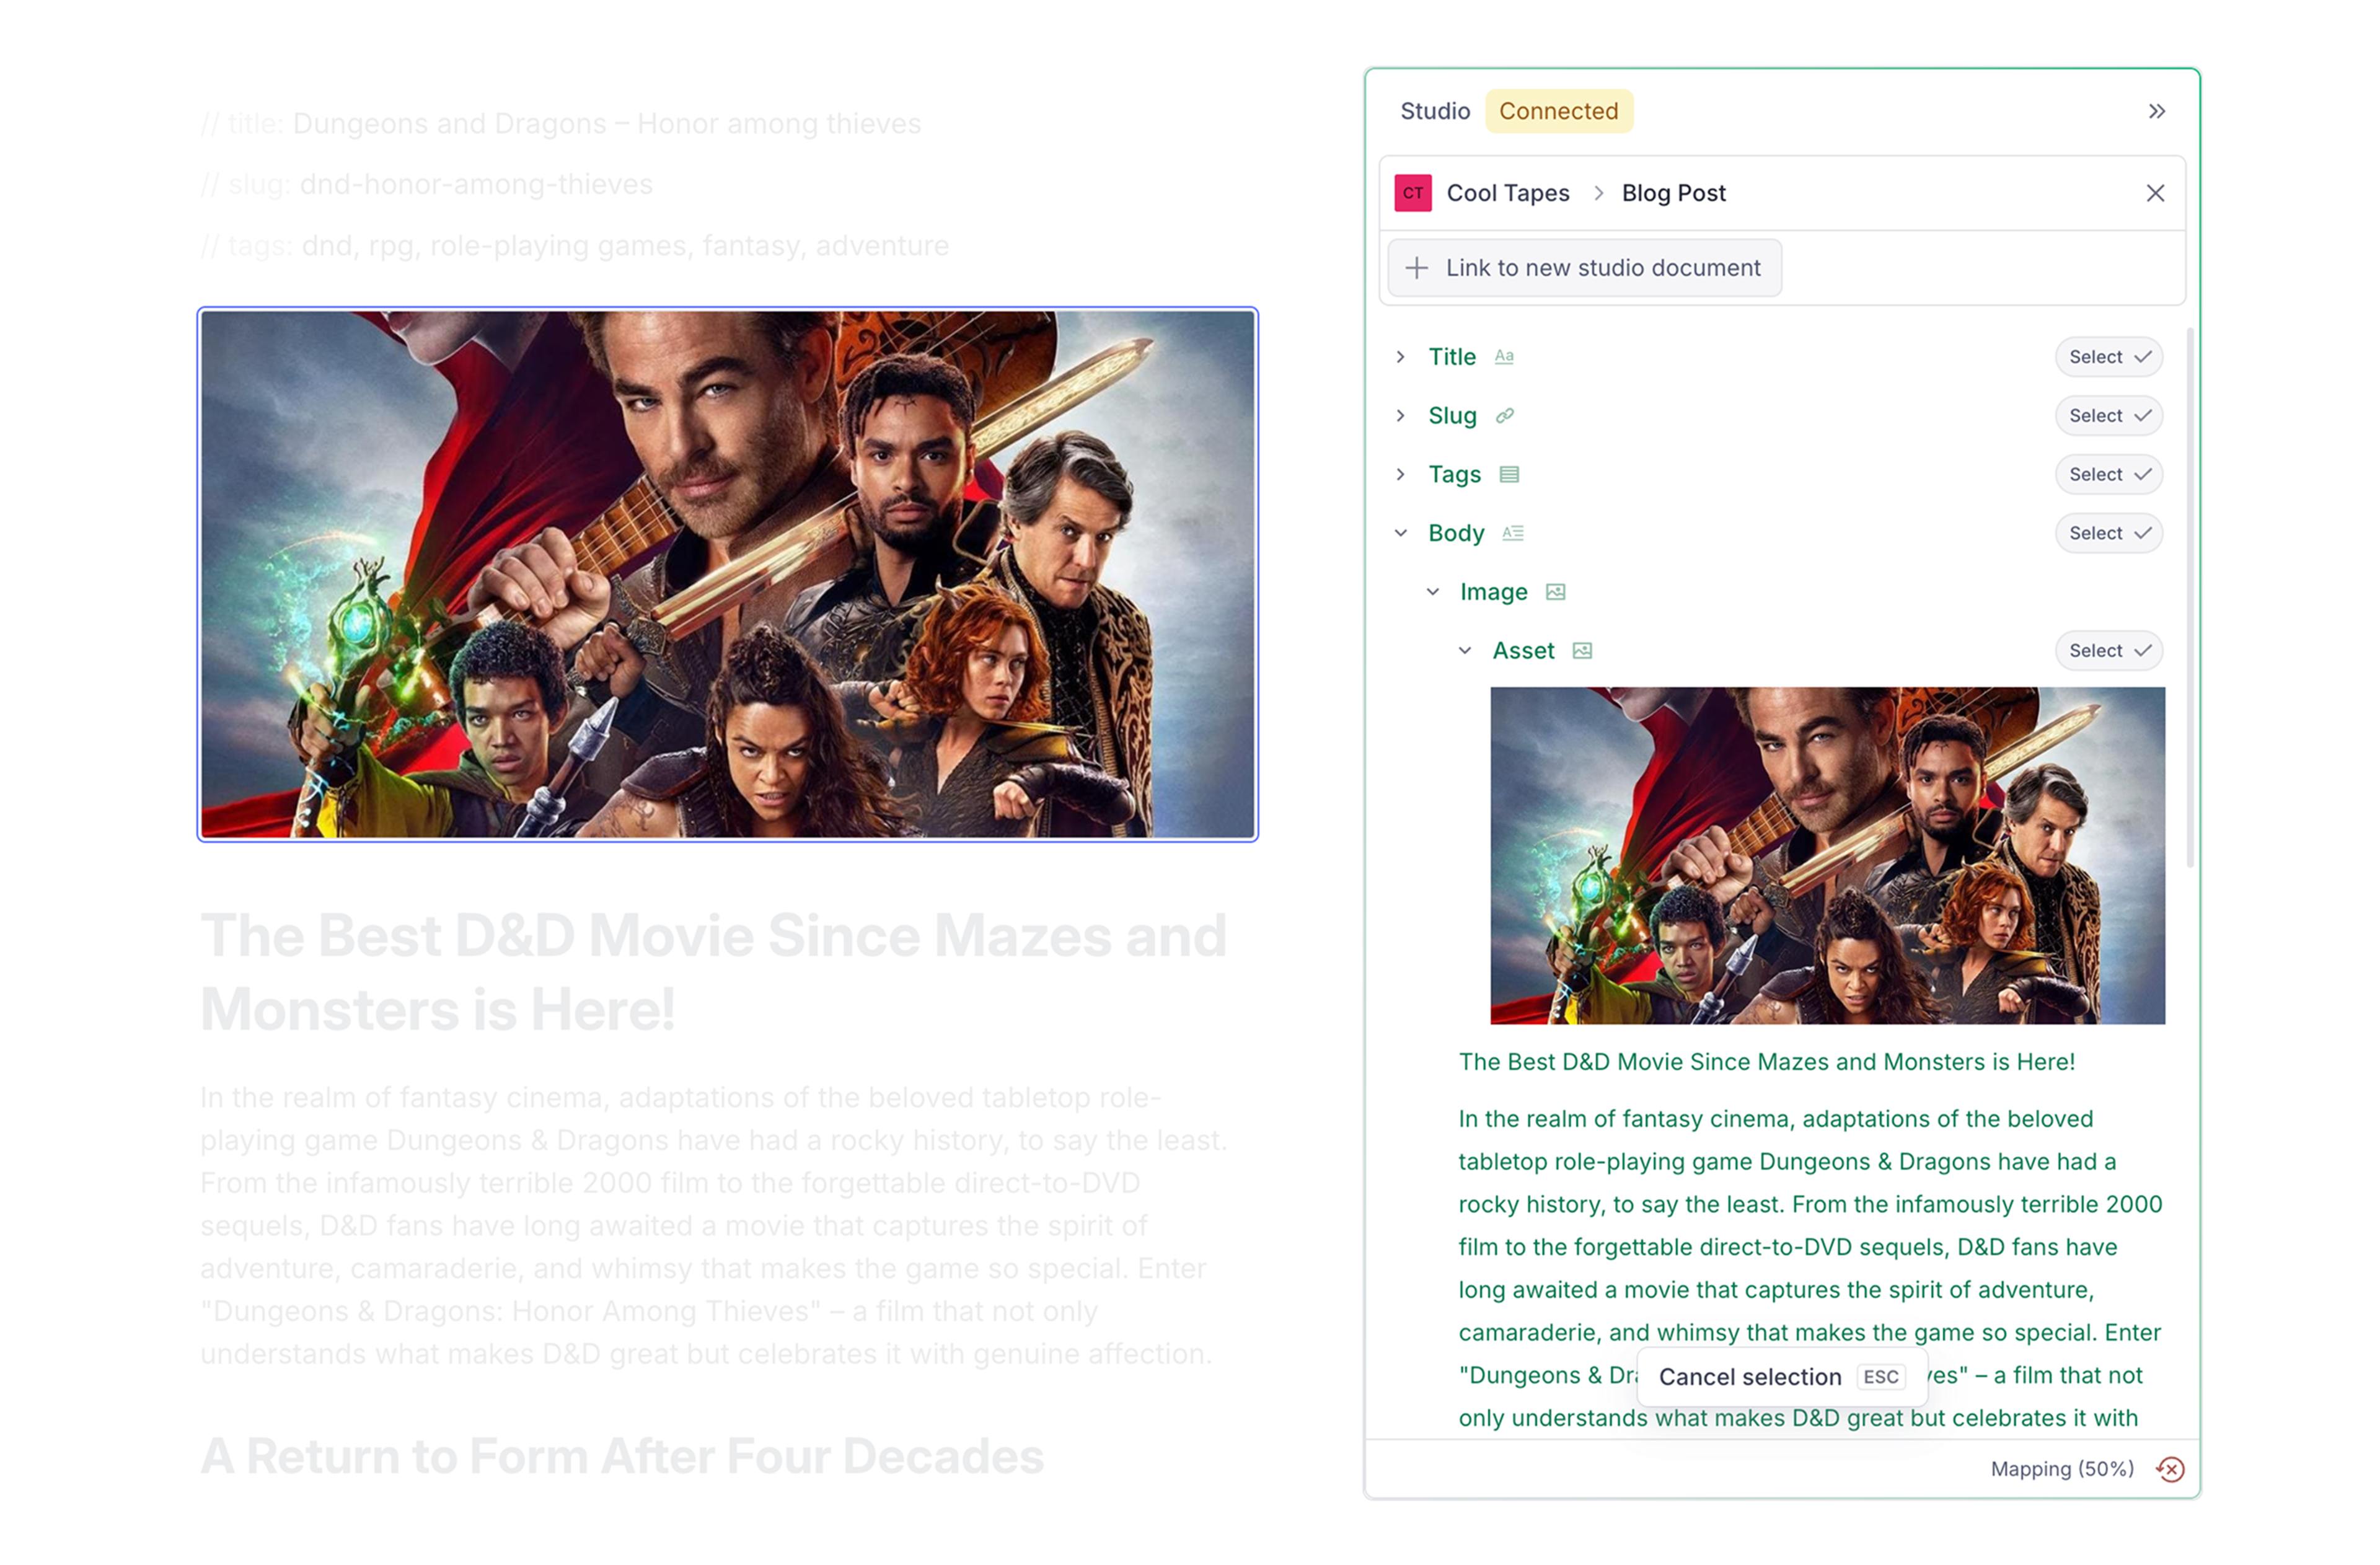
- To map a content block, like a paragraph or an image, to a specific field, click on the item to reveal its context menu, and find the option to Map to field... as shown below.
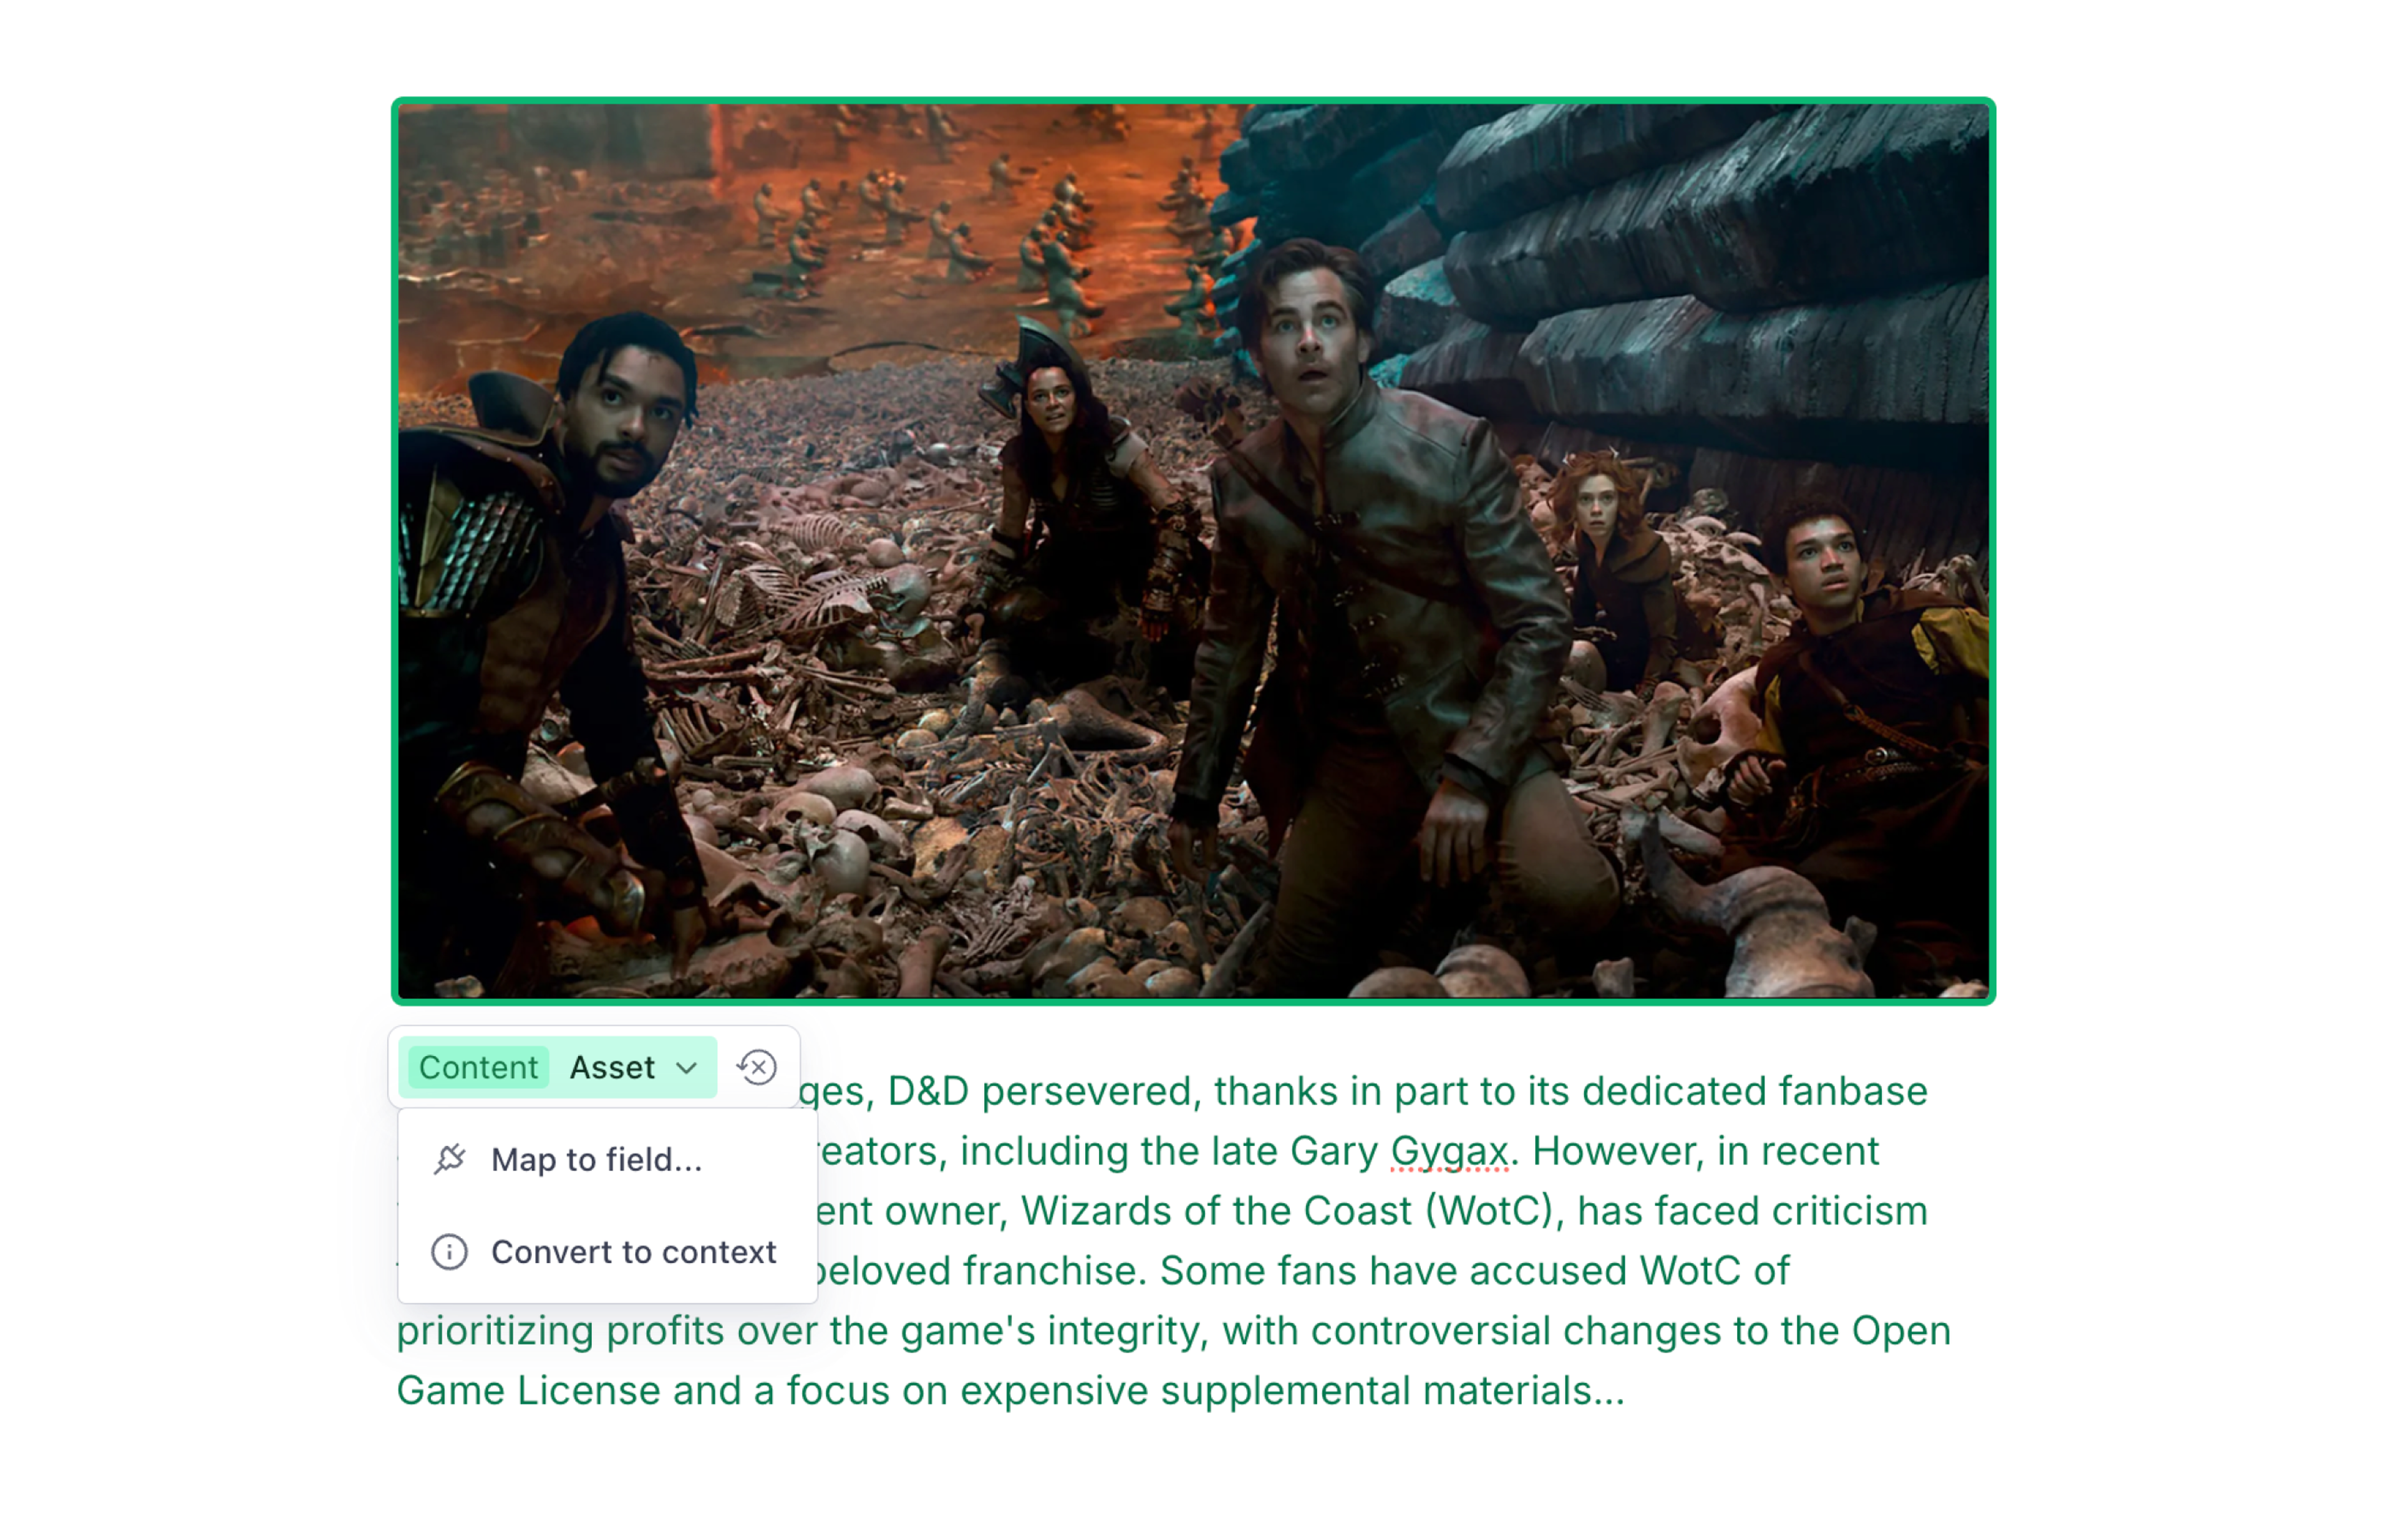
- Selecting Map to field... will cause the interface to direct focus to the link panel, where you can select an appropriate field to map your selected content to. In the example below, we mapped the first image in the document to the Cover Image > Asset field. User-defined mappings are shown in yellow, instead of green for auto-mapped or gray for context.
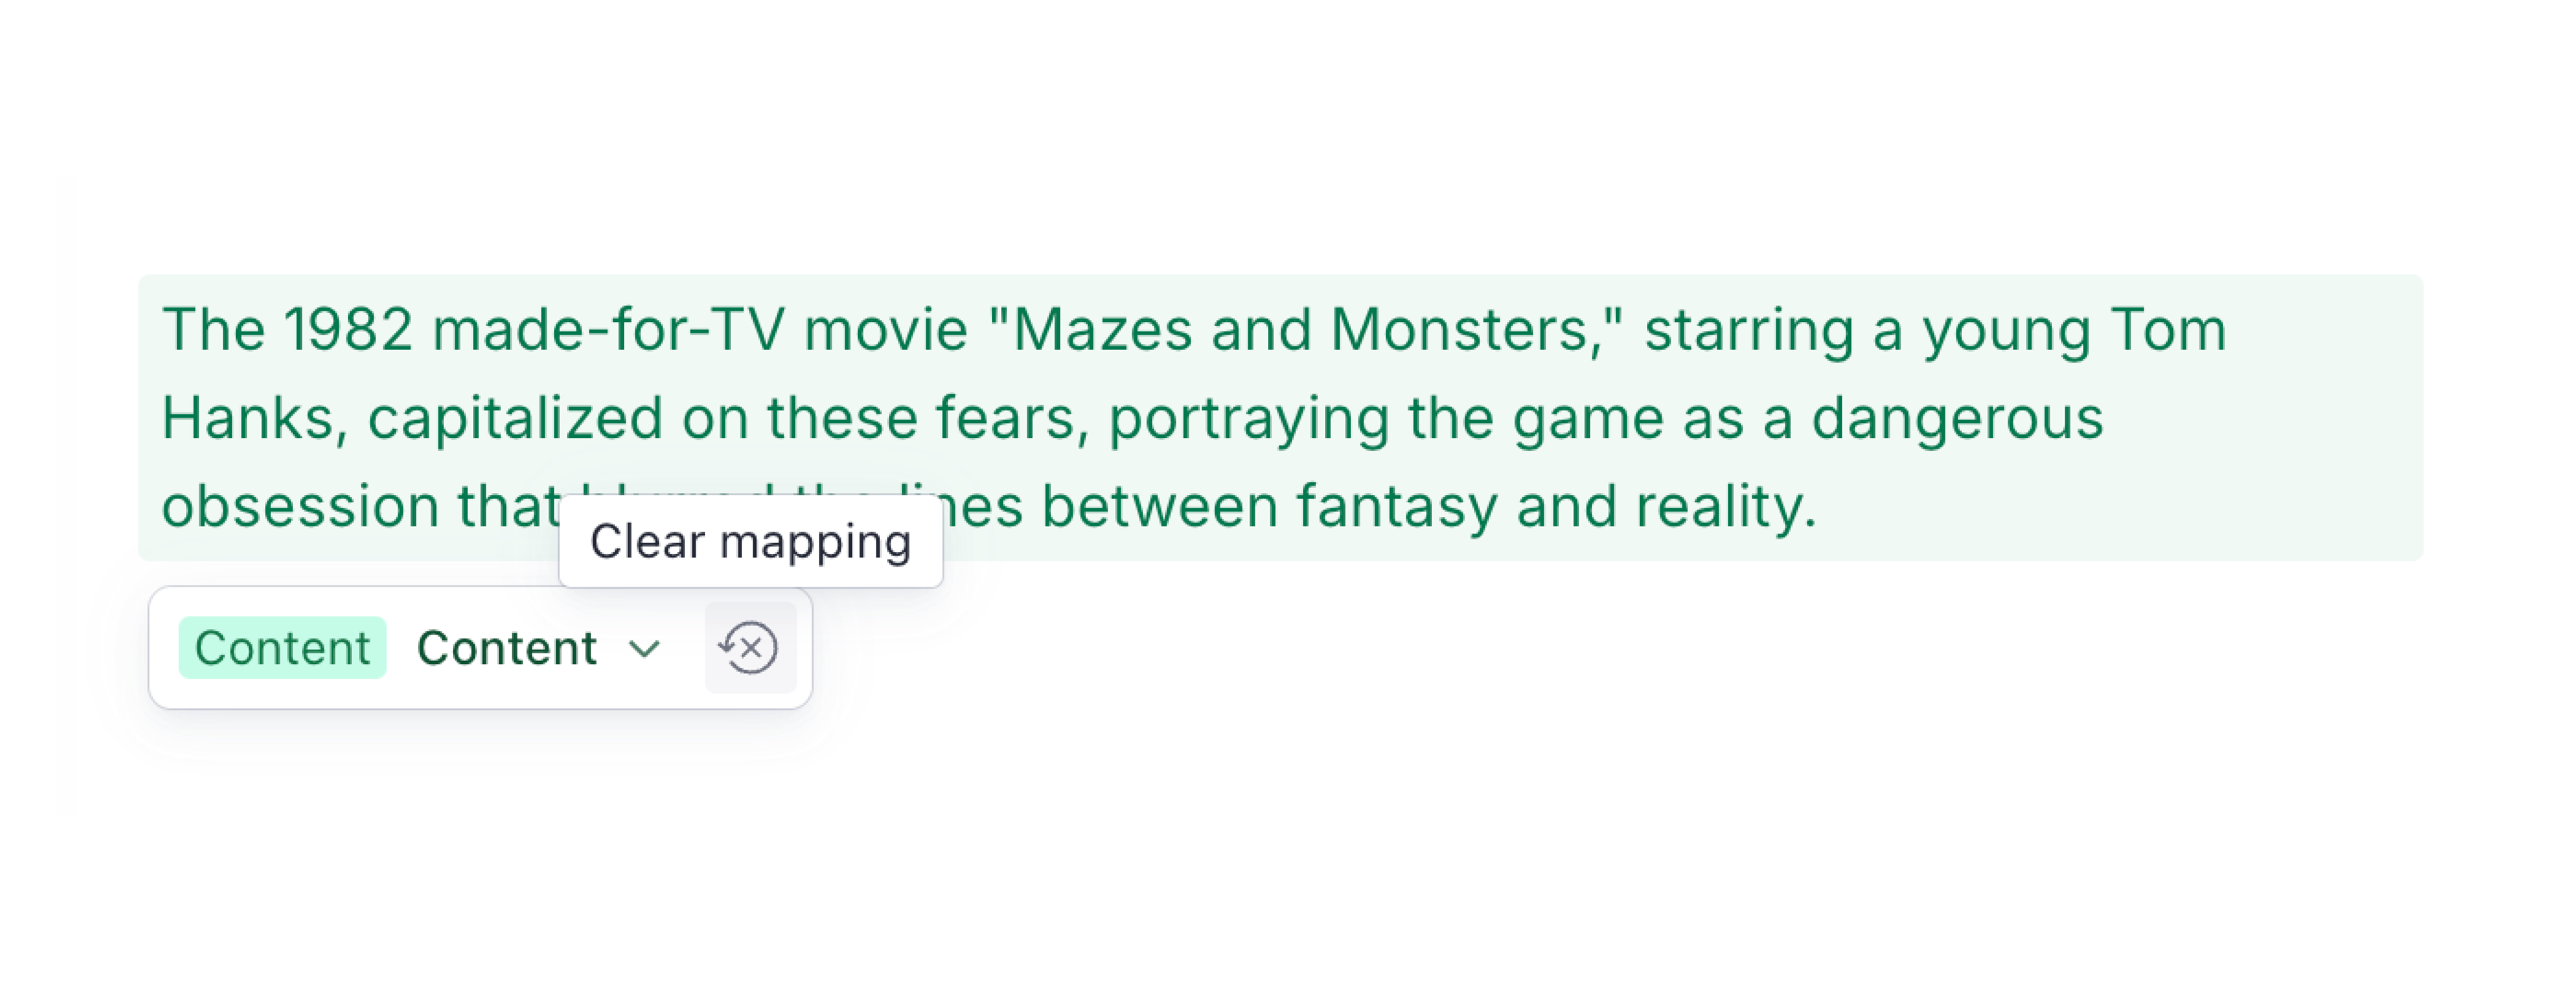
- Similarly, if any content is mapped incorrectly, you can unmap it by clicking the Clear mapping button. Note that unless you explicitly reassign it as context, the mapping agent will try to re-map on its next pass until everything has been neatly categorized with a color.
- For more granular control, you can select specific sentences or phrases and map them individually to Studio fields.
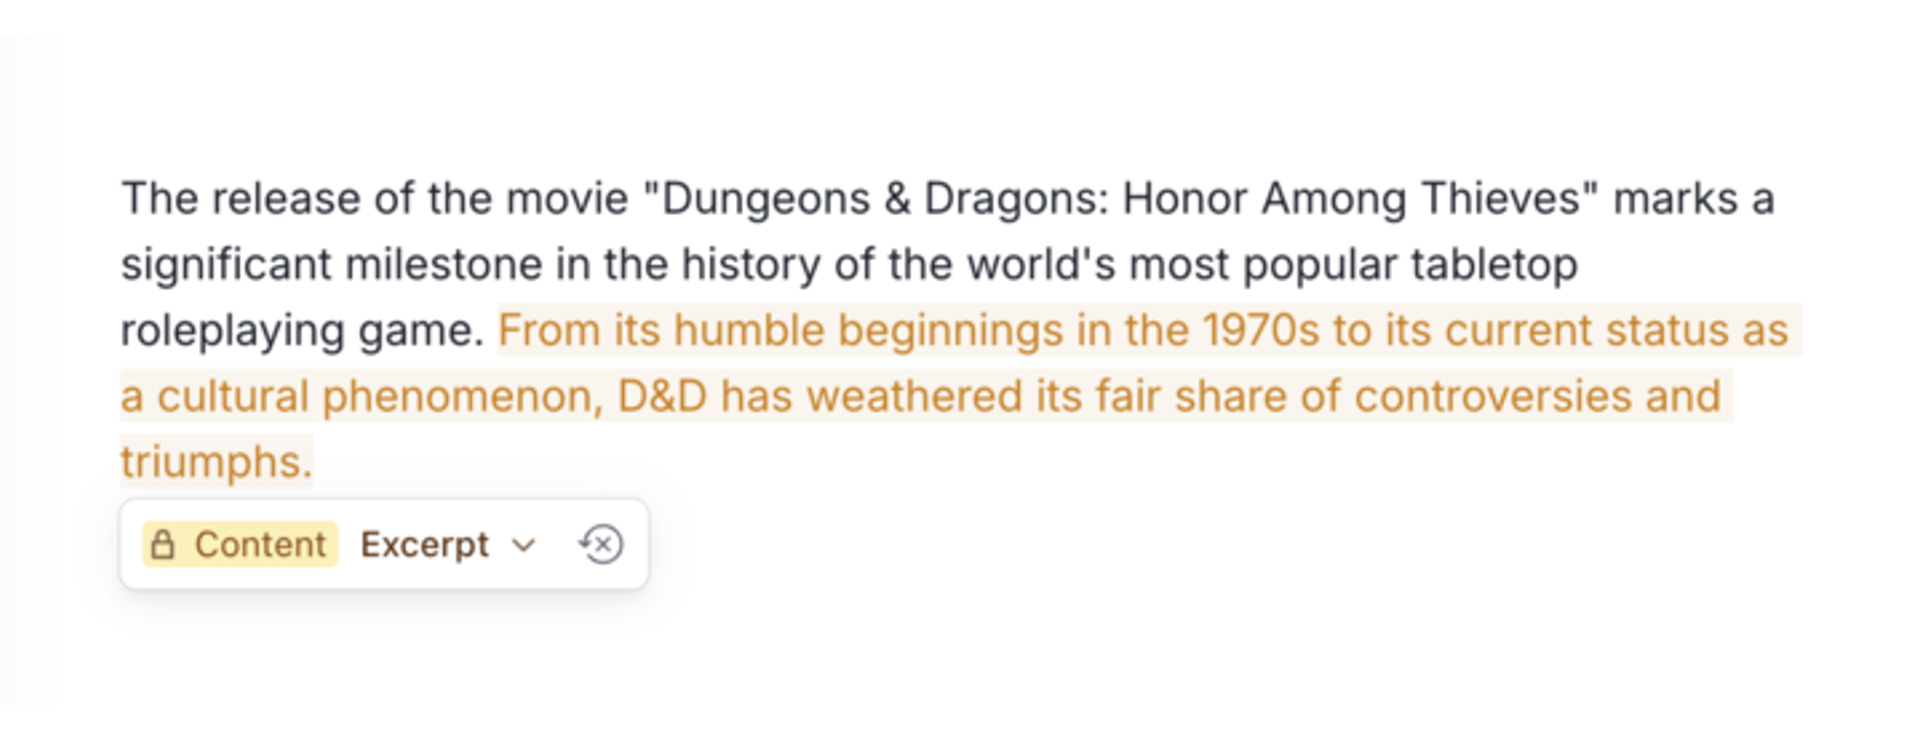
- As also demonstrated in the previous screenshot, leaving some contextual hints for the mapping agent can be quite effective. You can read more about this in the section on content mapping tips and tricks.
With these tools, you can control exactly how your content in Canvas will be translated into structured data in Sanity Studio. If you haven't already, this would be a good time to link your work to a new document in your studio.
Link your work to a new document in your studio
Protip
In this article, we’ve chosen to complete the mapping work first, and then create the studio document for narrative clarity. However, you’re free to do it the other way around—choose the workflow that suits you best!
Once you're happy with your mappings, find the button labeled + New studio document near the top of the studio panel. If you have any scheduled content releases, you will also have the option to choose a specific release to link your document to.

Clicking it should result in a visual confirmation of success, and the button label changing to Linked document. Click it to open the connected studio with your new document selected.
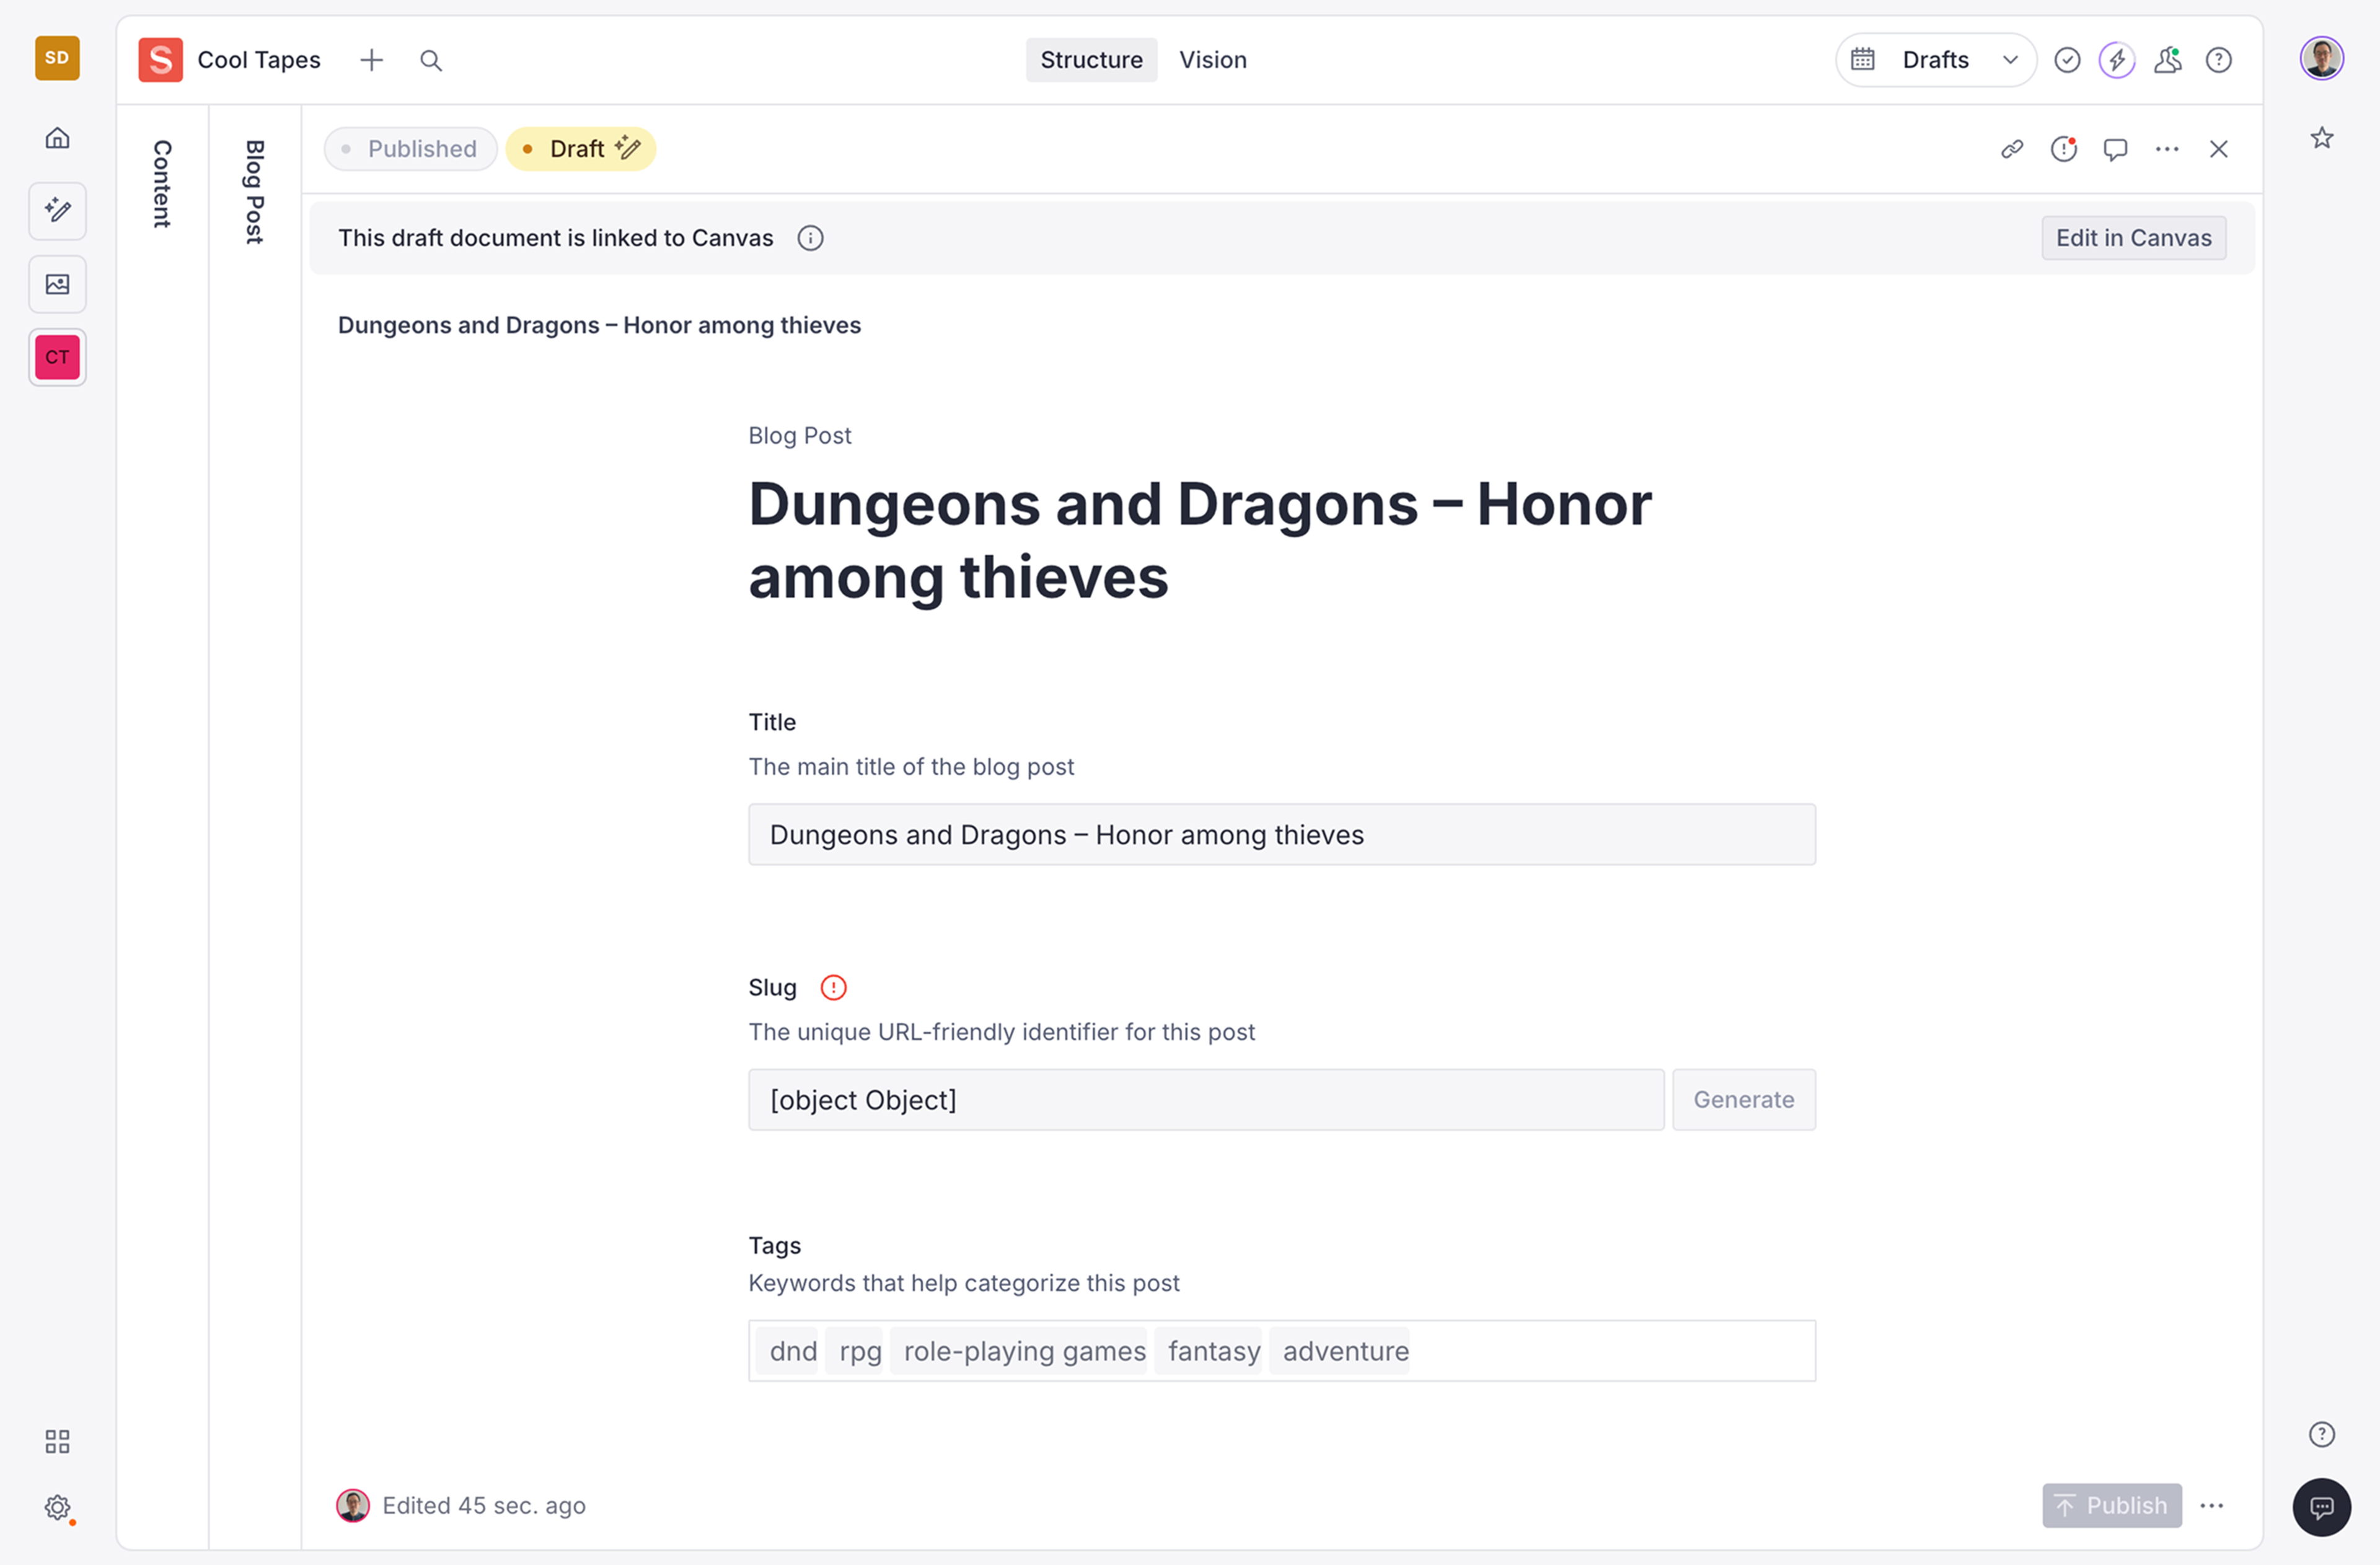
You'll notice that your new document in the studio is in a read-only state while linked to its counterpart in Canvas.
Any further changes you make in Canvas will be synced with the studio document automatically, so you can continue refining and expanding your content without worrying about manually transferring anything.
Unlink your document from Canvas to edit it in Sanity Studio
As mentioned, your document will appear as read-only in your studio while linked to Canvas. You can think of this as the Canvas document being the source of truth for both versions while the link persists. In order to edit your document in Sanity Studio, you need to unlink it from its source in Canvas.
When the time comes, locate the Unlink button in the contextual menu next to your Publish button to sever the connection and edit your document in the studio.
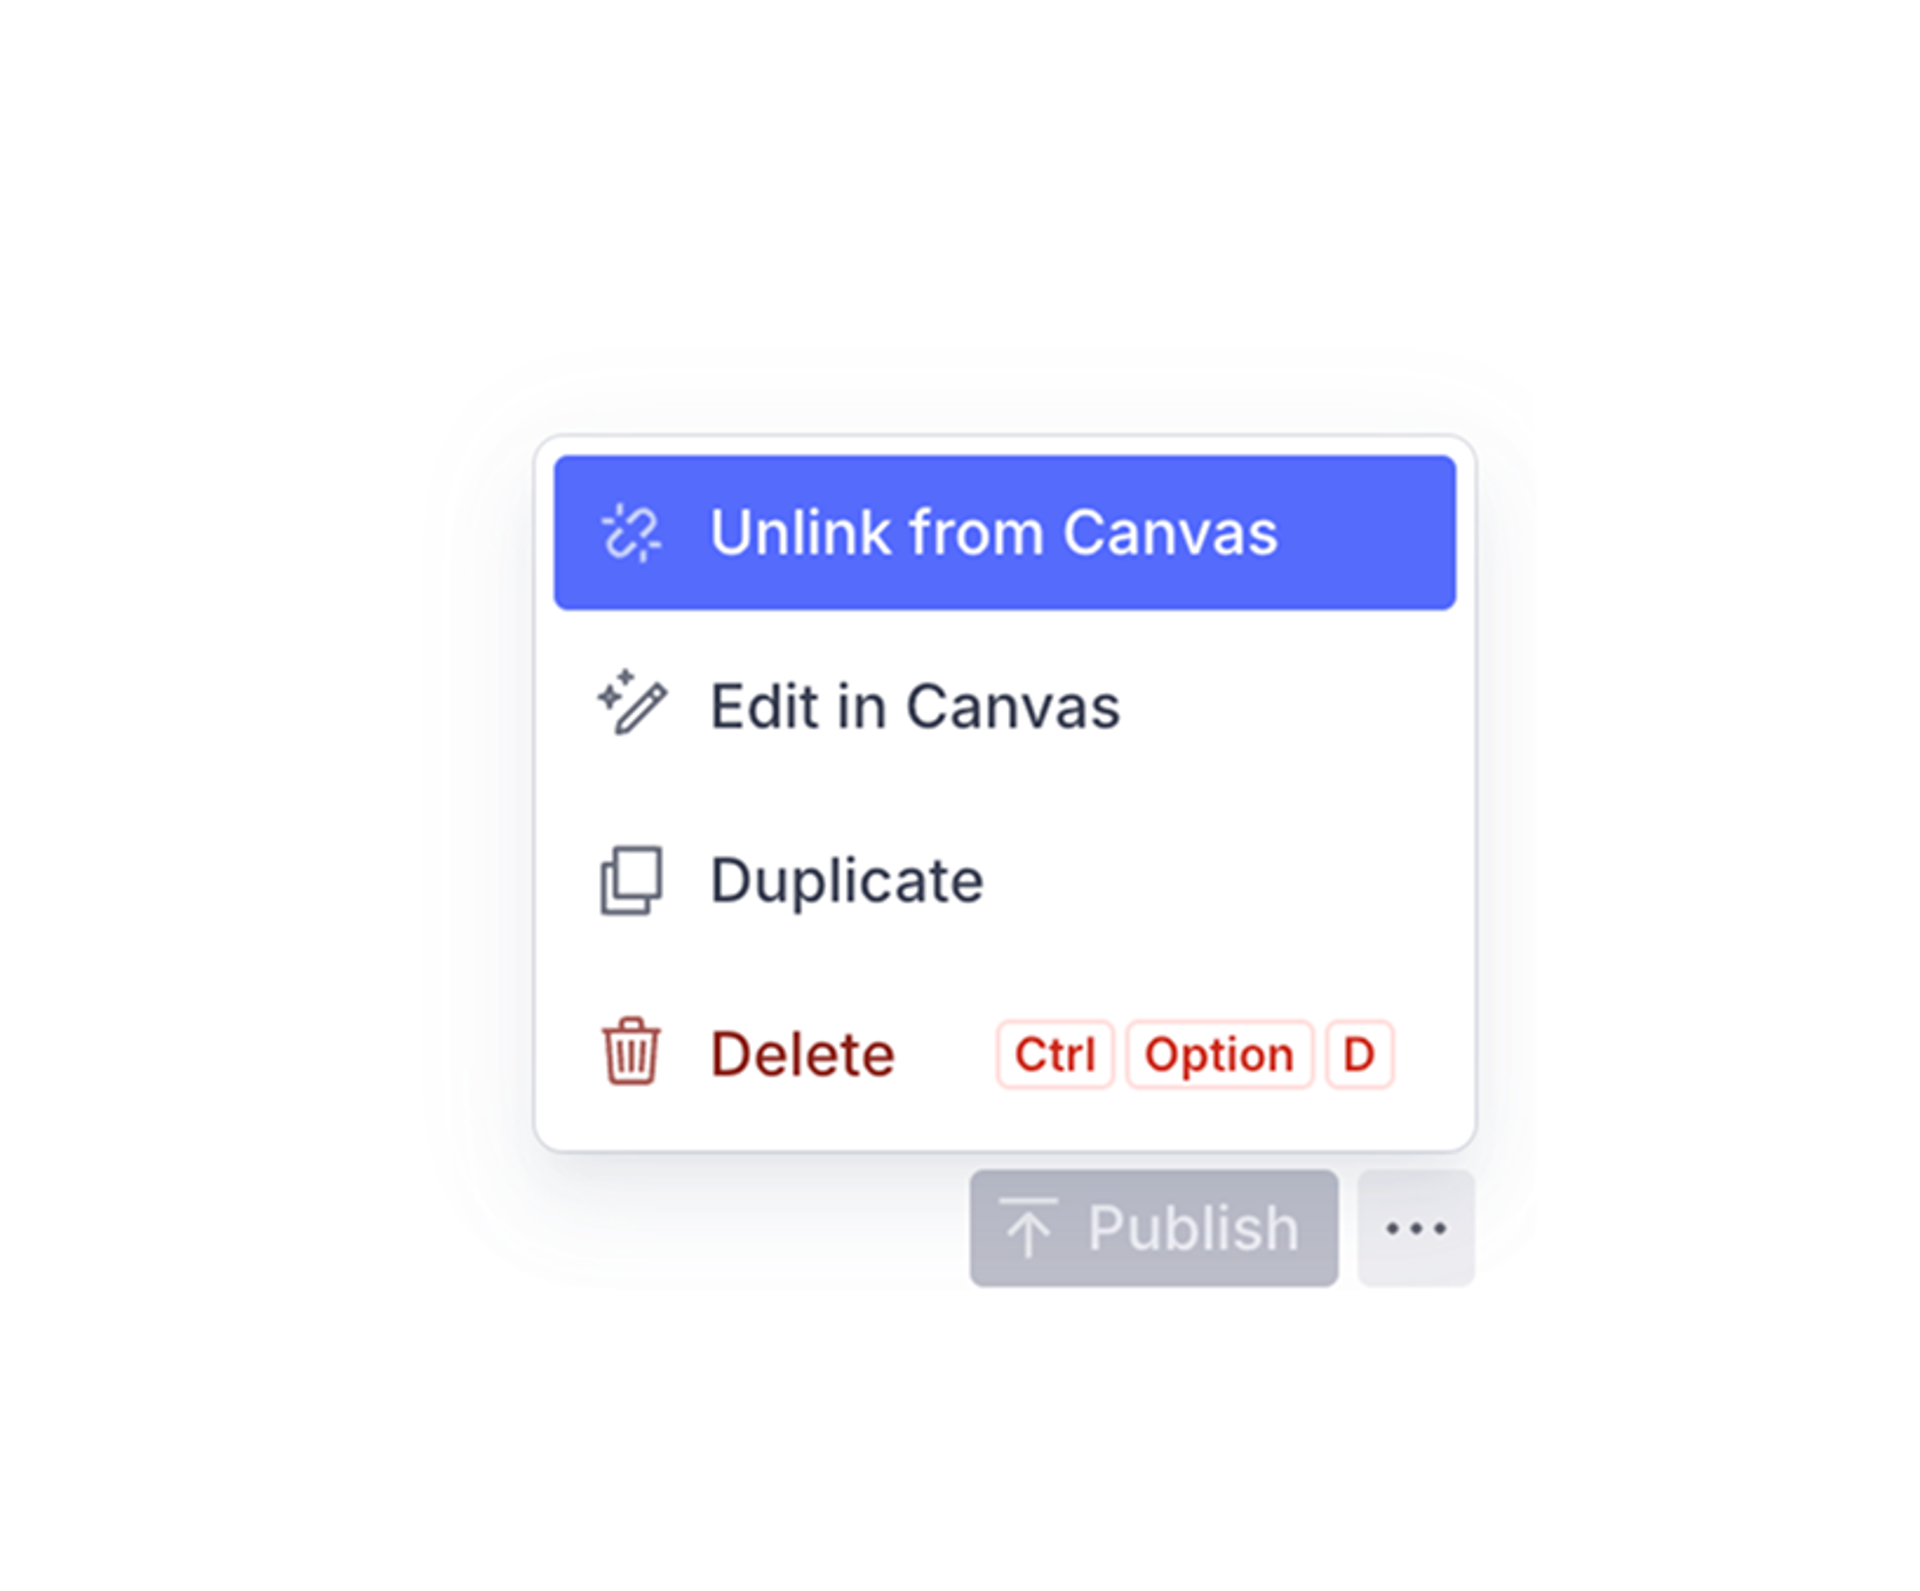
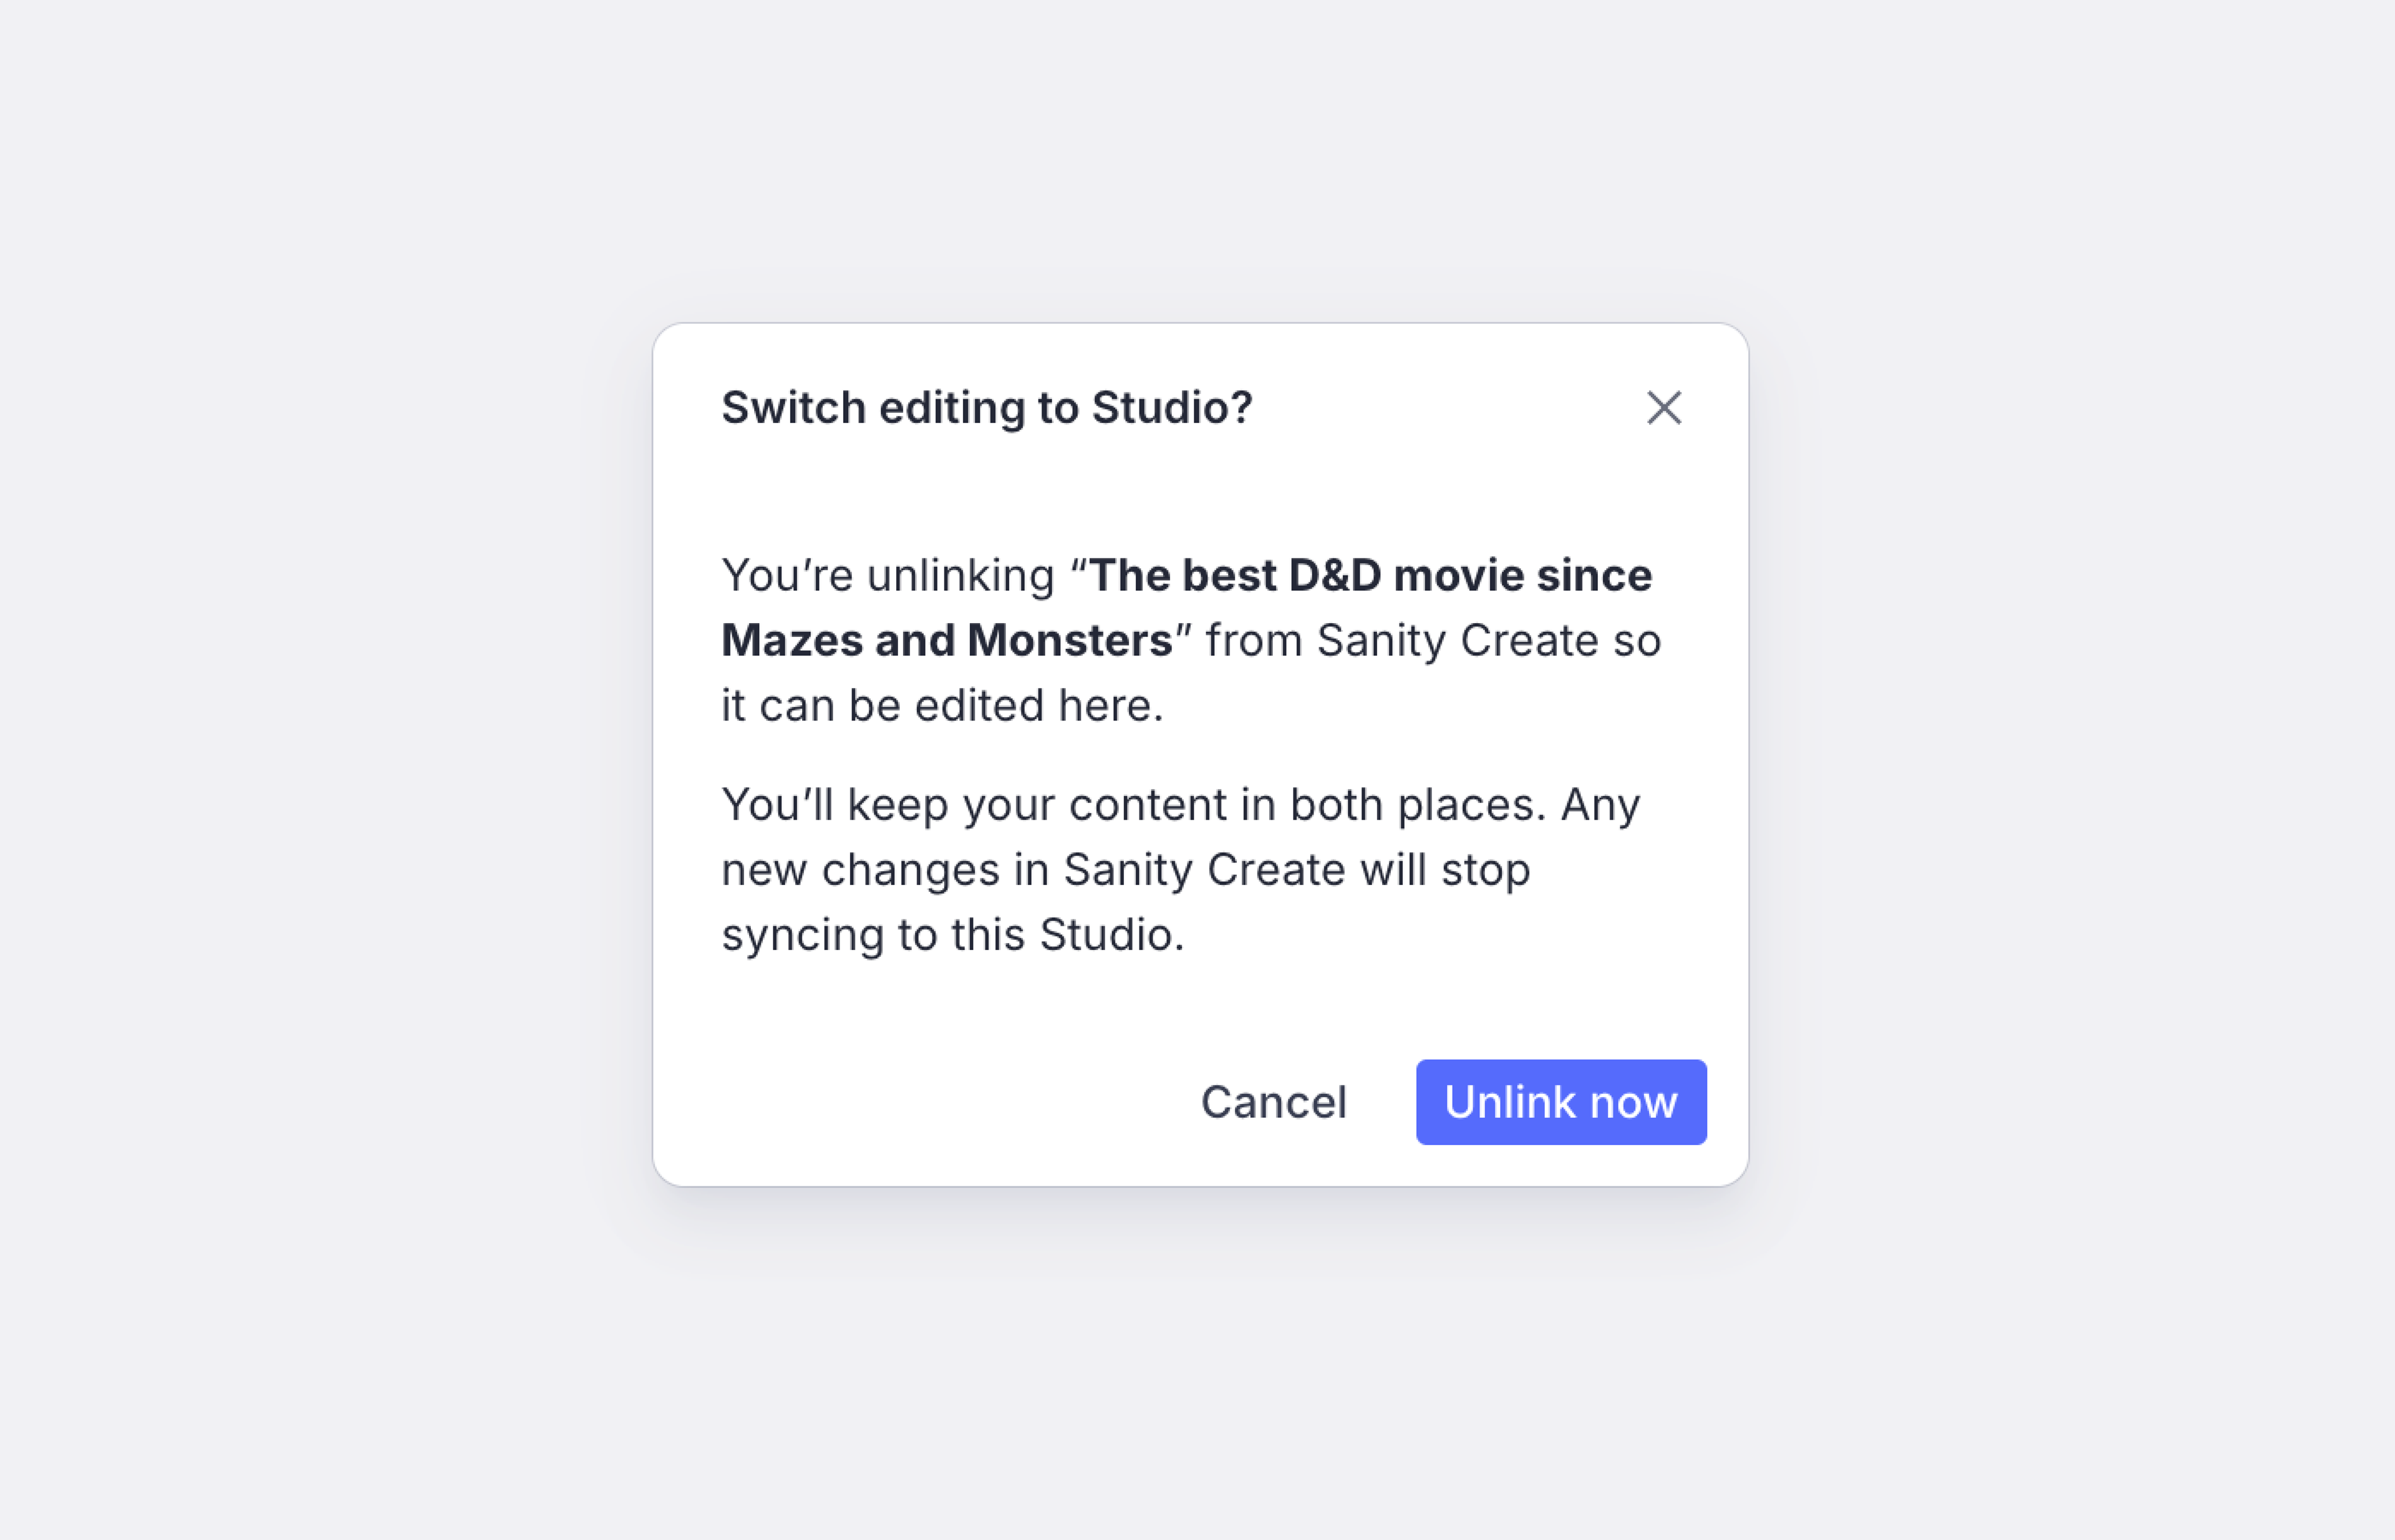
Clicking Unlink will cause a dialog to appear, informing you of the consequences. Confirm to dismiss it and unlock the document for editing in the studio.
Protip
Unlinking does not delete anything! You can keep on editing your document in Sanity Canvas, though the changes will no longer sync to the studio version. They are no longer connected.
Content mapping tips and tricks
- Procedural discovery! The bot works procedurally on one bit of content at a time, but it can and will make several passes, so it might re-visit and re-evaluate mappings as it moves through your content. You can use this to your advantage by adding content hints above content blocks to quickly make the bot reconsider its choices.
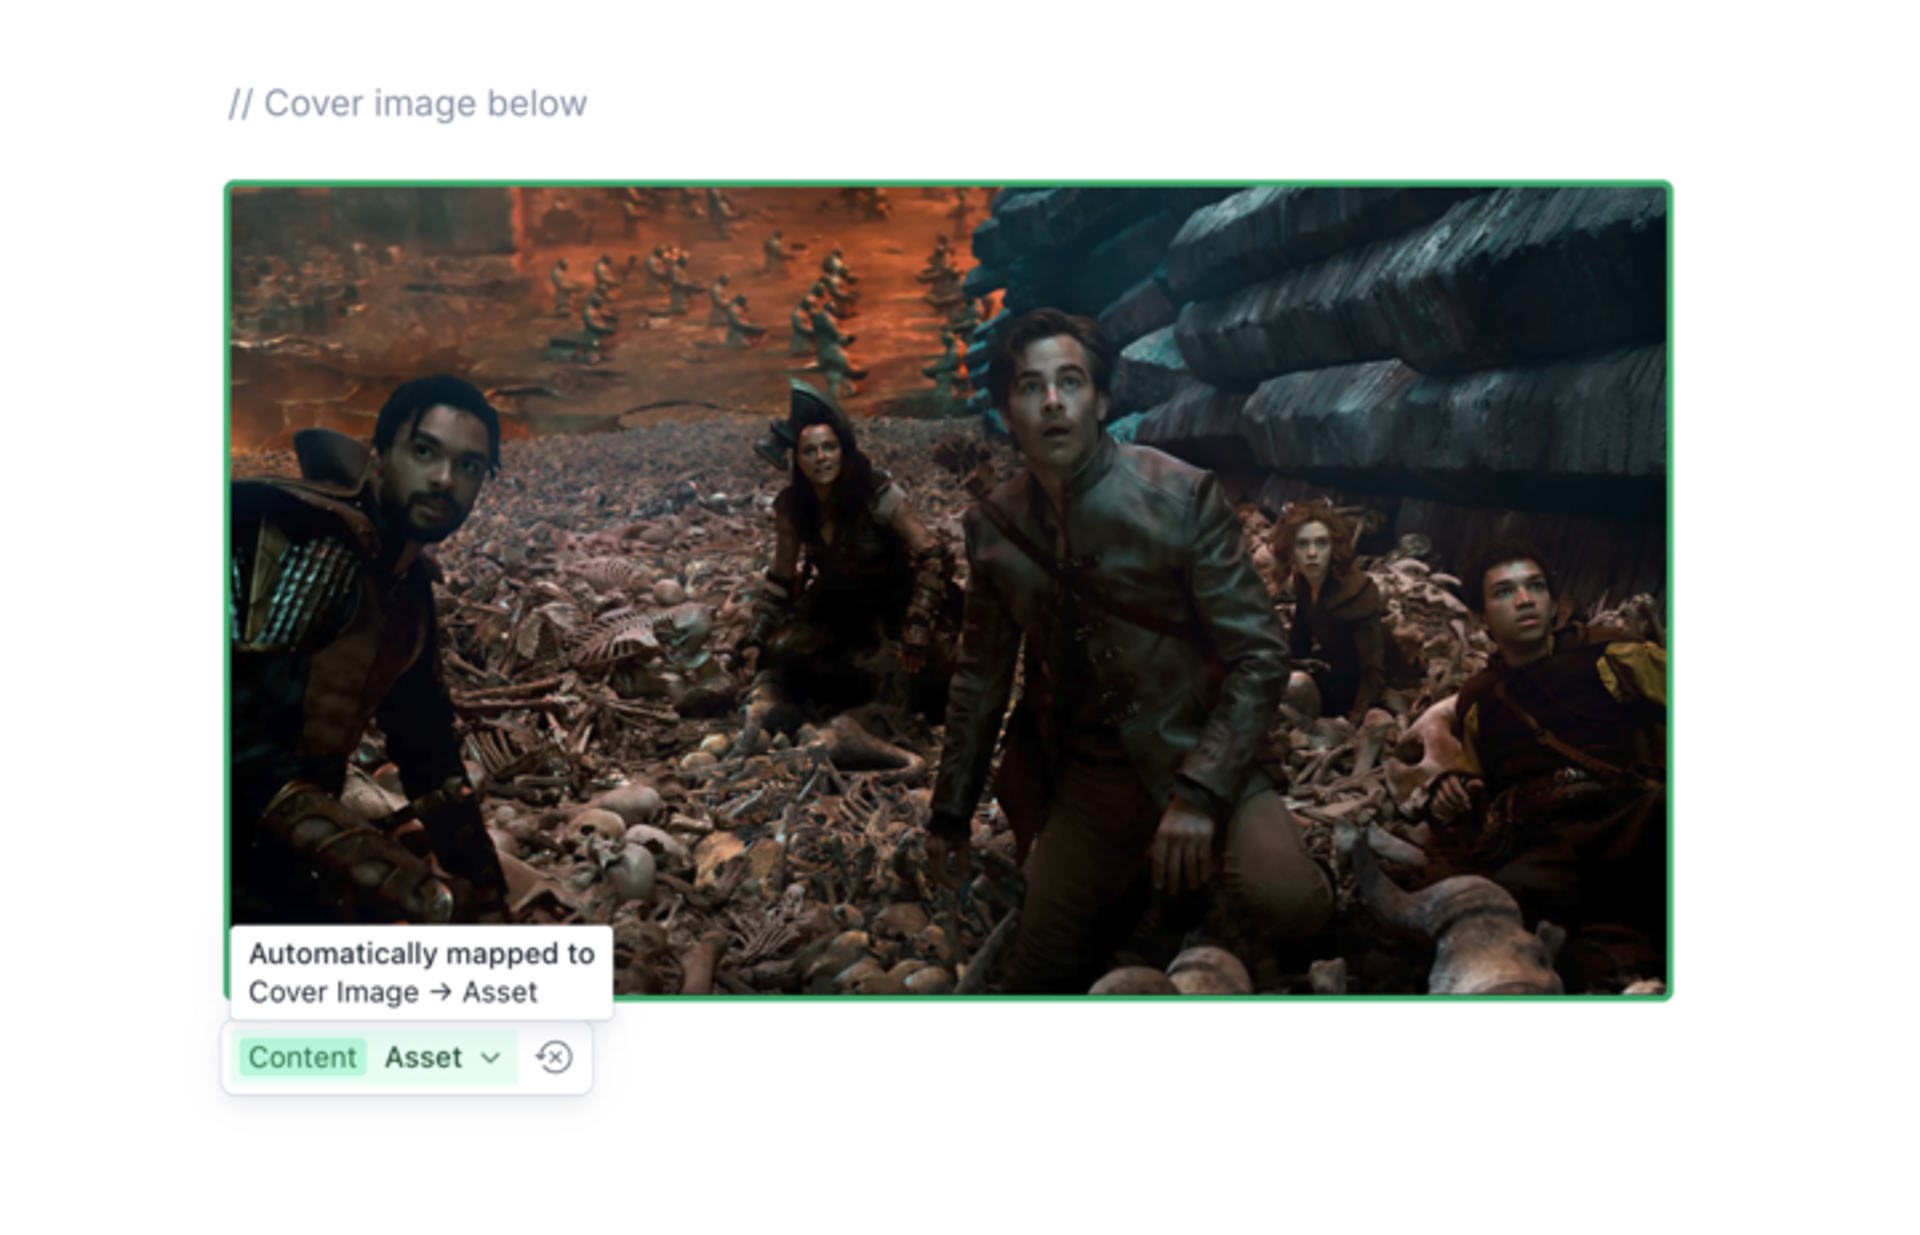
In the example above, the image was originally judged to be part of the blog post body field, but remapped to the coverImage field after some gentle nudging.
- Provide some context! Mark words, lines, or whole blocks as context to make the mapping agent treat your notes as notes that should not be mapped to any field. The bot will also read you context for clues on how to treat content, so feel free to be conversational.
// slug: my-cool-slugor[description below]might do wonders.
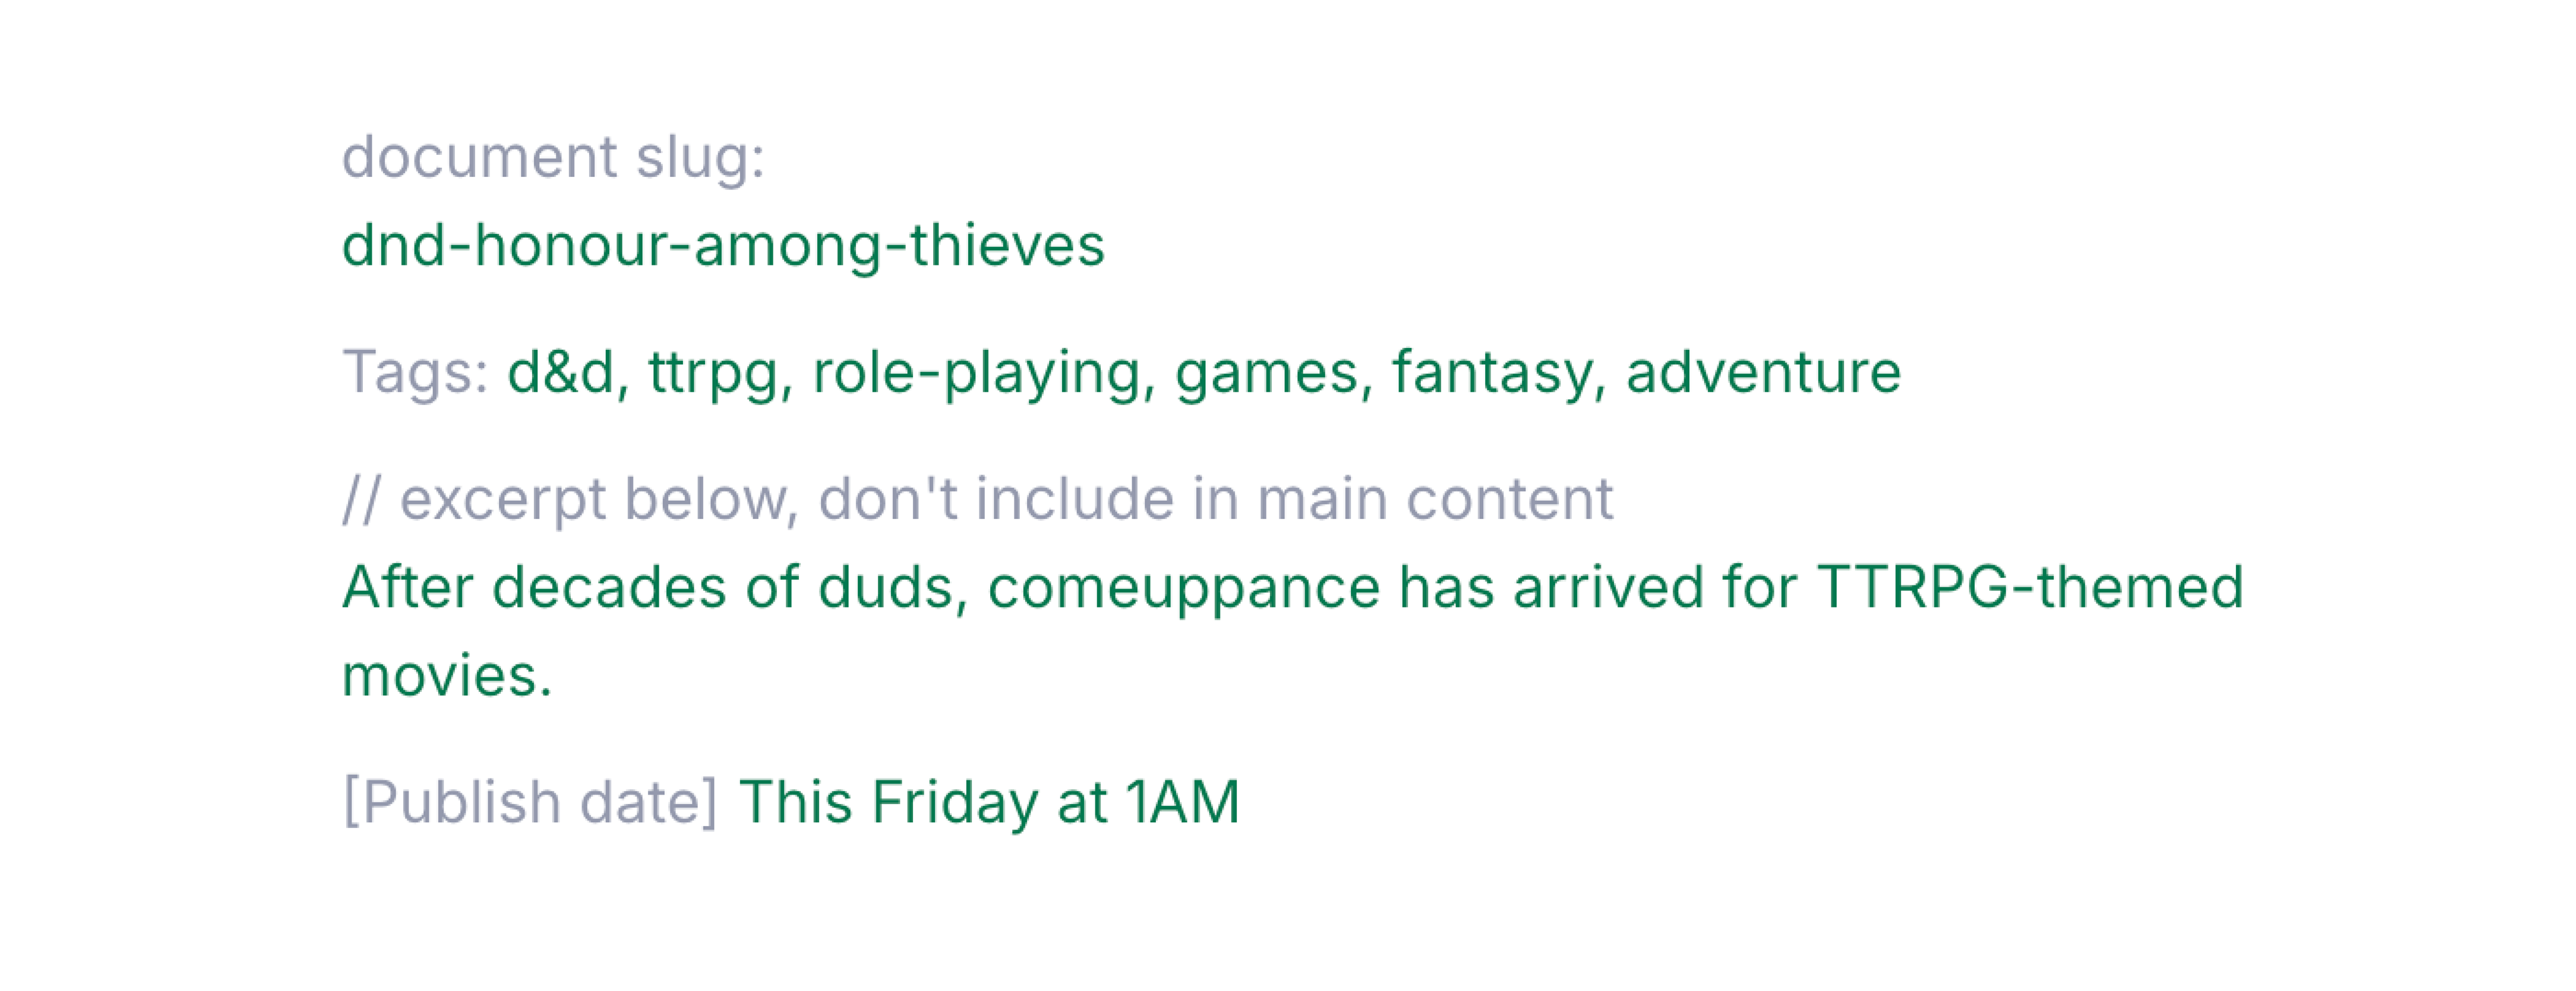
Troubleshooting
Can't find your project?
Make sure your studio has been configured properly to allow Canvas to connect. This involves configuring and deploying the relevant studio.
Can't see your content type, or content type is missing some fields
Make sure the relevant types or fields aren't configured to be excluded from content mapping. This, too, involves configuring and deploying the studio in question.
The bot is making too many mistakes when mapping content
Try leaving some contextual clues to help the bot figure out what's what. There are no hard rules when it comes to what the bot will and will not pick up on, but as a general guideline: If it would be hard for a human co-author to catch your context notes, the bot will probably not do great either. Some examples:
- Partial mapping simple values with a simple inline instruction like
slug: my-cool-slug - Using headings as mapping clues for blocks
- Leave a note in plain text.
Note: Use this part for description - ... and if all else fails, manually adjust the mapping to get it just right
I can't seem to map the title of my Canvas document to any field
Mapping the title is currently not possible, due to vague unspecified technical limitations. We're working on it!
Was this page helpful?