Fetch Sanity Content
Sanity content is typically queried with GROQ queries from a configured Sanity Client. Fortunately, one has already been created for you.
src/sanity/lib/client.ts to confirm it exists in your project.Sanity Client is built to run in any JavaScript run time and in any framework. It is also compatible with Next.js caching features, React Server Components, and the App Router.
It also provides ways to interact with Sanity projects and even write content back to the Content Lake with mutations. You'll use some of these features in later lessons.
It's time to put everything we've set up to work. In this lesson, you'll create a route to serve as a Post index page and a dynamic route to display an individual post.
For now, you'll focus on data fetching at the top of each route. React Server Components allow you to perform fetches from inside individual components. Future lessons may address where this is beneficial. For now, our queries are simple enough – and GROQ is expressive enough – to get everything we need at the top of the tree.
The most significant change we'll make first is creating a separate "Route Group" for the entire application front end. This route group will separate the front end layout code from the Studio without affecting the URL. It is also useful when integrating Visual Editing and displaying the front end inside the Studio.
(frontend) directory and duplicate layout.tsx into itmkdir -p "src/app/(frontend)" && cp "src/app/layout.tsx" "src/app/(frontend)/"You should now have two layout.tsx files inside the app folder at these locations:
src└── app ├── // all other files ├── layout.tsx └── (frontend) └── layout.tsxThe (frontend)/layout.tsx file has duplicated html and body tags, but you'll update the file those later in the lesson.
layout.tsx file to remove globals.css Later in this track, the home page will become fully featured. For now, it just needs a link to the posts index.
page.tsx into the (frontend) folderimport Link from "next/link";
export default async function Page() { return ( <section className="container mx-auto grid grid-cols-1 gap-6 p-12"> <h1 className="text-4xl font-bold">Home</h1> <hr /> <Link href="/posts">Posts index →</Link> </section> );}You should now have a basic home page like this:
This page will list up to 12 of the latest post documents. Inside this route:
- The configured Sanity Client is imported as
client - The GROQ query
POSTS_QUERYis used byclient.fetch - Thanks to automatic type inference, the response will be typed
POSTS_QUERYResult
post type documentsimport Link from "next/link";import { client } from "@/sanity/lib/client";import { POSTS_QUERY } from "@/sanity/lib/queries";
const options = { next: { revalidate: 60 } };
export default async function Page() { const posts = await client.fetch(POSTS_QUERY, {}, options);
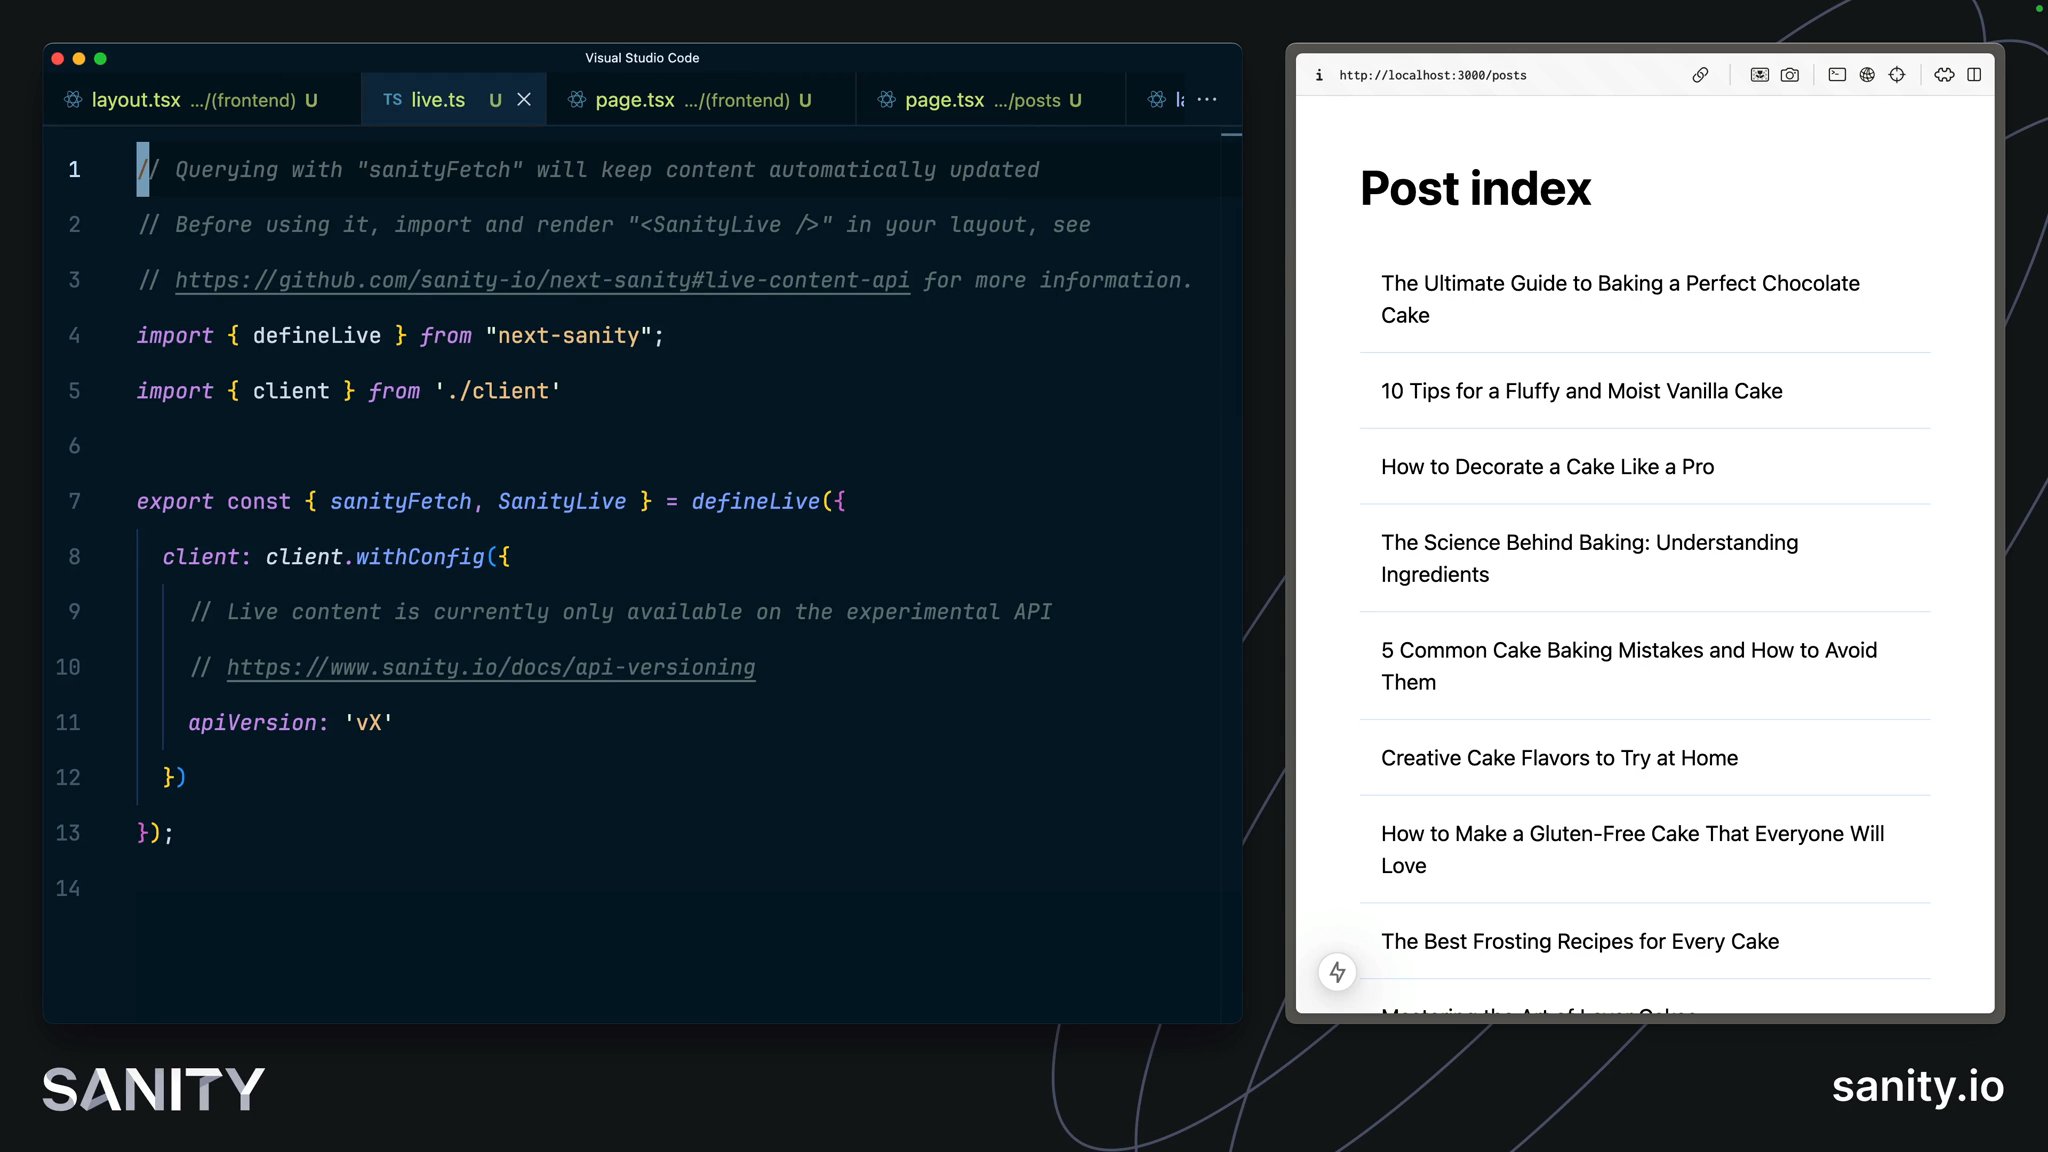
return ( <main className="container mx-auto grid grid-cols-1 gap-6 p-12"> <h1 className="text-4xl font-bold">Post index</h1> <ul className="grid grid-cols-1 divide-y divide-blue-100"> {posts.map((post) => ( <li key={post._id}> <Link className="block p-4 hover:text-blue-500" href={`/posts/${post?.slug?.current}`} > {post?.title} </Link> </li> ))} </ul> <hr /> <Link href="/">← Return home</Link> </main> );}await data within the component. Read more on the Next.js documentation.You should now have a post index page at http://localhost:3000/posts like this:
The options variable passed into the Sanity Client is a light configuration for Next.js caching. You should know that with these settings, the cache has been configured to only update pages at most every 60 seconds.
Finding the right balance between fresh and stale content is a complex topic, and there are ways to mitigate the concerns of your content creators and end users to find a solution for everyone.
If you'd like to learn more on the topic and continue to configure caching manually, see: Controlling cached content in Next.js.
What's better than manually configuring the cache? Never doing it.
The next-sanity package contains helper functions to perform fetches that take advantage of the Live Content API. So every fetch for data is automatically cached and revalidated using the built-in tag-based revalidation.
layout.tsx file to include SanityLiveimport { SanityLive } from '@/sanity/lib/live'
export default function FrontendLayout({ children,}: Readonly<{ children: React.ReactNode}>) { return ( <> {children} <SanityLive /> </> )}client to sanityFetchimport Link from "next/link";import { sanityFetch } from "@/sanity/lib/live";import { POSTS_QUERY } from "@/sanity/lib/queries";
export default async function Page() { const { data: posts } = await sanityFetch({ query: POSTS_QUERY });
return ( <main className="container mx-auto grid grid-cols-1 gap-6 p-12"> <h1 className="text-4xl font-bold">Post index</h1> <ul className="grid grid-cols-1 divide-y divide-blue-100"> {posts.map((post) => ( <li key={post._id}> <Link className="block p-4 hover:text-blue-500" href={`/posts/${post?.slug?.current}`} > {post?.title} </Link> </li> ))} </ul> <hr /> <Link href="/">← Return home</Link> </main> );}Now when you publish changes in Sanity Studio, you should see those updates take place live. No more caching. No more hammering the refresh button.
The GROQ query included a filter to ensure only documents with a slug.current was defined – but the TypeGen generated a type where slug.current could be null.
This is a known limitation of TypeGen while it is in beta.
The GROQ query POST_QUERY used a variable $slug to match a route with a post in the dataset. For this, you can use a "Dynamic Route," where a segment in the URL is made available to the server component for the route as a prop.
So, for example, because you're creating a route at:
src/app/(frontend)/posts/[slug]/page.tsxIf you visited the URL:
http://localhost:3000/posts/hello-worldThe route would have this params object in its props:
{ "slug": "hello-world" }Which can then be passed into Sanity Client to match the value of slug to a value in a document.
import { sanityFetch } from "@/sanity/lib/live";import { POST_QUERY } from "@/sanity/lib/queries";import { notFound } from "next/navigation";import Link from "next/link";
export default async function Page({ params,}: { params: Promise<{ slug: string }>;}) { const { data: post } = await sanityFetch({ query: POST_QUERY, params: await params, });
if (!post) { notFound(); }
return ( <main className="container mx-auto grid grid-cols-1 gap-6 p-12"> <h1 className="text-4xl font-bold text-balance">{post?.title}</h1> <hr /> <Link href="/posts">← Return to index</Link> </main> );}You should now be able to click any of the links on the posts index page and see the title of a blog post with a link back to the index:
You now have a basic – but functional – web application. It's currently trapped in your local development environment. And while it isn't much, it's an excellent habit to deploy early and often so you can get into a habit of continuous improvement.
You'll deploy your web application to the world in the following lessons.