Block content and rich text
You may be familiar with "rich text" from almost every text editing interface you've used. Any text with formatting applied — like bold, italic, etc — is considered rich text. Displaying rich text is one of the fundamental building blocks of the web.
"Block content" is a more modern concept in which rich media — like video and images — or complex objects are editable as "blocks" within paragraphs of rich text.
Editing block content and rich text typically takes one of two forms.
Visual editors like Notion or WordPress' "Gutenberg" block editor allow you to author block content and rich text with a focus on visuals and a locked-down interface. Extracting the blocks and text as data is not simple and typically does not follow a published standard.
The alternative is authoring the formatting markup of text inline. Examples include Markdown and MDX, where there are many "standards," authoring the styles inline requires deep knowledge, and rendering the content requires complex parsers.
Sanity created, standardized, and maintains tooling for Portable Text to address these challenges.
Portable Text is a published standard for storing block content and rich text as an array of objects compatible with JSON.
Portable Text is not intended to be human-readable or human-authored. Tooling is provided for both of these purposes.
The Portable Text editor — which you see as the body field inside post-type documents — is maintained by Sanity for the authoring of Portable Text. It has many options as part of the Studio configuration API. Your content creators style rich text and insert blocks, and the Portable Text editor creates the correct data structures.
One of the significant benefits of authoring in this standard is that the data structures it writes are queryable with GROQ. It makes queries like "find every post document with a link" or "extract all the headings from this text to generate a table of contents" possible.
Converting this array of objects into HTML (or any other output) is a matter of mapping over it and serializing each item into the desired output. Fortunately Sanity also provides tooling for this.
Before doing this in your project, let's get some styling in place first.
Tailwind CSS provides a plugin to add "good defaults" to blocks of rich text – and an option to revert to default styles for blocks – with the Typography Plugin. Install it now into the project.
npm install -D @tailwindcss/typographyglobals.css file to use it@import "tailwindcss";@plugin "@tailwindcss/typography";
Sanity provides a PortableText component from @portabletext/react to render Portable Text blocks into React components. It was installed as part of next-sanity. You can now import this component
import { notFound } from "next/navigation";import Image from "next/image";import Link from "next/link";import { PortableText } from "next-sanity";import { sanityFetch } from "@/sanity/lib/live";import { POST_QUERY } from "@/sanity/lib/queries";import { urlFor } from "@/sanity/lib/image";
export default async function Page({ params,}: { params: Promise<{ slug: string }>;}) { const { data: post } = await sanityFetch({ query: POST_QUERY, params: await params, });
if (!post) { notFound(); }
return ( <main className="container mx-auto grid grid-cols-1 gap-6 p-12"> {post?.mainImage ? ( <Image className="w-full aspect-[800/300]" src={urlFor(post.mainImage) .width(800) .height(300) .quality(80) .auto("format") .url()} alt={post?.mainImage?.alt || ""} width="800" height="300" /> ) : null} <h1 className="text-4xl font-bold text-balance">{post?.title}</h1> {post?.body ? ( <div className="prose"> <PortableText value={post.body} /> </div> ) : null} <hr /> <Link href="/posts">← Return to index</Link> </main> );}You should now see the rich text of any published document rendered with sensible default styling. The base configuration of the PortableText component includes rendering headings (h1, h2, etc) and lists (li, ol, etc).
We don't yet have any block content. Let's look at that in the Studio first, then render on the front end.
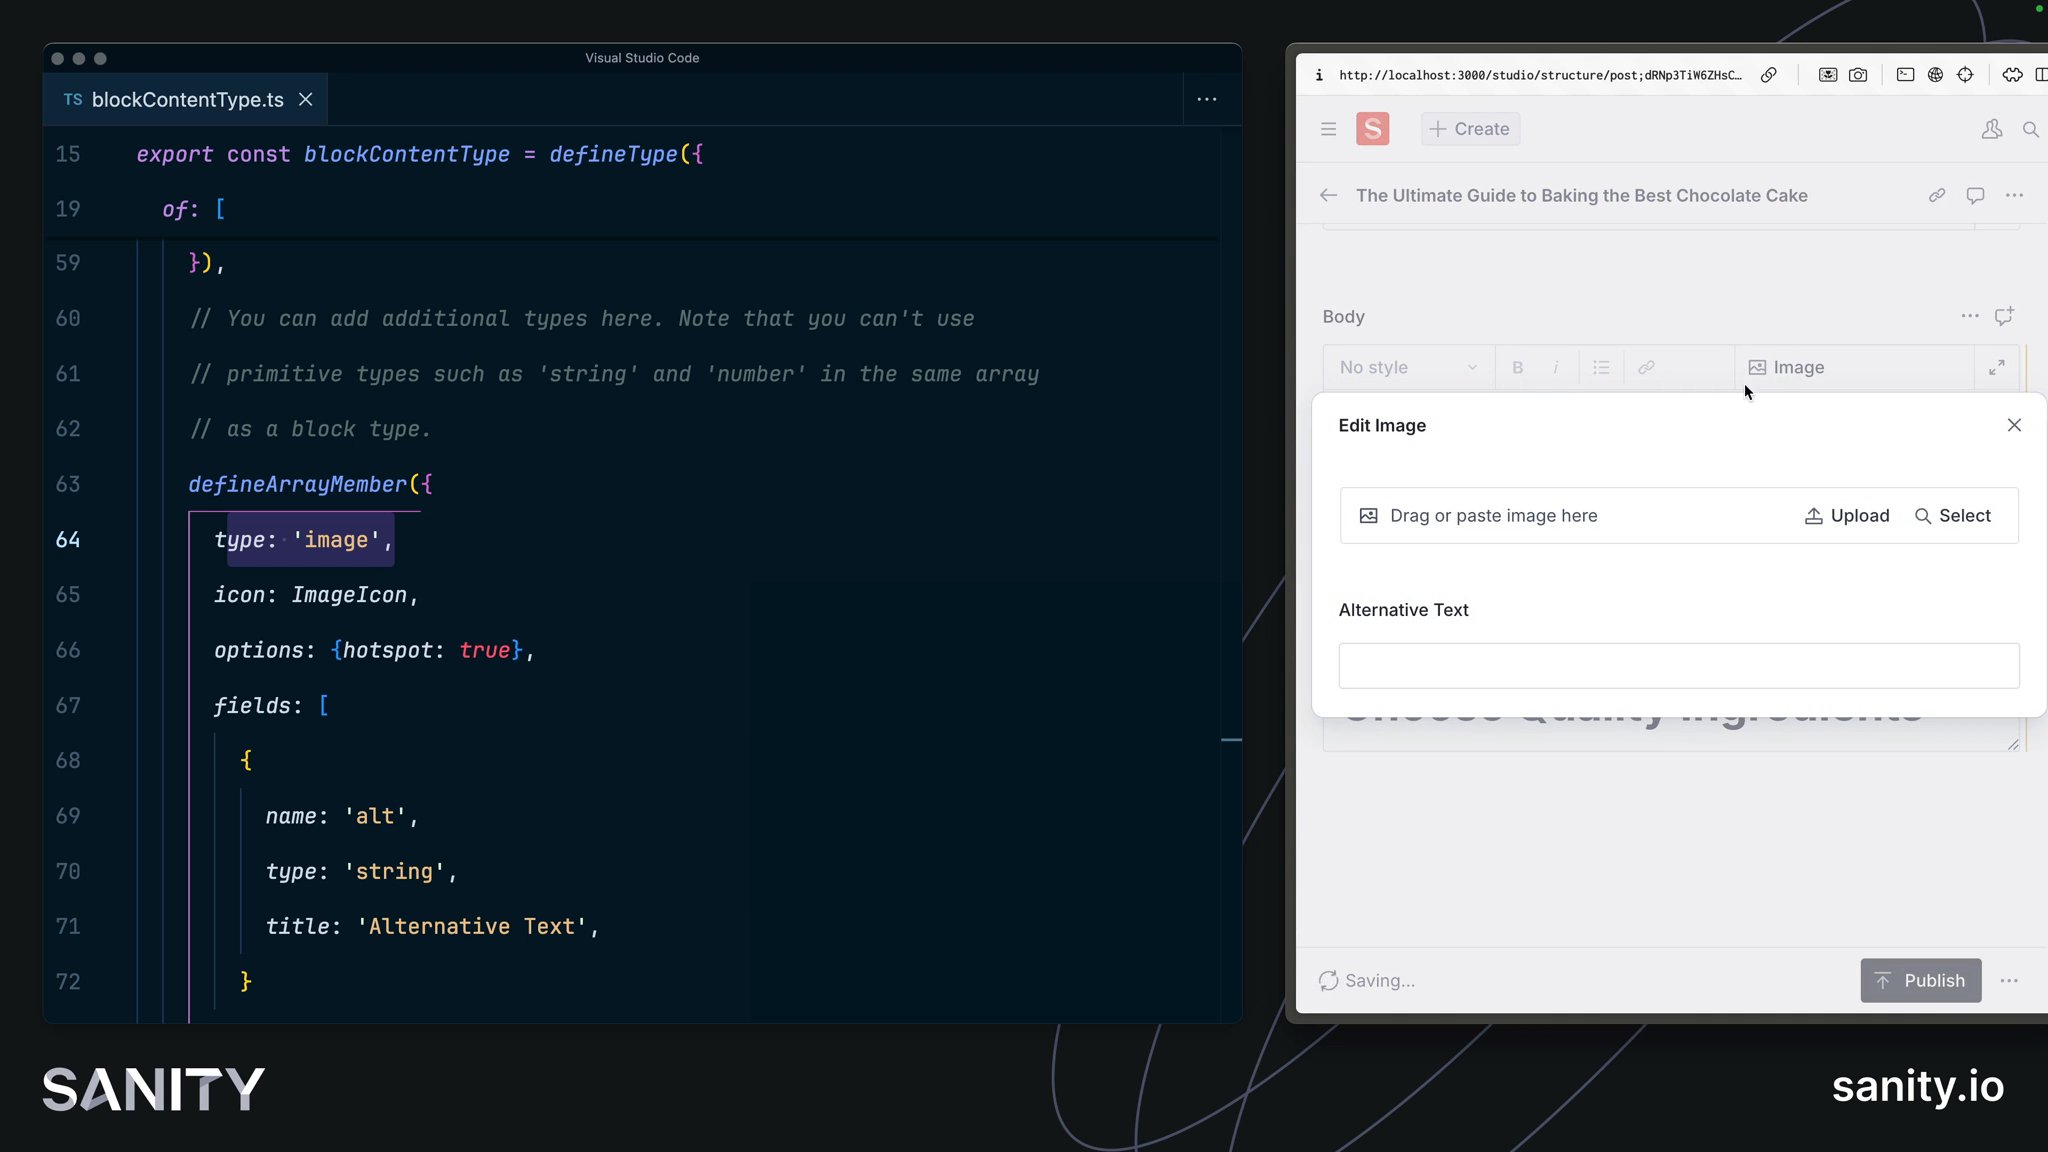
Open blockContentType.ts and you will see the current configuration of the Portable Text editor. It contains styles, lists, marks, and annotations you could add or remove.
You can load additional blocks into the editor at the end of the array. An image field is already configured.
If you refresh your front end for this post now, you won't see the image rendered on the page. This is because the PortableText component does not know what to do with it.
To solve this, you can create an object of components that can replace or extend the defaults.
import Image from "next/image";import { PortableTextComponents } from "next-sanity";import { urlFor } from "@/sanity/lib/image";
export const components: PortableTextComponents = { types: { image: (props) => props.value ? ( <Image className="rounded-lg not-prose w-full h-auto" src={urlFor(props.value) .width(600) .height(400) .quality(80) .auto("format") .url()} alt={props?.value?.alt || ""} width="600" height="400" /> ) : null, },};import { components } from "@/sanity/portableTextComponents";PortableText component to accept it as a prop<PortableText value={post.body} components={components} />You should now have the image from your Portable Text field rendered inline. You could adjust the styling or size to give it different treatment.
You might also extend the image field inside the body field to give your authors some additional options for presenting the image.
You've now finished your final fundamental. Your functional blog lacks some polish. Let's spruce it up in the next lesson.