CoursesIntegrated Visual Editing with Next.jsToken handling and security
Track
Work-ready Next.js

Integrated Visual Editing with Next.js

Log in to watch a video walkthrough of this lesson
Video thumbnail

To access draft content your application will need to be authenticated with a token. Learn how to do this securely.

Log in to mark your progress for each Lesson and Task

In a public dataset, documents are kept private in the Content Lake when they have a period (.) in the _id attribute. For example, draft document IDs begin with a drafts. prefix.

Authentication will also be required to use the previewDrafts "perspective," a method of performing a GROQ query that returns the latest draft version of a document instead of an already-published document.

Learn more about Perspectives for Content Lake in the documentation

To view draft content, requests to the Content Lake require authentication.

On the client side, the same credentials that allow authors to log in to Sanity Studio will handle this. On the server side, an API token will be required.

Learn more about Authentication in the documentation

Storing and accessing tokens or other secrets server-side is a safe practice. However, React 19 blurs the line between server and client—for good reason—however, this makes accidentally leaking sensitive data to the client easier than ever.

React 19 provides a taintUniqueValue function (currently experimental) to improve the security of handling tokens. This function will throw a warning if your application attempts to access its value client-side.

Learn more about protecting tokens from Client Components in the React documentation.
Update your next.config.mjs file to include the experimental taint option.
next.config.mjs
/** @type {import('next').NextConfig} */
const nextConfig = {
// ...all other config
experimental: {
taint: true,
},
}
export default nextConfig

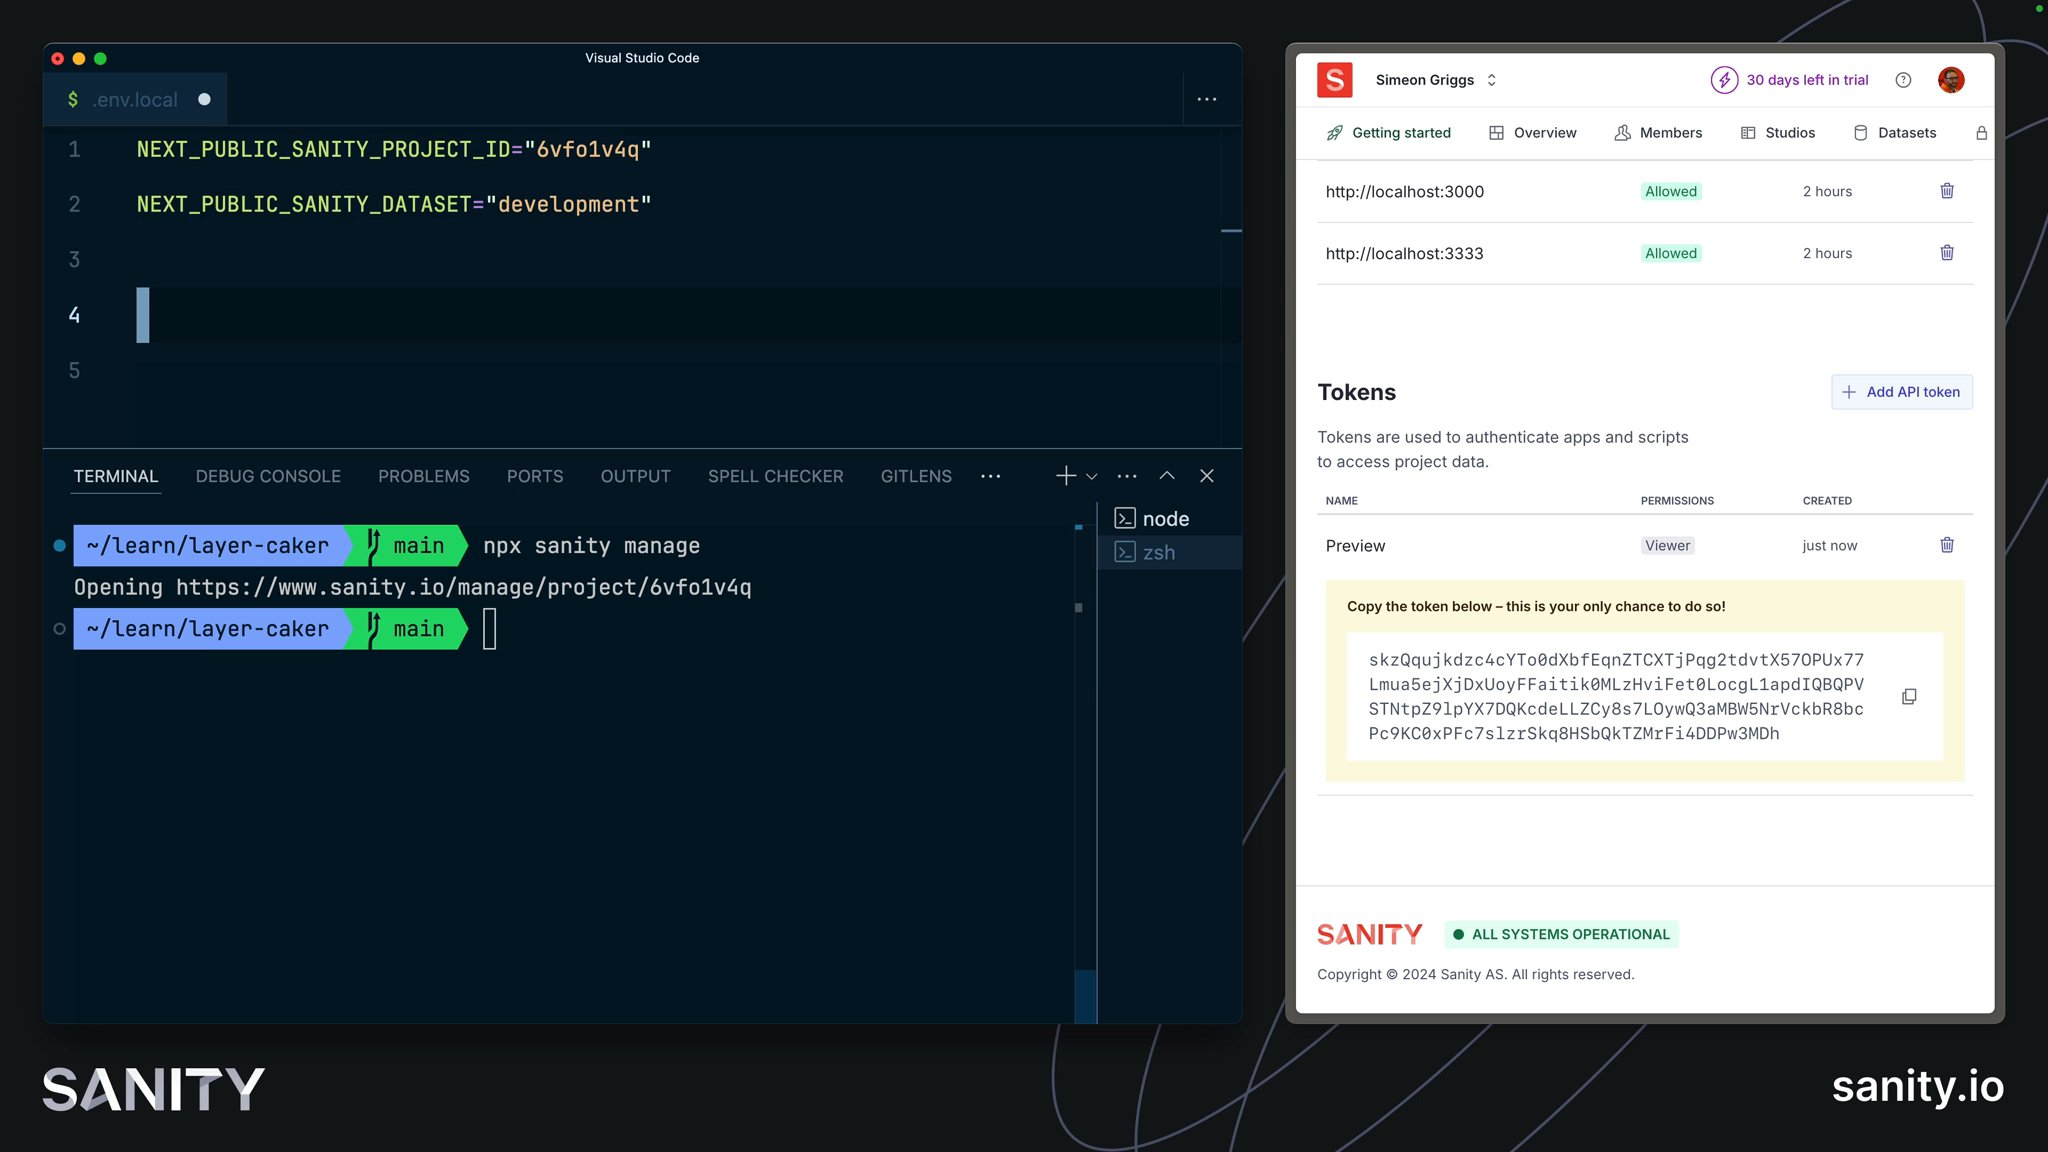
Access tokens can be created from Manage or the API.

You can access Manage for your project either from the menu at the top right of your Studio:

Or you can automatically open your browser to the Manage page of your project from the command line:

npx sanity@latest manage
In Manage, go to the "API" tab and create a "Viewer" token
Update your .env.local file to include the token
.env.local
NEXT_PUBLIC_SANITY_PROJECT_ID="your-project-id"
NEXT_PUBLIC_SANITY_DATASET="your-dataset-name"
SANITY_REVALIDATE_SECRET="your-secret"
# 👇 add this line
SANITY_API_READ_TOKEN="your-new-token"
It is your responsibility to secure this token. Unencrypted access could allow a user to read any document from any dataset in your project. The taintUniqueValue function will help prevent some chance of leaking the token but should not be considered absolutely secure.
The Personal Website template contains additional logic to help prevent the value from being leaked client-side.

You may need to restart your development environment to make the token available. The file below will export the token to other server-side imports and protect it from leaking to the client. It will also throw an error if the token is not found in your environment variables.

Create a new file to store, protect, and export this token
src/sanity/lib/token.ts
import 'server-only'
import { experimental_taintUniqueValue } from 'react'
export const token = process.env.SANITY_API_READ_TOKEN
if (!token) {
throw new Error('Missing SANITY_API_READ_TOKEN')
}
experimental_taintUniqueValue(
'Do not pass the Sanity API read token to the client.',
process,
token,
)

You're now ready to make authenticated server-side requests for content. Let's do this in the next lesson.

Courses in the "Work-ready Next.js" track