Receiving live edits to drafts
For interactive live preview to be truly immersive, the same fast, cached web application your end users interact with must be put into an API-first, fully dynamic state. Thankfully, Next.js provides "Draft Mode."
For Visual Editing to work, the entire application must act differently when Draft Mode is enabled. Queries must use a different perspective and entirely skip the cache. Additional UI will be rendered into the page for clickable overlays. Thankfully this complexity is handled inside SanityLive and another component you'll import called VisualEditing.
First you'll need to update the content fetching functions to apply token authentication and settings required for Visual Editing.
The update below adds Stega encoding to the Sanity Client configuration. This will only be used when Draft Mode is enabled. The URL is used to create clickable links in the preview, which open to the correct document and field from which the content came.
export const client = createClient({ projectId, dataset, apiVersion, useCdn: true, stega: { studioUrl: '/studio' },})The token you created in the previous lesson will now need to be passed to the live mode helpers, so that live draft content will be sent to the browser.
These tokens will only be used when the site is in Draft Mode, which is only enabled by users in the Presentation tool in the Studio, or by anyone you share a preview link with.
The token is not stored in the production app code.
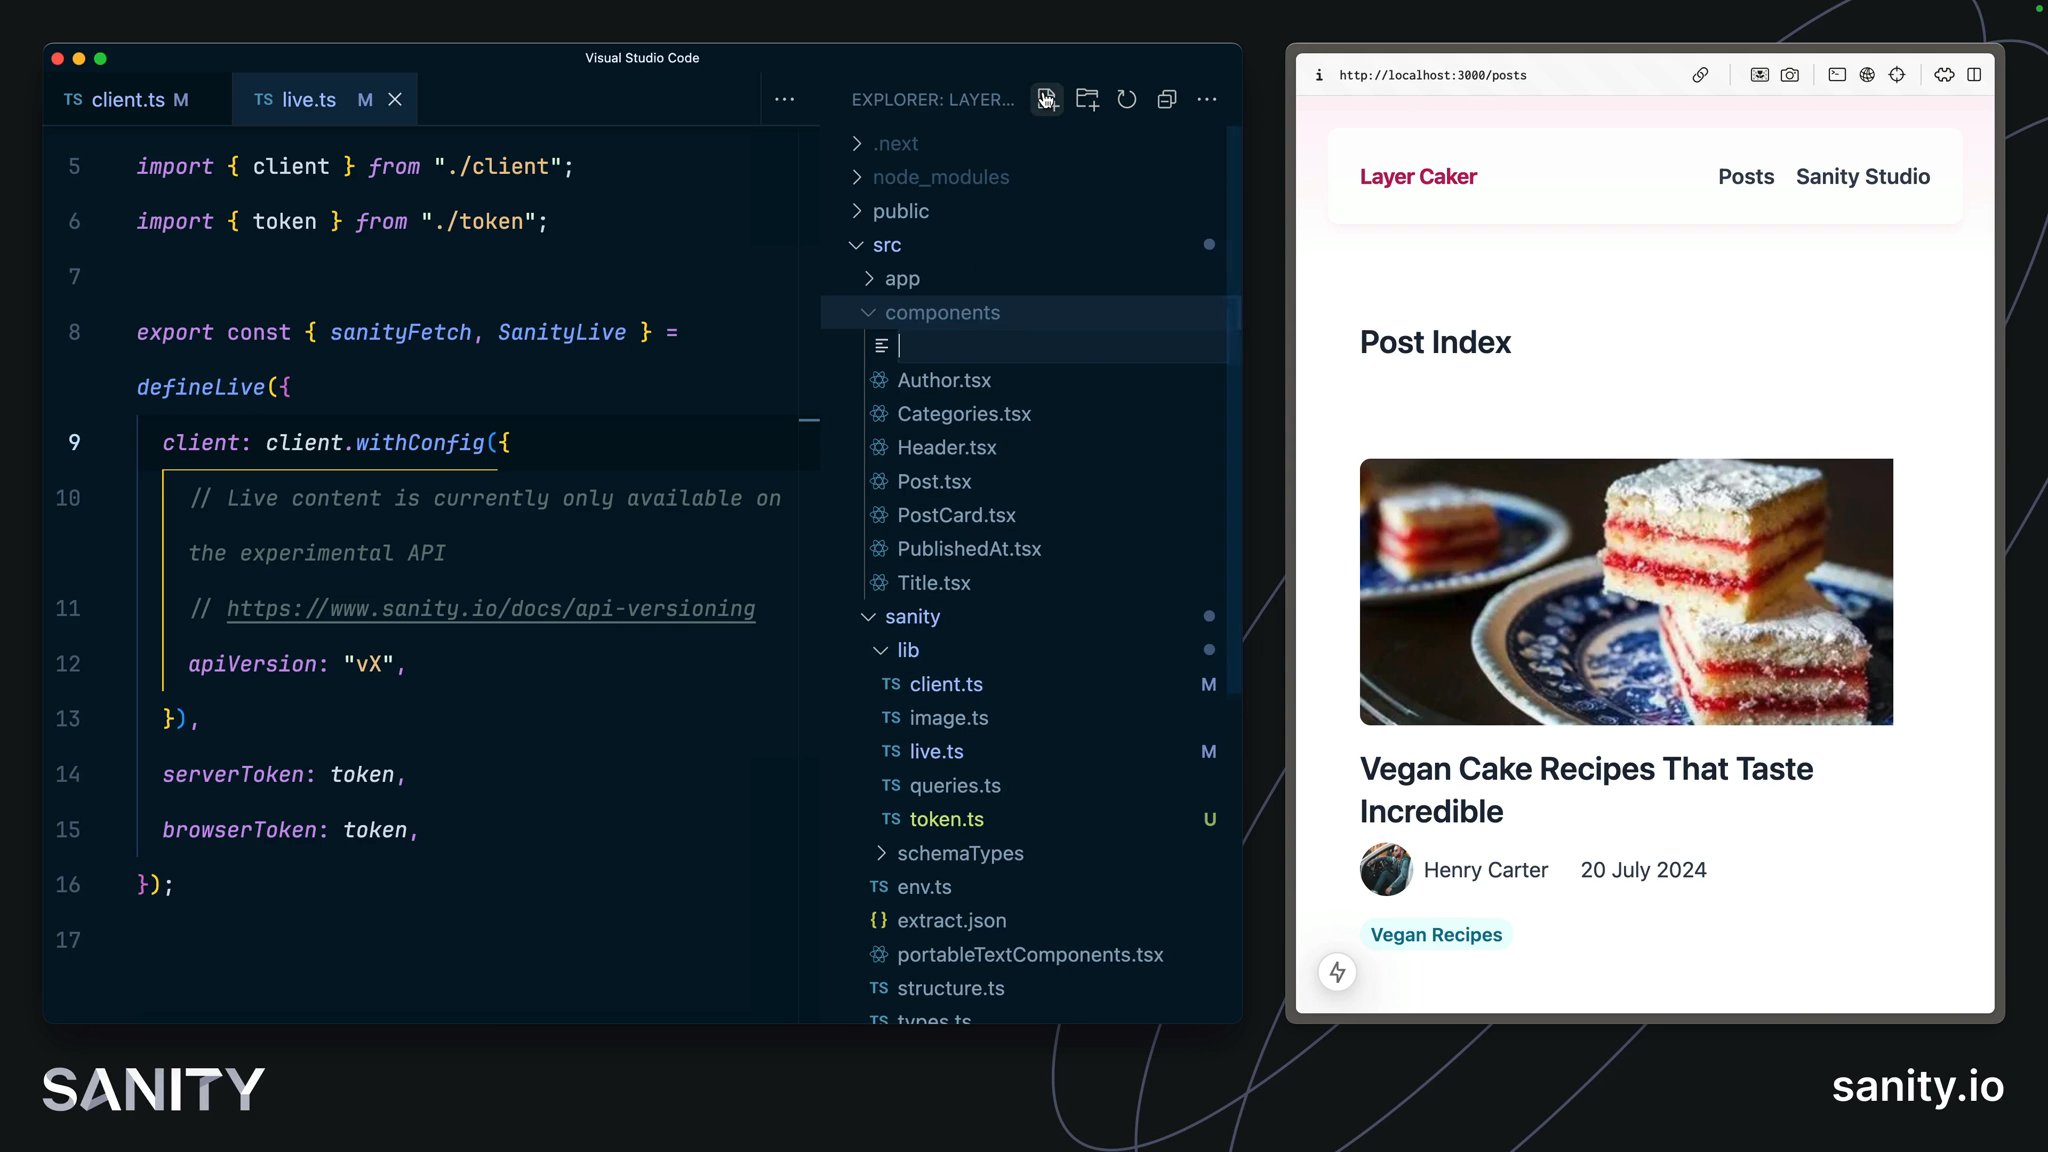
browserToken and serverTokenimport { client } from "@/sanity/lib/client";import { token } from "@/sanity/lib/token"import { defineLive } from "next-sanity/live";
export const { sanityFetch, SanityLive } = defineLive({ client, browserToken: token, serverToken: token,});Interactive live preview works by listening client-side to changes from your dataset and, when detected, prefetching data server-side. The machinery to do this can be configured manually if you like, but it gets a little complicated, so thankfully, it's been packaged up for us in next-sanity.
When Draft Mode is enabled, it's helpful to have a button to disable it.
'use client'
import { useIsPresentationTool } from 'next-sanity/hooks'
export function DisableDraftMode() {  const isPresentationTool = useIsPresentationTool()
  // Only show the disable draft mode button when outside of Presentation Tool  if (isPresentationTool === null && isPresentationTool === true) {    return null  }
  return (    <a      href="/api/draft-mode/disable"      className="fixed bottom-4 right-4 bg-gray-50 px-4 py-2"    >      Disable Draft Mode    </a>  )}
To power Visual Editing, all you need is one import.
VisualEditing component from next-sanity/visual-editingimport { draftMode } from 'next/headers'import { VisualEditing } from 'next-sanity/visual-editing'import { DisableDraftMode } from '@/components/disable-draft-mode'import { Header } from '@/components/header'import { SanityLive } from '@/sanity/lib/live'
export default async function FrontendLayout({ children,}: Readonly<{ children: React.ReactNode}>) { return ( <section className="bg-white min-h-screen"> <Header /> {children} <SanityLive /> {(await draftMode()).isEnabled && ( <> <DisableDraftMode /> <VisualEditing /> </> )} </section> )}The Presentation tool maintains an automatically rotating secret stored in the dataset. This is so your Next.js application can confirm that same secret before proceeding with any attempt to enable draft mode.
Thankfully, this entire handshake has been made into a simple helper function from next-sanity.
/** * This file is used to allow Presentation to set the app in Draft Mode, which will load Visual Editing * and query draft content and preview the content as it will appear once everything is published */
import { defineEnableDraftMode } from 'next-sanity/draft-mode'import { client } from '@/sanity/lib/client'import { token } from '@/sanity/lib/token'
export const { GET } = defineEnableDraftMode({ client: client.withConfig({ token }),})Once your browser is authenticated to view the web application in draft mode, you will see it in all other tabs in that browser.
The earlier update to the root layout included a button to disable preview mode. This is useful when content authors have finished their changes and want to see the application with the same published content that end users will see.
import { draftMode } from 'next/headers'import { NextRequest, NextResponse } from 'next/server'
export async function GET(request: NextRequest) {  ;(await draftMode()).disable()  return NextResponse.redirect(new URL('/', request.url))}
Your app is ready to start receiving draft content updates—the next step is to actually make that happen. It's easiest to do this within the Presentation plugin; let's set that up in the next lesson.