Browsing Content How You Want with Structure Builder
How to make content more browseable using the Structure Builder API for Sanity Studio‘s Desk Tool
This developer guide was contributed by Hidde de Vries (Developer Relations Specialist at Sanity.io).
How can you go beyond the default document lists for Sanity Studio’s Desk Tool? The Structure Builder API lets you improve the editorial experience with tailored workflows. This guide will help you get started with custom document lists and views.
Let’s say you’ve built a Studio to keep track of books you are reading. It contains documents of a book type with some metadata. By default, your Sanity Studio displays a long list of books under a “Books” heading. If you read a lot, this could run into hundreds of documents. Wouldn’t it be cool if it was a bit more like the old iPod interface? “A thousand songs in your pocket,” it was advertised, but the UI wouldn’t have worked so well if it was just one giant list of songs.

The first iPod displayed songs, but you could browse them also by artist, album, and genre. Were you in a Vengaboys mood, you would find that artist to Shuffle play all their songs. Were you in more of a genre-based mood, you could do that, though it was a little trickier as genres overlap. Anyway, it turns out that this kind of browsing by your data’s properties can be done in Sanity Studio using the Structure Builder API. Here’s how it works.
Including a Desk Tool
In your Sanity Studio, a “tool” is a page or route accessed via the main menu at the top. Which tools you use is up to you. They are all optional, but pretty much all studios will have the Desk Tool. It comes built-in with Sanity Studio and is what content editors use to browse, find and edit content. You can also build your own tools, like a map view of all branches of your franchise, to name one example.
To use the Desk Tool in your Studio, you add it by enabling the Desk Tool plugin. In sanity.config.js, you import that plugin:
// sanity.config.js
import { deskTool } from 'sanity/desk'
This imported deskTool is a function. In the configuration object that is passed to defineConfig , you include it in the plugins array:
// sanity.config.js
import { defineConfig } from 'sanity'
import { deskTool } from 'sanity/desk'

export default defineConfig({
  plugins: [
    deskTool()
	],
	// other config items like name,
	// title, projectId, schema
})
Creating a custom list
The default structure
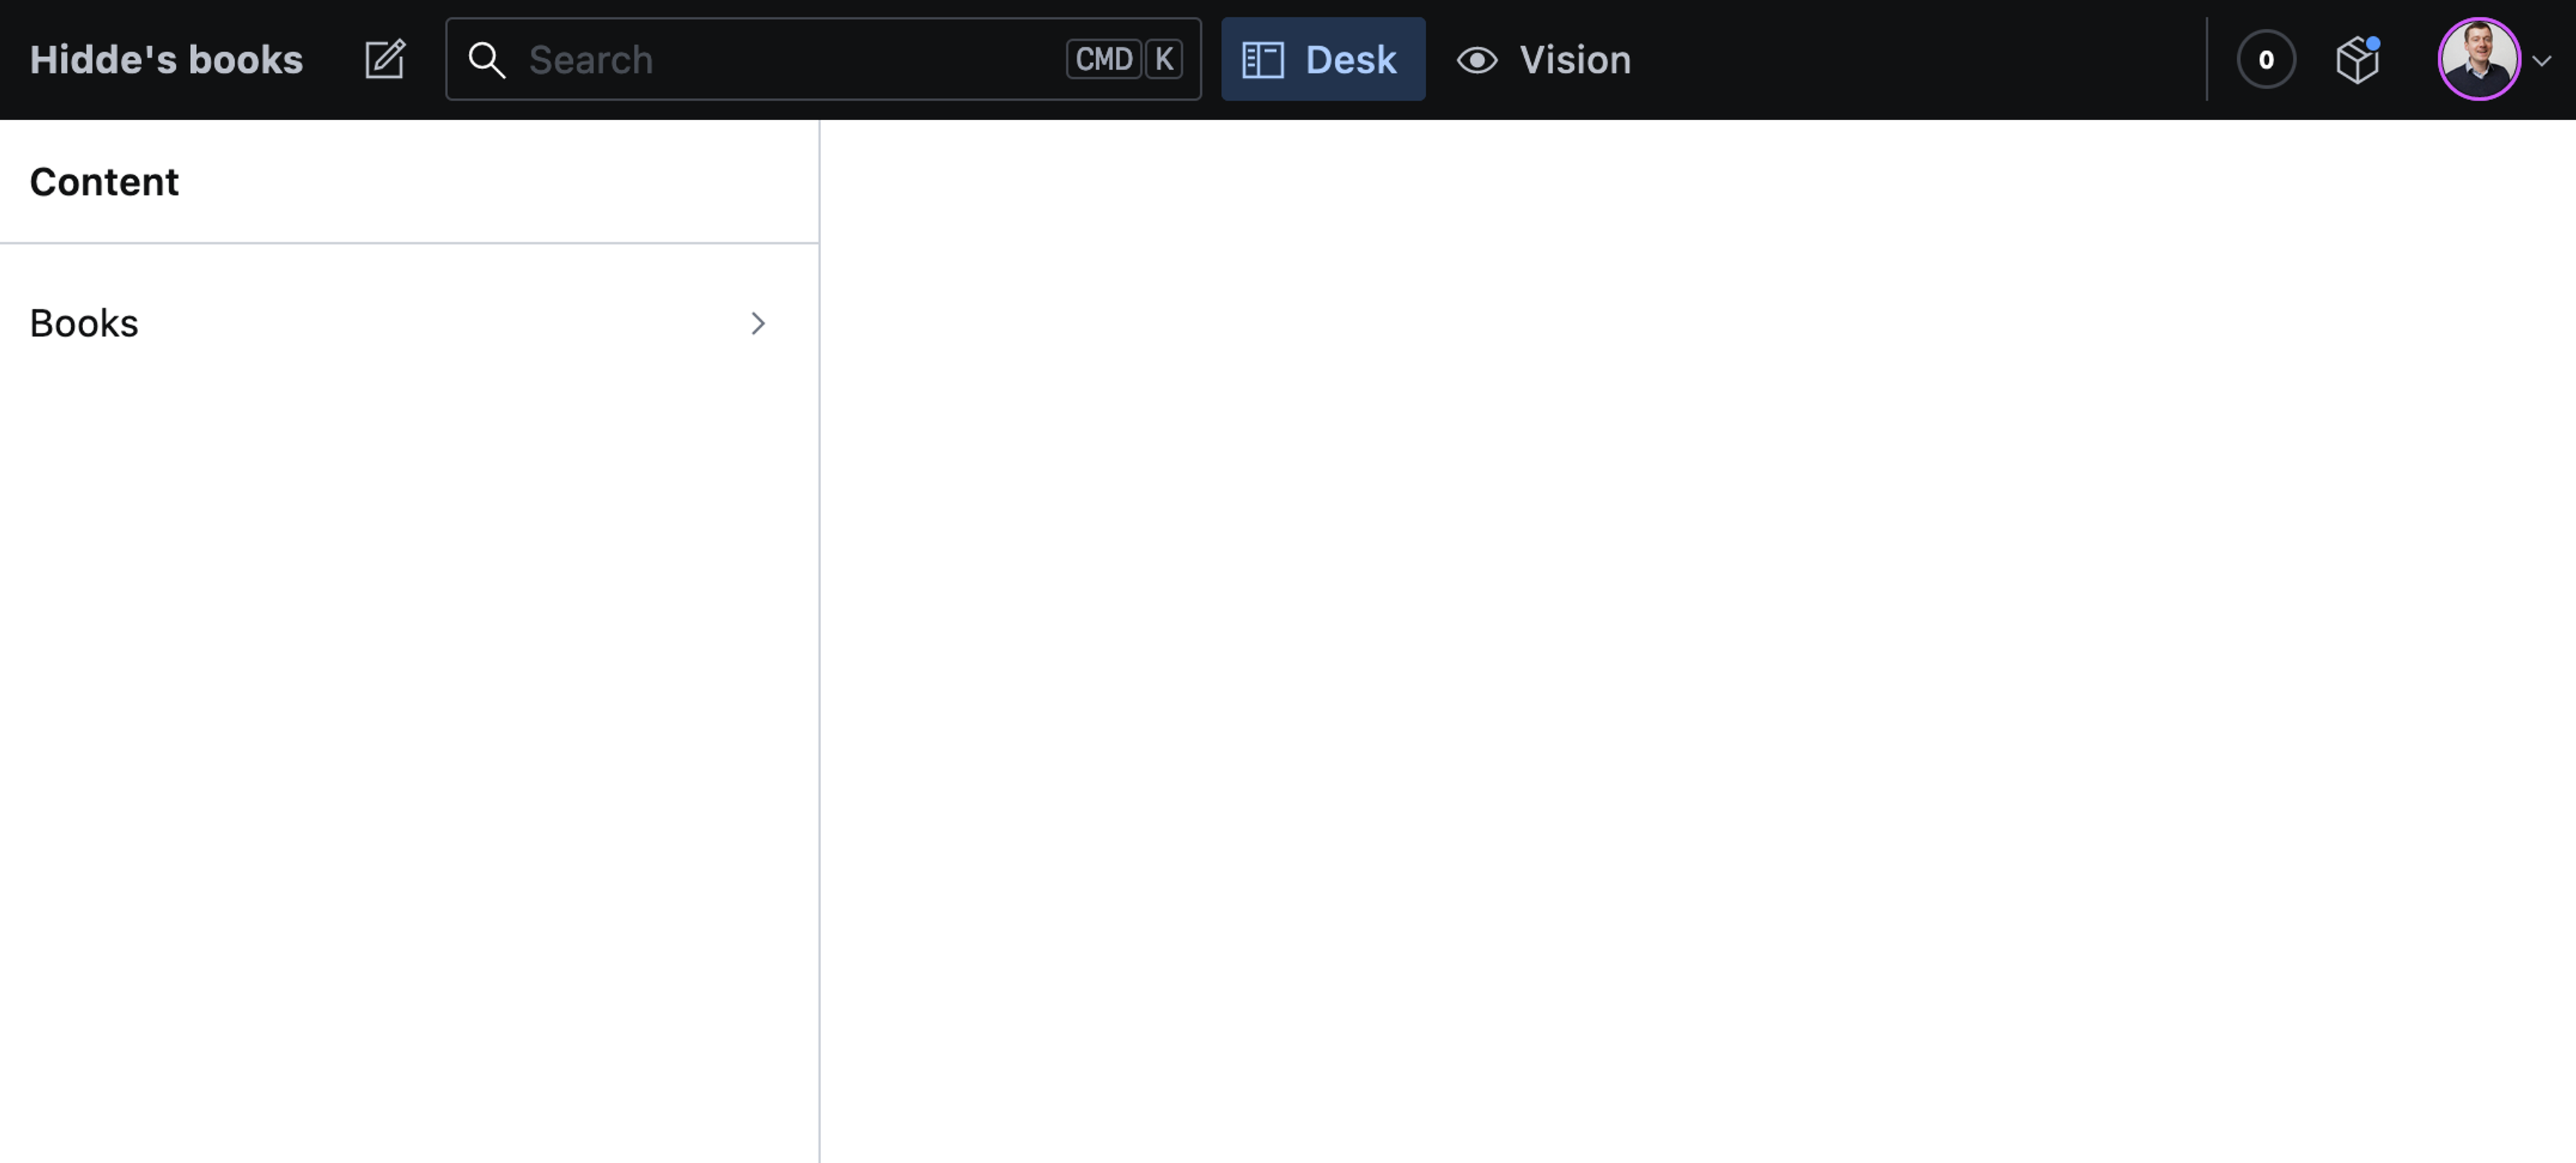
With no arguments added, your desk tool will only display the content you have, organized by document type:

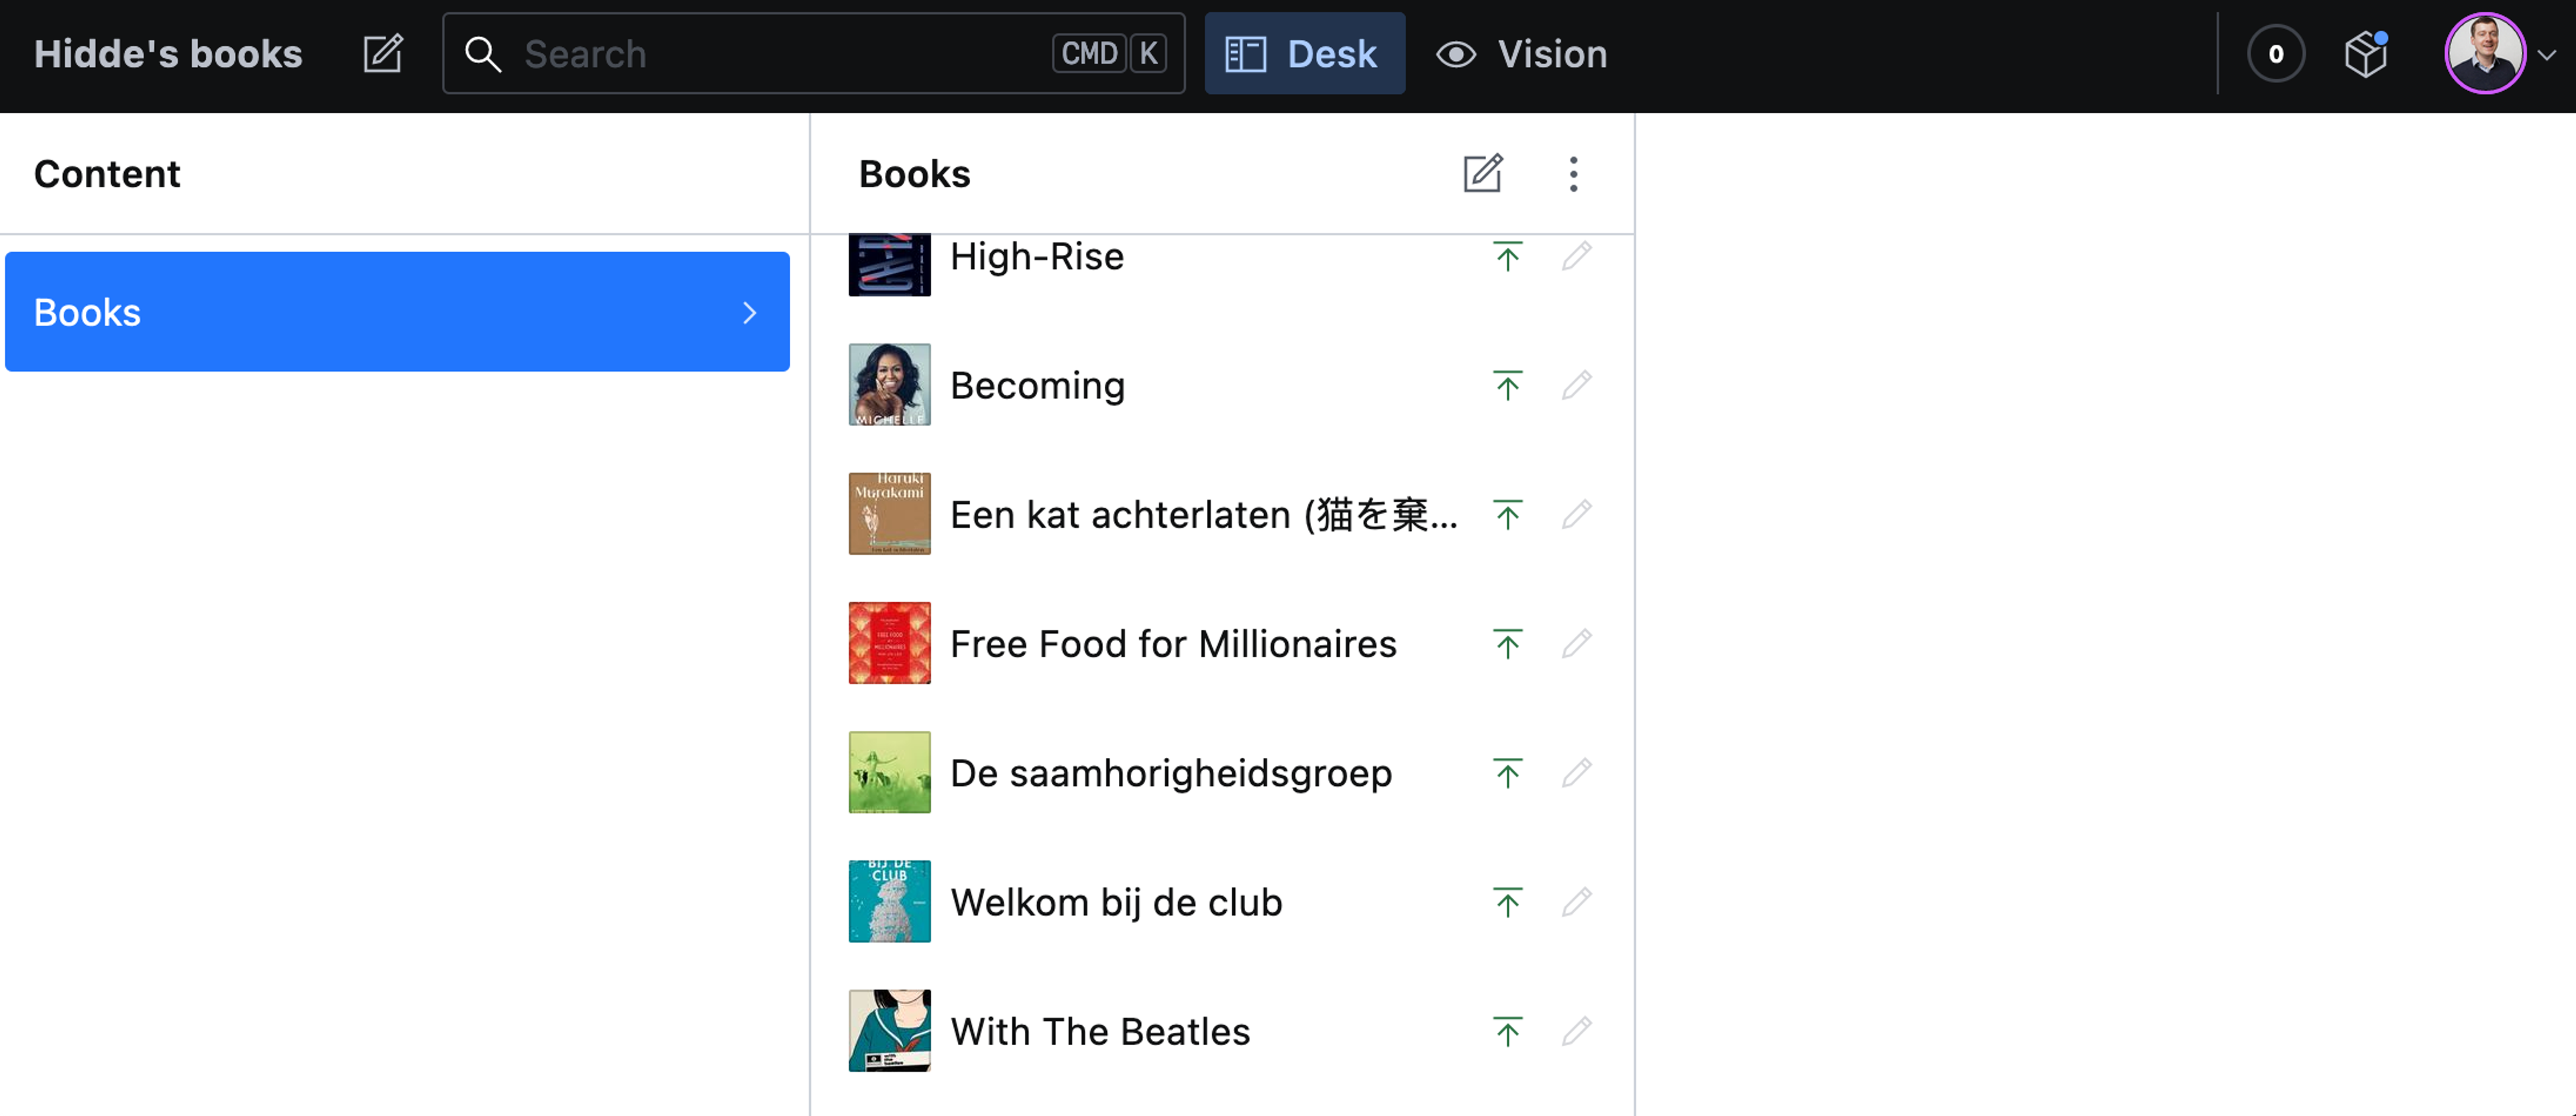
In my case, I only added books, so it shows those:

On the left is a “List” titled “Content,” the default. The list has items, one in this case: “Books.” Items open a “child,” which can be a new list, like a list of books, or a “view,” which is used to render fields to edit content, previews of content, and more. This “Books” list item that opens a list of books is the default structure Sanity Studio provides us. If we were to add a “Movies” document type, it would be displayed right underneath “Books” and open a pane with all the movies.
Customizing the title and adding an item
We can customize the structure to our needs with the Structure Builder API. It allows anything from slightly augmenting what’s already there to completely inventing our own structure.
Let’s start with the essential thing: change the title and add an item:
// sanity.config.js
// (…)
deskTool({
  structure: (S) =>
    S.list()
    .title('Browse books')
      .items(
      [
        ...S.documentTypeListItems(),
        S.listItem()
          .title('Hello world')
      ]
    )
}),
// (…)
So, first, you pass in an object to deskTool with a structure property. Its value is a function that receives the structure as an argument (named S by convention). This is the structure resolver function. You can work with S to set up our structure:
- add a list with
S.list() - name it “Browse books”
- add list items
- first, spread
S.documentTypeListItems(), a convenience method provided by the Structure Builder API that returns list items for all your document types. As I’m overwriting the whole structure, this adds the existing default structure back (in this case, it adds the “Books” list item) - then, add an item with
S.listItem()and title that “Hello world”
- first, spread
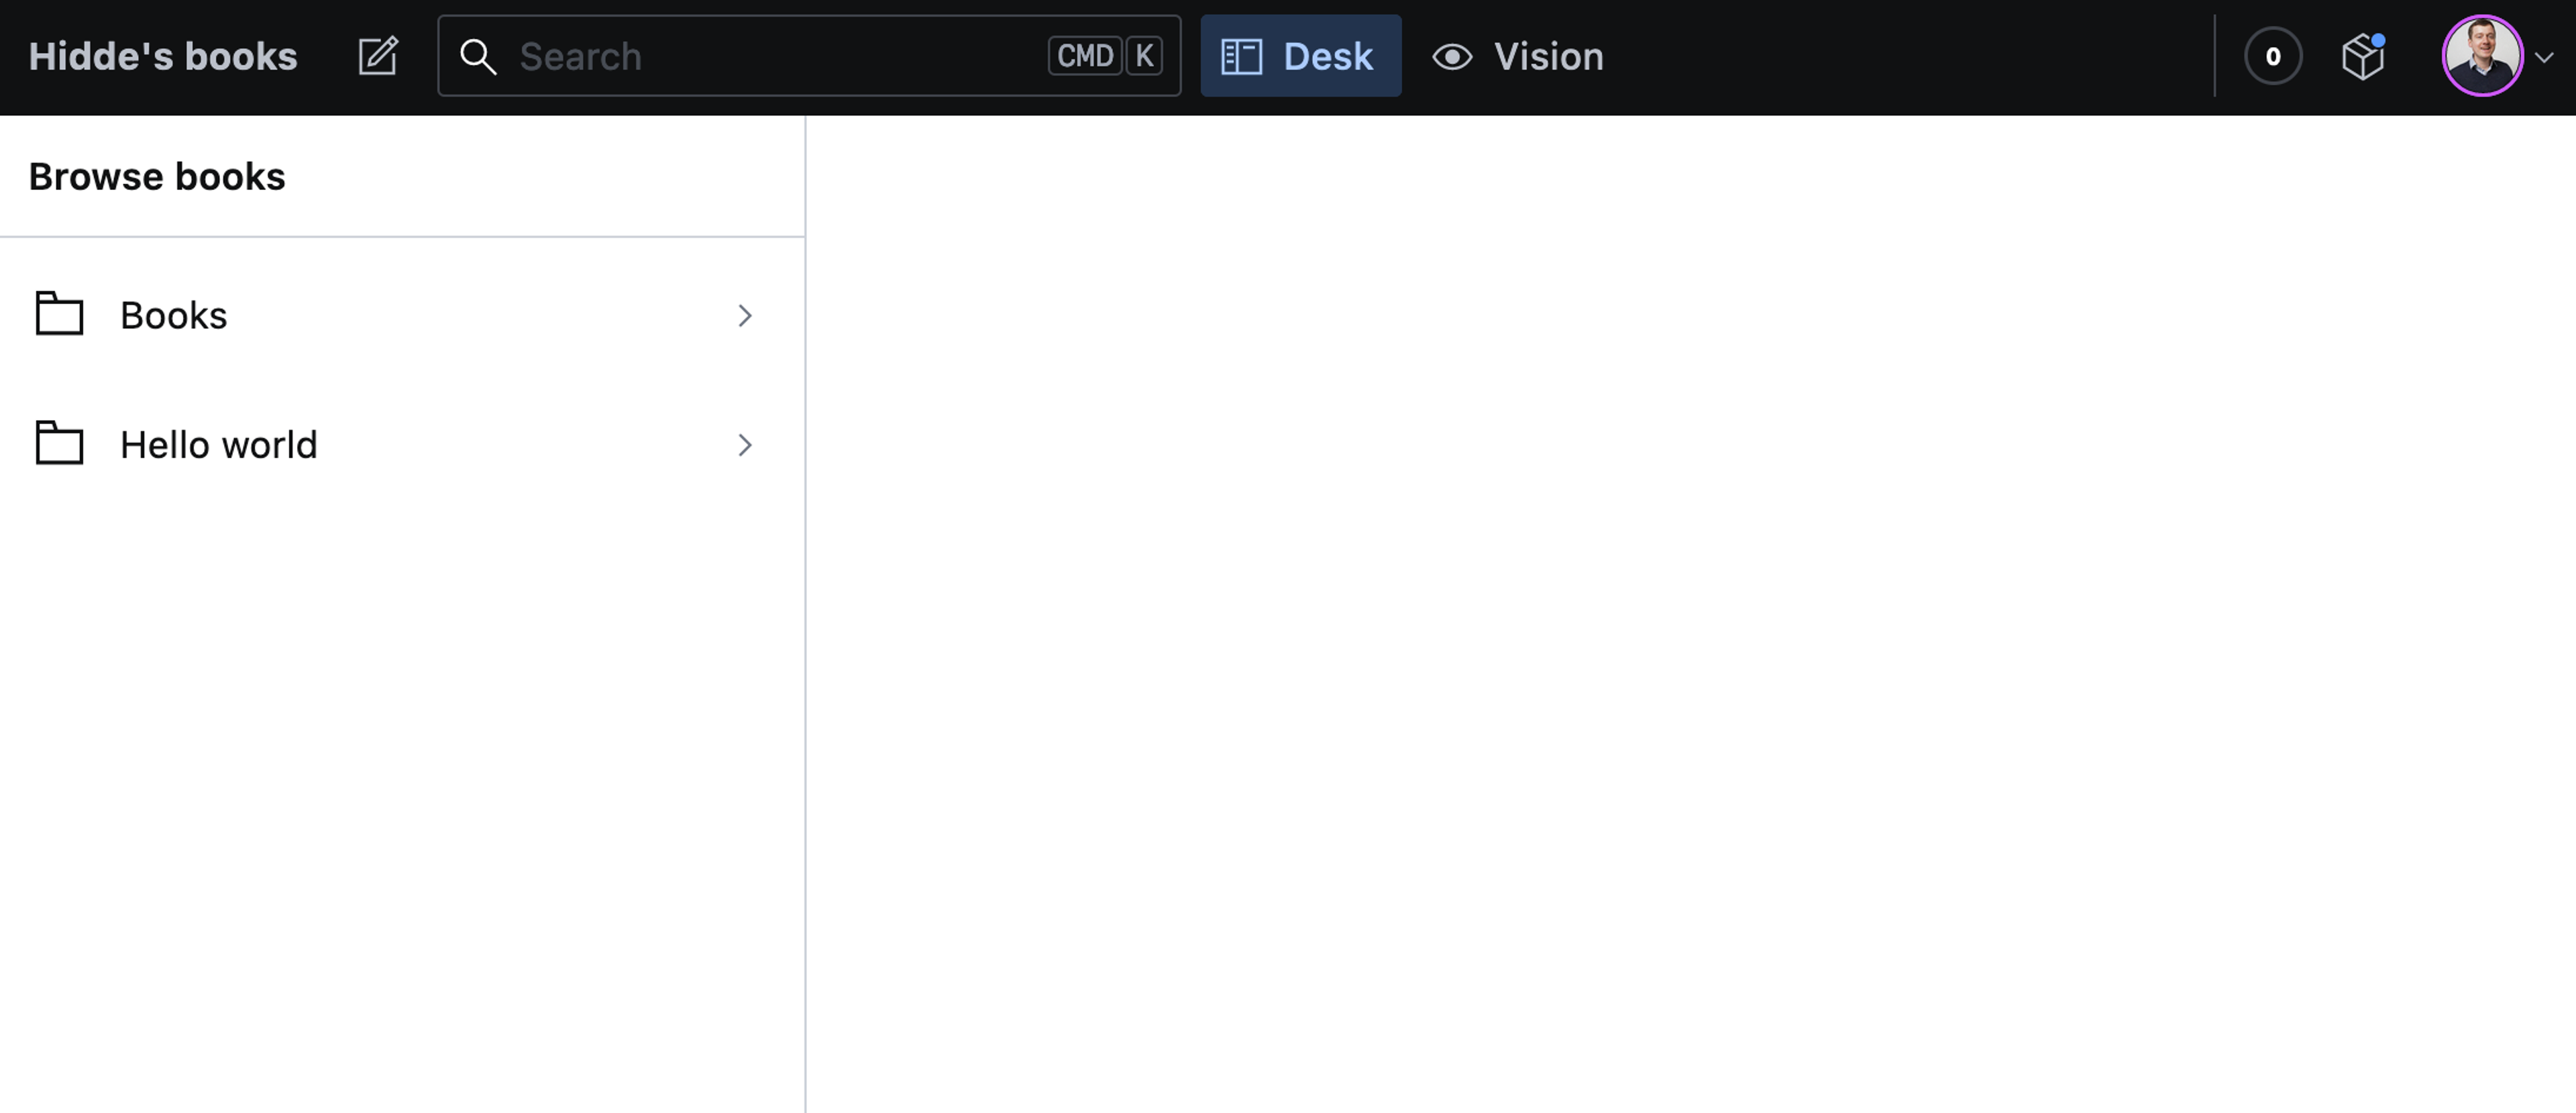
So, it is basically like the default, but now with a new title for the list and a new item called” Hello world”:

Populating our list item with items
In the previous example, there is no definition of what lives inside of “Hello world,” so clicking it will currently do nothing. Maybe you want to fix that and make it open a pane with items. Ratings, for example. Each book has a rating (1, 2, or 3 stars), and you want to allow browsing by rating. You could create a list item called “Ratings,” which opens a pane listing the available ratings (3 stars, 2 stars, 1 star), which opens a pane with the relevant documents.
This is how to add a list item called “Ratings”:
// sanity.config.js

// setting passed to structure resolver
S.listItem()
  .title(`Ratings`)
The list item opens a pane. You can add that with .child, passing a list with a title, say, “Ratings,” passed into items:
// sanity.config.js

// setting passed to structure resolver
S.listItem()
  .title('Ratings')
  .child(
      S.list()
        .title('Ratings')
        .items([])
  )
The array passed to items is where you’d add the list’s items. In this case, you’ll want one array item for each rating option, so three in total. This is what one of them would look like:
// sanity.config.js

// setting passed to structure resolver
S.listItem()
  .title(`3 stars`)
  .child(
    S.documentList()
    .title(`3 stars`)
    .menuItems(
      S.documentTypeList('book')
        .getMenuItems()
    )
    .filter(`rating == 3`)
)
To break it down:
- make a list item and title it “3 stars”
- when it opens, show a pane that displays a list of documents, and title that pane “3 stars”
- within it, add a list of books
- filter it by only the books that have a rating of 3 stars (
filtertakes GROQ)
Generating list items
Usually, you would not add each list item manually. You would generate them dynamically. You could put the possible ratings in an array and map that to an array of list items:
// sanity.config.js
// ... other code

const RATINGS = [1, 2, 3];

// setting passed to structure resolver

S.listItem()
  .title('Ratings')
  .child(
      S.list()
        .title('Ratings')
        .items(RATINGS.map(rating =>
          S.listItem()
          .title(`${rating} star${rating > 1 ? 's' : ''}`)
          .child(
            S.documentList()
            .title(`Books with rating ${rating}`)
            .schemaType('book')
            .filter(`rating == ${rating}`)
        )
      )
    )
  )
Let’s break this down:
- You add a list item called “Ratings” that opens a panel with a document list called “Ratings”
- In
items, pass in the resulting array from mapping over1,2, and3and returning a list item, using the relevant rating in the title (only adding an “s” if we have more than 1 star) and in the filter
You may not want to hardcode the properties used to generate these list items. And you don’t have to, as you have the information already in your Sanity data.
With this GROQ query, you can find a list of all unique ratings given to your books:
// GROQ query
array::unique(*[_type == "book"].rating)

// possible response
[1, 2, 3]
You can send in this GROQ to request your Sanity data wherever you request your Sanity data, but you can also use it right in your structure builder definition. In the structure resolver function, you optionally get access to a context argument. Among other things, it provides access to your Sanity data via its getClient method.
Instead of:
const RATINGS = [1, 2, 3]
You can do the following:
// sanity.config.js

structure: async (S, context) => {
	const RATINGS = await context
          .getClient({apiVersion: '2023-01-16'})
          .fetch(`array::unique(*[_type == "book"].rating)`)
  return /* return your list items */
}
You only need to pass in the API version. The dataset and project ID are derived from the project. For this to work, you’ll need your structure resolver function to be an asynchronous function, hence the added async keyword, and you’ll need to return your structure explicitly.
Here’s a complete example where you map the array that we fetched with the Sanity client to list items you want to display:
// sanity.config.js

deskTool({
  structure: async (S, context) => {
    const RATINGS = await context
      .getClient({apiVersion: '2023-01-16'})
      .fetch(`array::unique(*[_type == "book"].rating)`)

    return S.list()
      .title('Browse books')
      .items([
        ...S.documentTypeListItems(),
        S.listItem()
          .schemaType('book')
          .title('Ratings')
          .child(
            S.list()
              .title('Ratings')
              .items(
                RATINGS.map(rating =>
                  S.listItem()
                    .title(`${rating} star${rating > 1 ? 's' : ''}`)
                    .schemaType('book')
                    .child(
                      S.documentList()
                        .title(`Books with rating ${rating}`)
                        .schemaType('book')
                        .filter(`rating == ${rating}`)
                    )
                )
              )
          ),
      ])
  },
}),
Getting document lists based on specific fields
In the example above, you’ve added a ‘Browse by rating’ list to your Studio based on what was in your book’s rating fields. You could do the same with other fields so Studio users can also browse by other properties, like author, year, and publisher. You would fetch an array of unique authors, years, and publishers and build items from them.
Life could be easier, now and in the future. You could have accounted for authors and publishers in your content model, creating document types for each. Then in a book, the field is a reference to documents of that type.
So, rather than having a string field for an author like this…

// schema.js

export const schemaTypes = [
  {
    name: 'book',
    type: 'document',
    title: 'Books',
    fields: [
      {
        name: 'author',
		  	type: 'string'
      }
    ]
  }
]
…you would create an Author document type and make the book’s author field a reference to authors:
// schema.js

export const schemaTypes = [
  {
    name: 'book',
    type: 'document',
    title: 'Books',
    fields: [
      {
        name: 'author',
		  	type: 'reference',
        to: [{type: 'author'}]
      }
    ]
  },
  {
    name: 'author',
    type: 'document',
    title: 'Authors',
    fields: [
      {
        name: 'name',
		  	type: 'string'
      }
    ]
  }
]
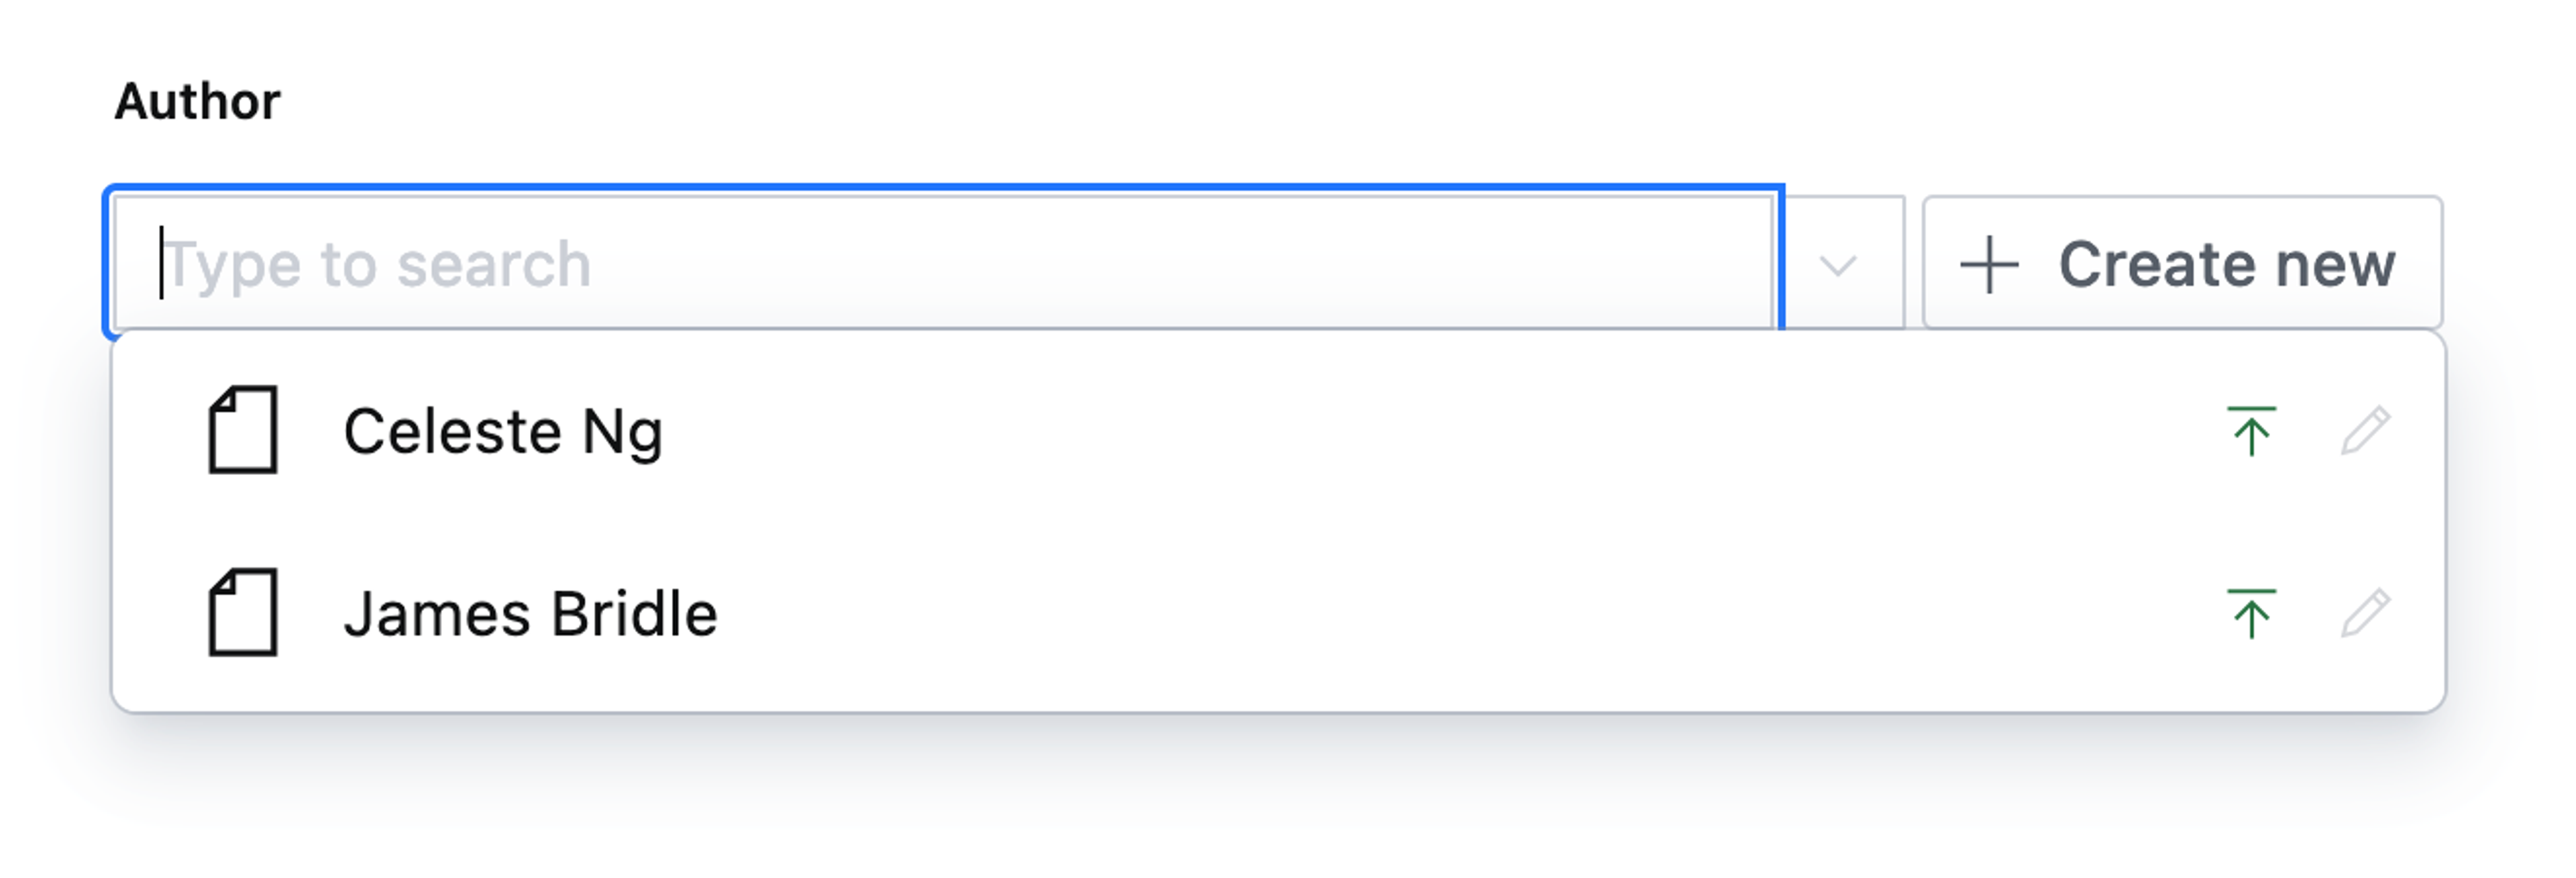
Which looks like this in the Studio:

Now, authors show up as their own entities. When you edit your book, you can look for existing Authors to select or create a new one right there.
Next steps
This Guide showed how to use the Structure Builder API to customize pretty much every aspect of finding content in Sanity with the Desk Tool. You have learned how to add custom items and make it so that content editors can browse items by their properties. Now that you know how it works technically, the next step could be to check with your content editors: how do they want to browse? There is no right or wrong here! How you organize the editor experience is up to what works best for your team. And once you know, go ahead and make your Studio yours.
Was this page helpful?